Introduction
The Racks feature is used to manage and visualize your rack use with an Organisation, Location, Building, Floor, Room and Row.
How Does it Work?
A rack is a collection of devices which are assigned a position and height within the rack. A device can optionally have a picture associated with it. A rack is placed in a row. We have created a very granular system for positioning of racks, which is as follows. At the top level (as always) is the Organisation (Org). An Org can have multiple locations (as has always been the case). With the addition of the Racks feature, a location can now contain one or more Buildings. A building can contain one or more Floors. A floor can contain one or more Rooms. A room can contain one or more Rows. This sounds like a lot of work, but defaults are created for you. Create a new Location and the sub-components will be automatically created for you. If you need more items (buildings, rooms, etc) you can add them as you like. A rack can also be part of a "pod" of racks. The pod attribute works as a tag, rather than a strict hierarchical inheritance model as per buildings, floors, etc.
Racks are a feature available to Open-AudIT Enterprise licensed customers.
Creating a Rack Entry
As always, racks are fully usable from the API, just like other collections within Open-AudIT.
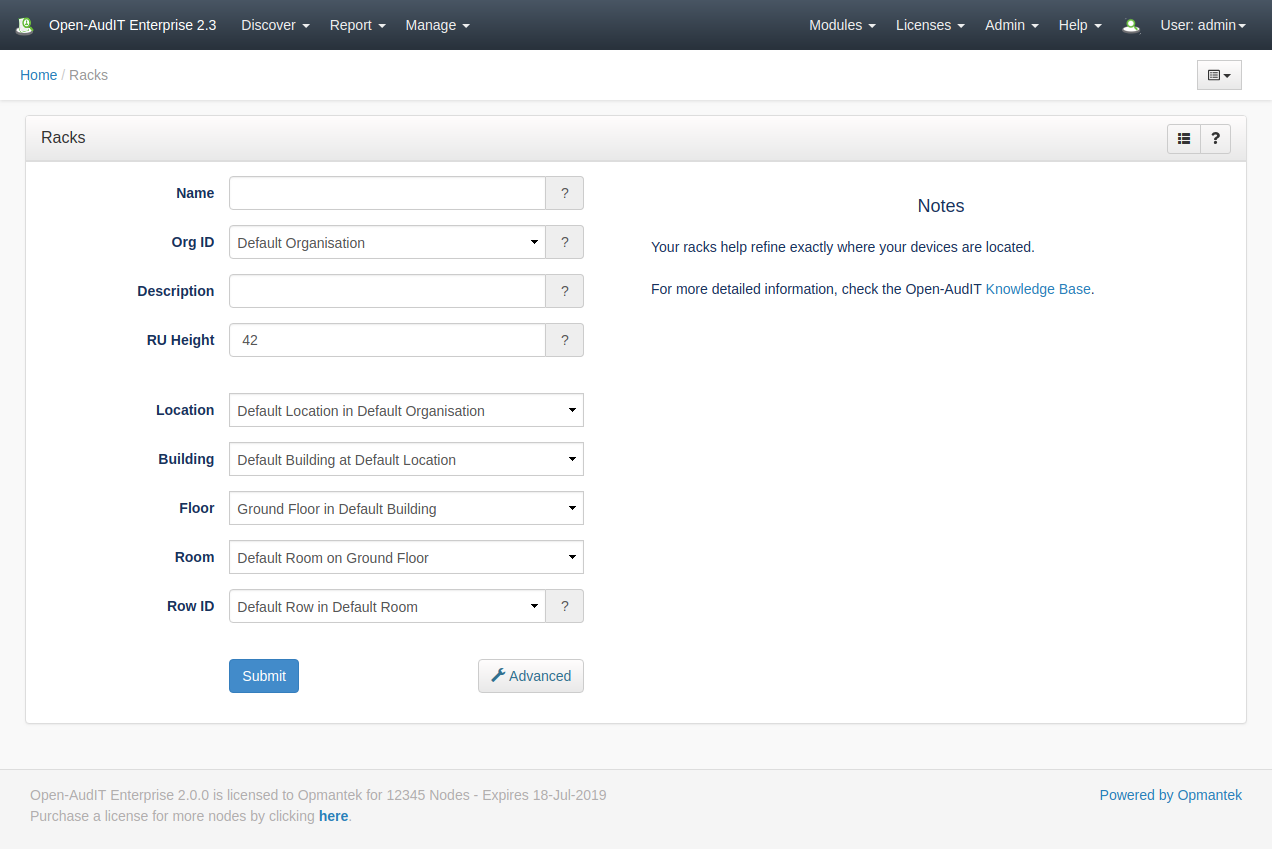
A Rack entry can be created using the web interface if the current user logged in has a role that contains the racks::create permission. Go to menu: Manage -> Racks -> Create Racks. They can also can be created from the Rooms View, using the "Create" button.
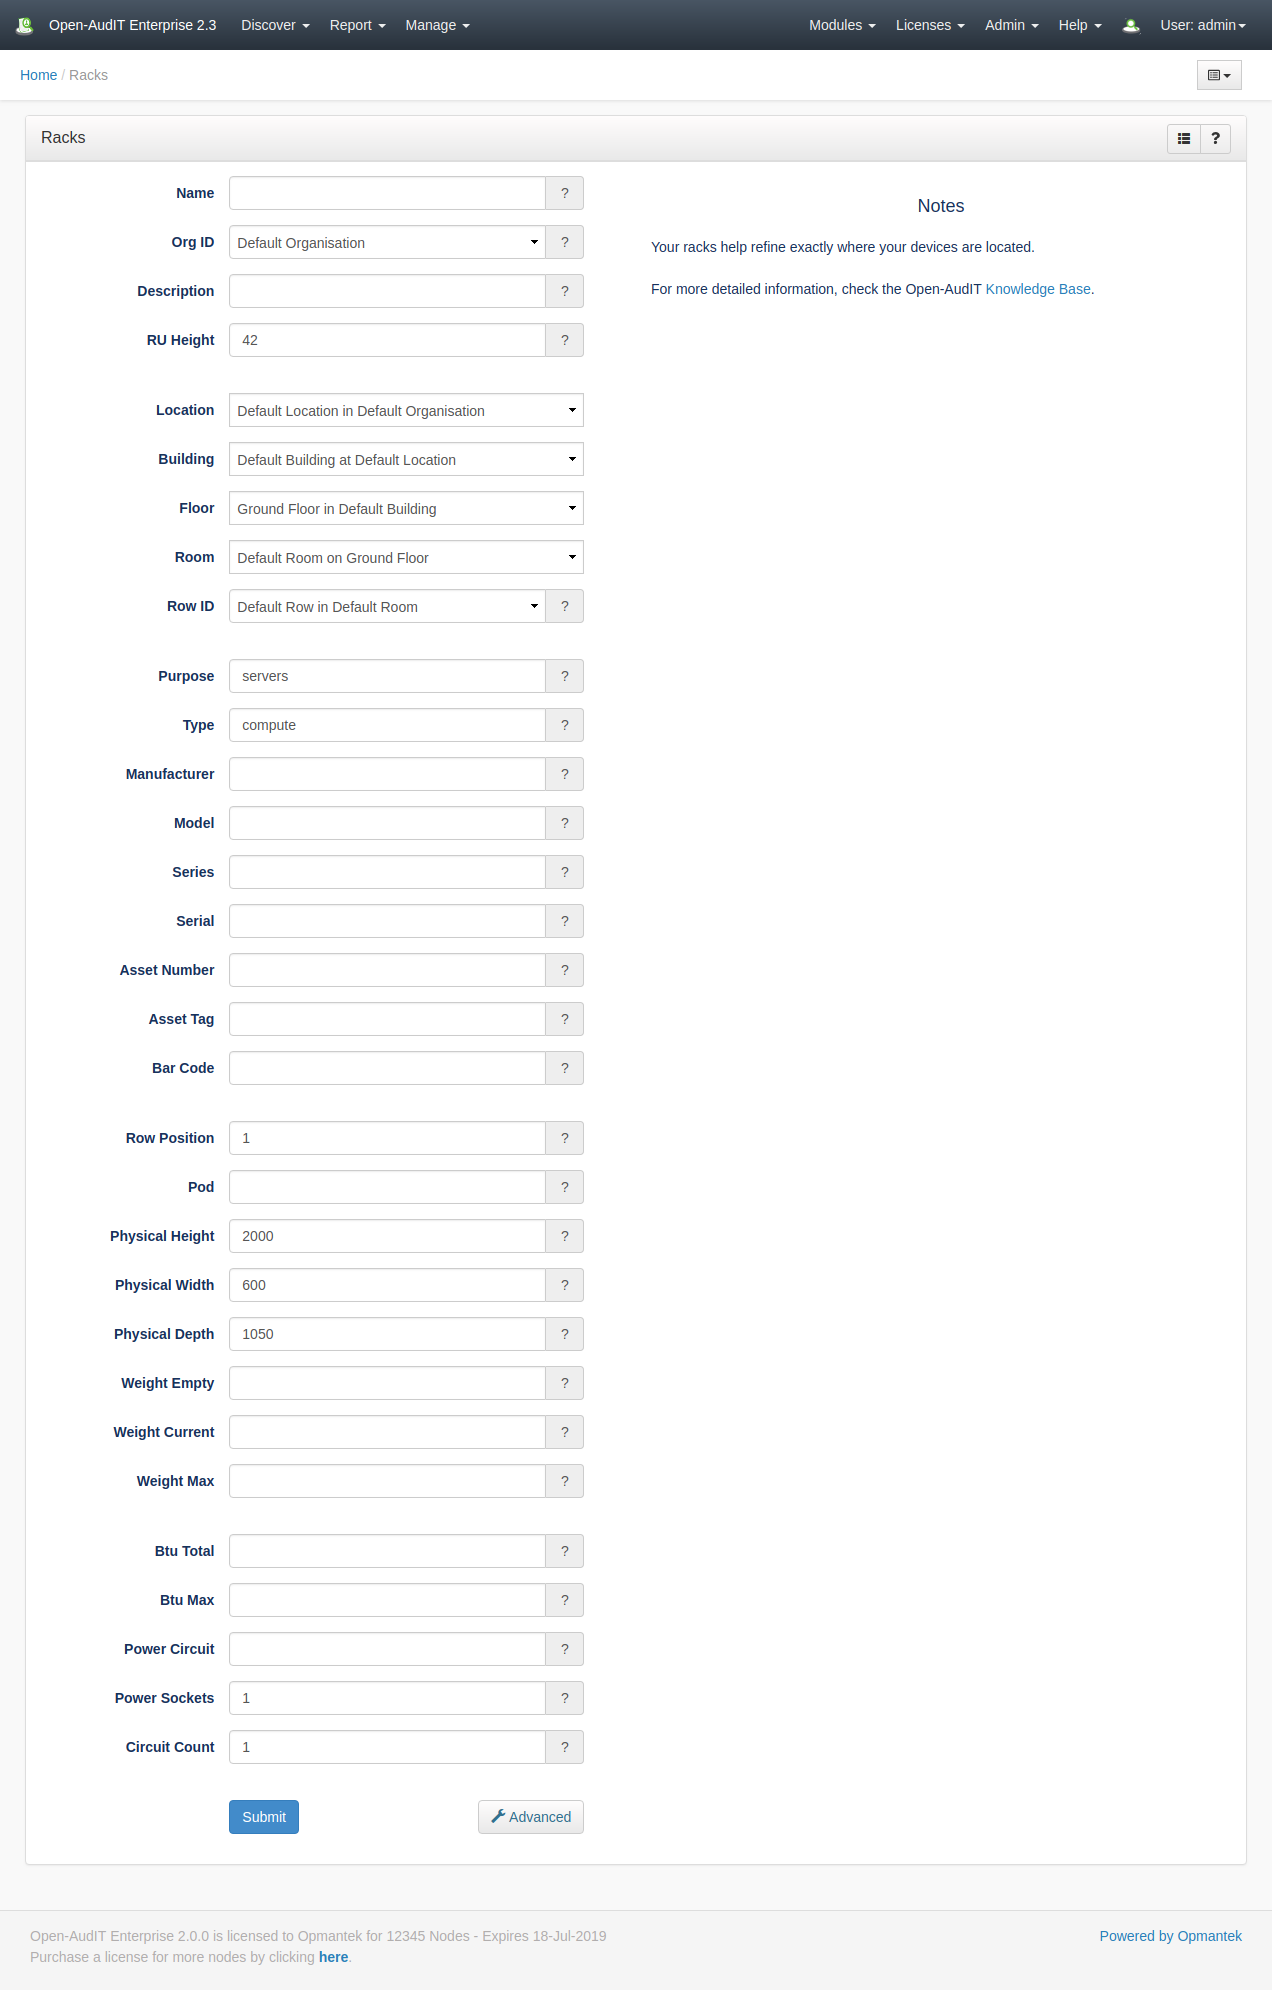
When creating a rack, you can provide the minimum required amount of information (name, Org, height and location details). We have provided defaults for all we can, so really - all you need is a name. If you would like to keep more details about the rack, click the "Advanced" button and you see many more attributes you can use.
Viewing Racks
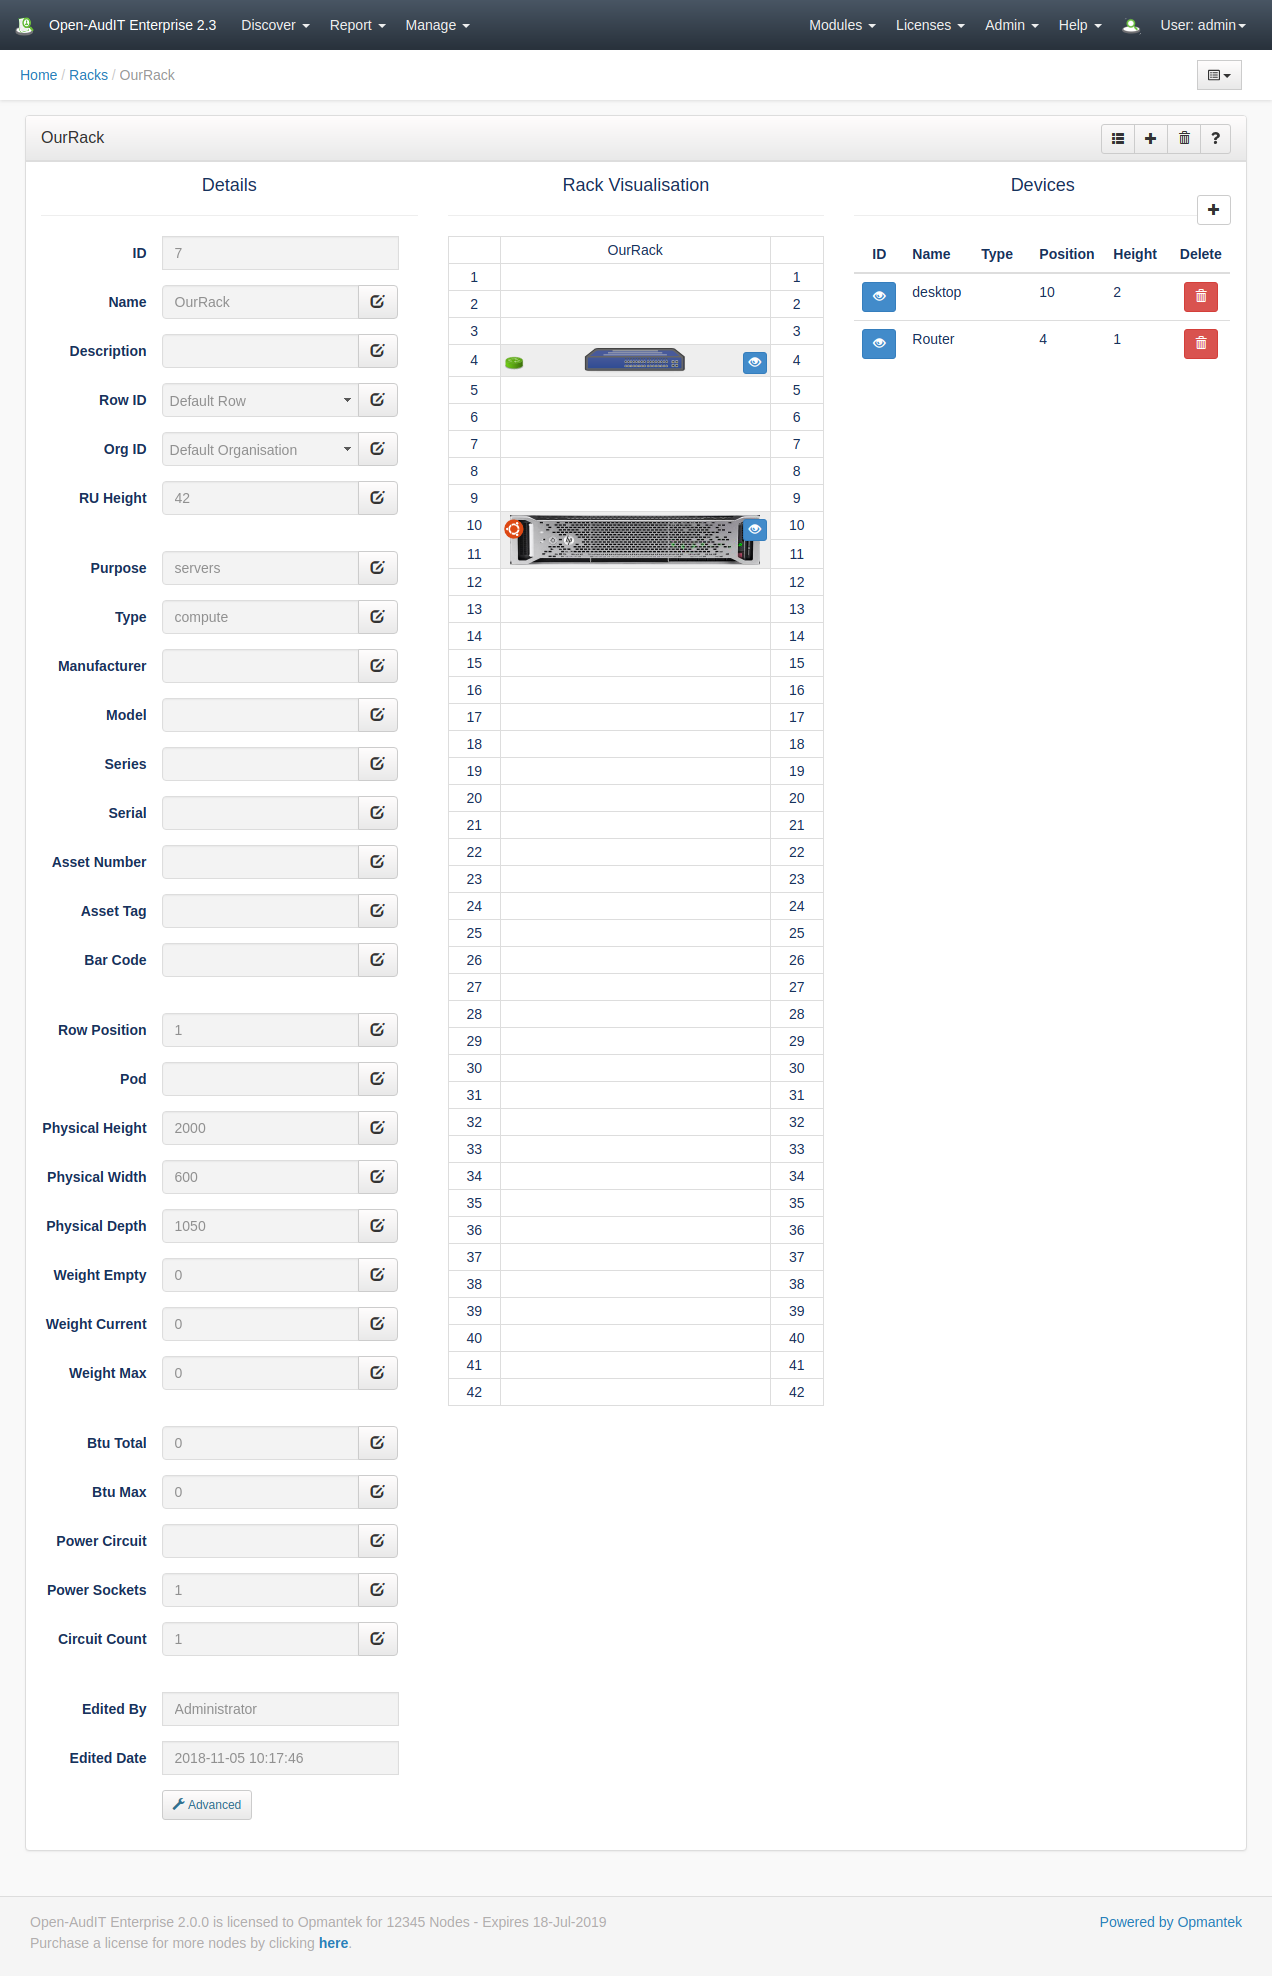
As pre creating a rack, when viewing a rack, if you have provided the minimum amount of attributes, the Advanced attributes will not show by default. Click the Advanced button to reveal (and edit) them. If you have provided some Advanced attributes, they will be shown by default. Eack device will have its icon shown on the left, along with a clickable "eye" icon on the right. Clicking this icon shows the basic machine details (name, IP, etc) and provides a link to view the full device. You can add a device by clicking the + icon in the Devices table. You can edit the potition and height of a device by clicking the blue 'eye' icon next to each device.
If you have added an image to a device, it will be shown. If you have not added an image (as per the router, below), the device's icon will be shown.
The best size for an image is 500px wide and 50px high for each RU in height. The image of the HP server below is 500px by 100px. You can now also assign a single image to multiple devices (as at 2.3.0).
They are accessible using The Open-AudIT API.
The table definition is best retrieved in application by going to menu → Admin → Database → List Tables.
Racks Reporting
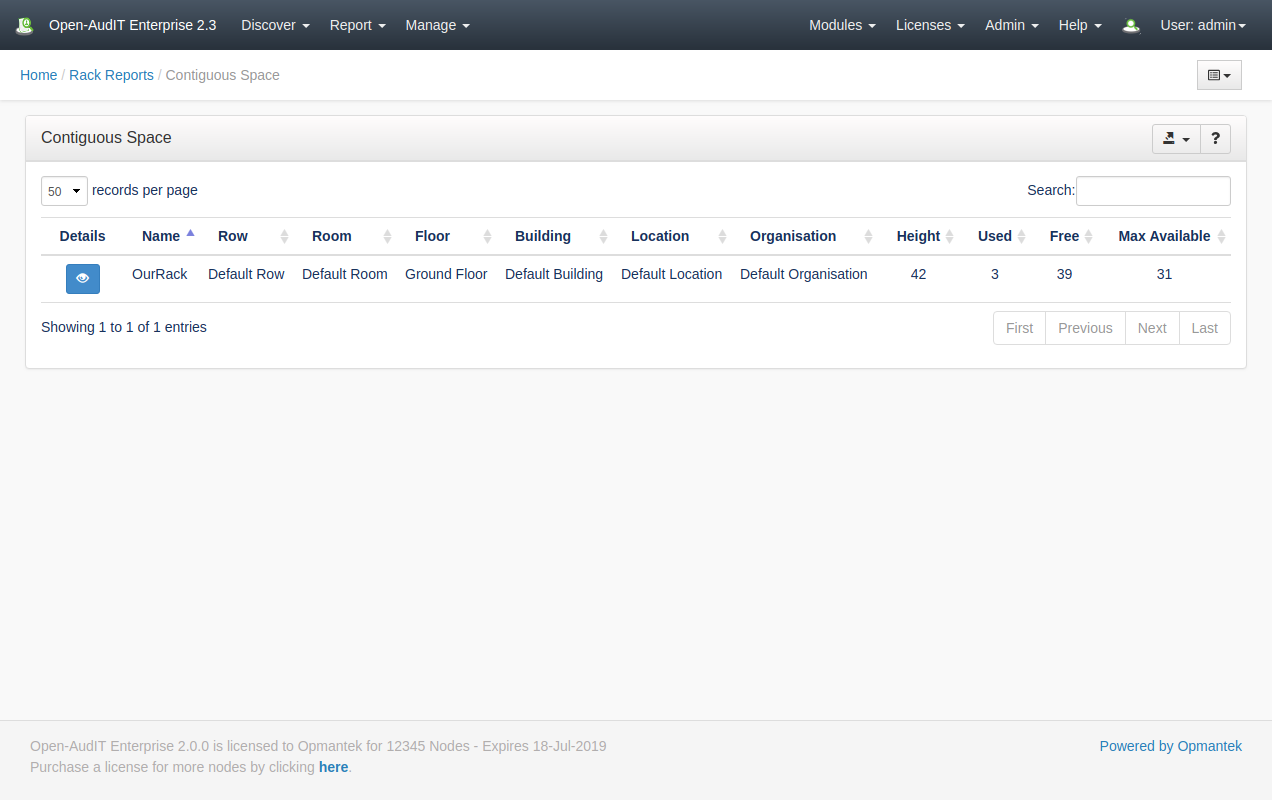
Along with being able to create and visualize Racks, we have provided some initial Rack Reporting. You can find it at menu -> Report -> Reacks Reporting or menu -> Manage -> Racks -> Reporting.
You can specify the Org, all the way down to the Pod the list of racks you would like to know about and the largest contiguous aspaces there-in. This provides a quick and easy way to say "What's the largest space in Building C" (for example).
Database Schema
The database schema can be found in the application is the user has database::read permission by going to menu: Admin -> Database -> List Tables, then clicking on the details button for the table.
API / Web Access
You can access the collection using the normal Open-AudIT JSON based API. Just like any other collection. Please see The Open-AudIT API documentation for further details.