Introduction
Managing and monitoring a large network of devices requires a scalable, high availability and easy to manage solution. opHA 3.0.5 brings a new feature that allows you to centralise the configuration files from the Primary and send it to the pollers. The configuration files can be applied in NMIS and OMK. This partial configuration file would override the configuration that the poller has.

Requirements
- NMIS 9.0.6
- opHA version 3.0.5
- The pollers also need to be updated with opHA version 3.0.5 or above
Configuring opHA
opHA configuration consists of the following steps:
- Create a configuration file from a template (NMIS or OMK)
- Validate and save the file
- Create a group. By default, the following groups are created:
- Pollers - which contain all the peers
- Primary - which contain the local machine (this is configured with opha_hostname in /usr/local/omk/conf/opCommon.json. If you set this, you must also set opha_url_base and nmis_hostname)
- Main Primary - which monitors itself and the pollers.
- Assign peers to a group
- Assign group to a configuration file
- Push the configuration file. The file will be sent to the peers.
- Restart the daemons when required (you will see a message when it is necessary).
You can also map a role with a peer. By default, the following roles are available:
Poller
Primary
Portal
Local
And these roles are assigned:
- Primary: Server Local
- Poller: All existing peers available
Configuration files
Viewing configuration files
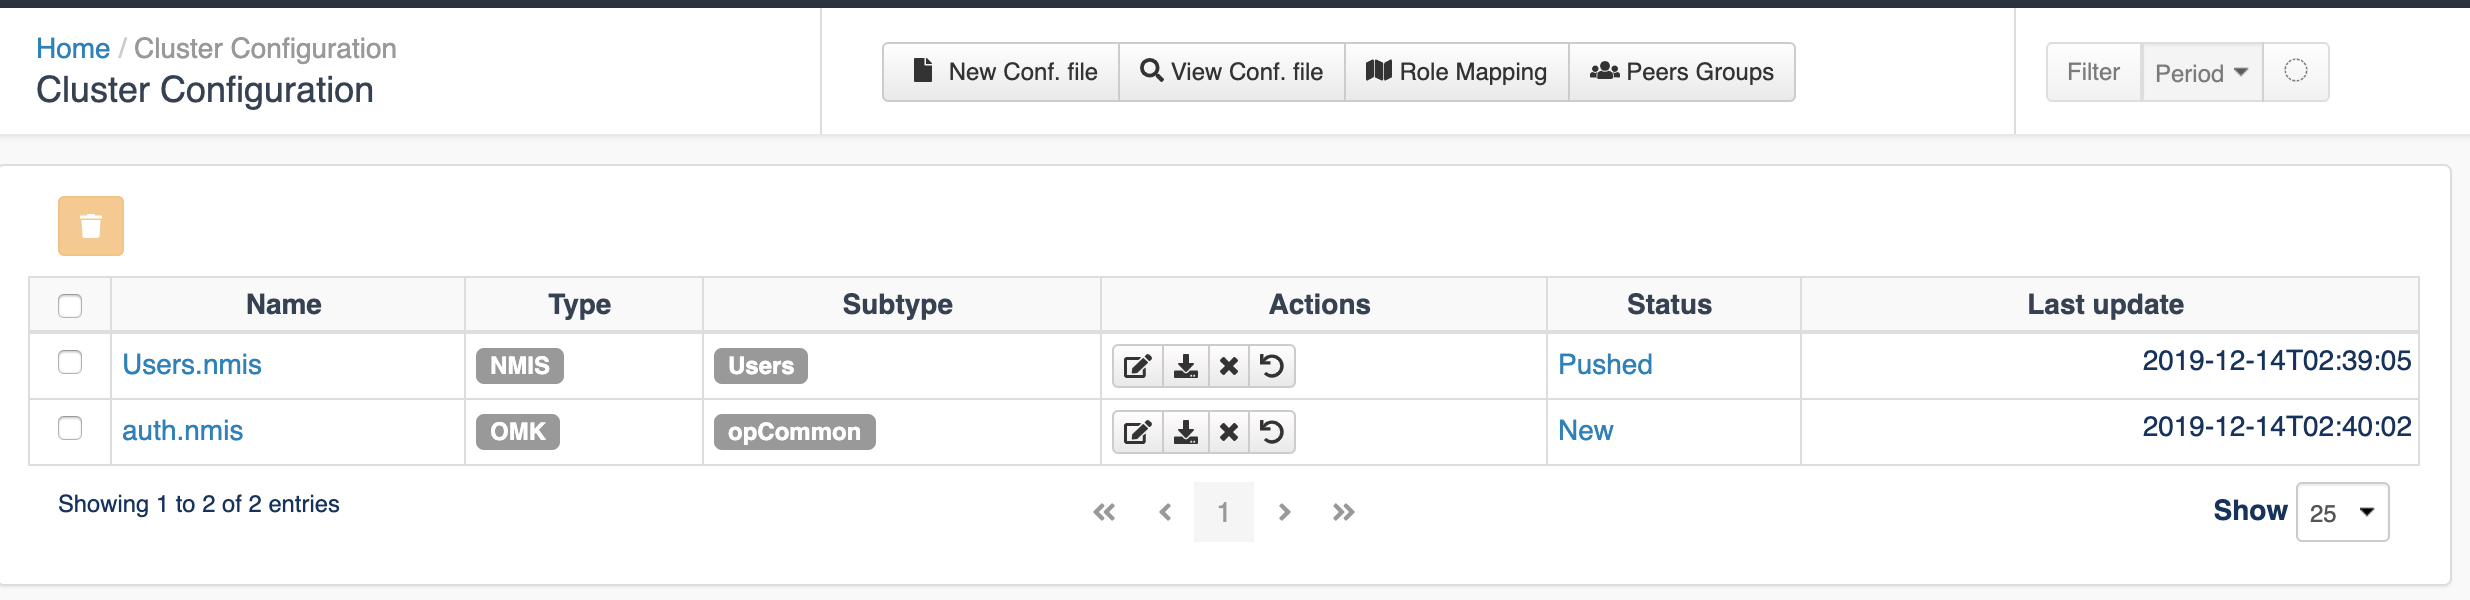
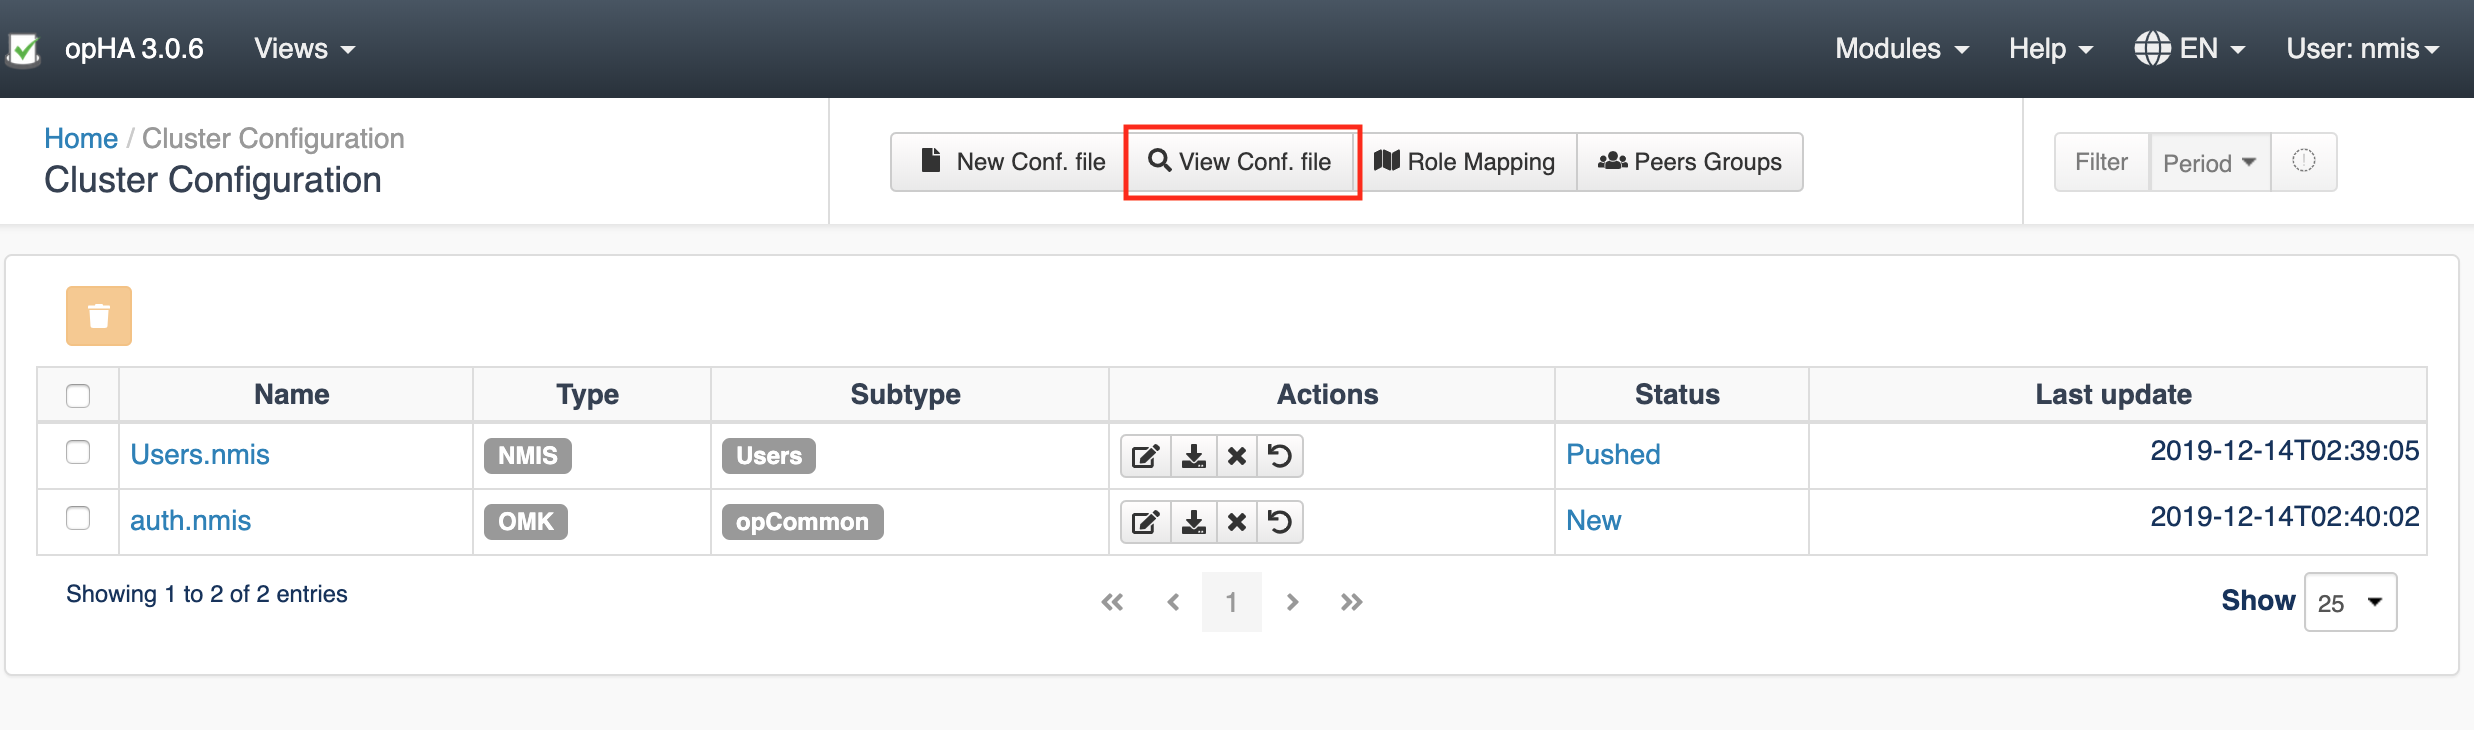
On the Views > Configuration > Cluster Configuration page, you can see a list of configured files.

Creating a new configuration file
To start creating a new configuration file, go to View > Configuration and click the New Conf. File button on the Cluster Configuration page.
On the "Create New Configuration file" window that opens -
- Select the file type - NMIS or OMK. It is very important to select the right type, as it is going to be applied on different products.
- Select the file subtype. You can only choose a file subtype depending on the file type you have selected above.
- Specify a file name. The file name must end with an appropriate extension -
.nmisor.json- depending on the file type selected above.
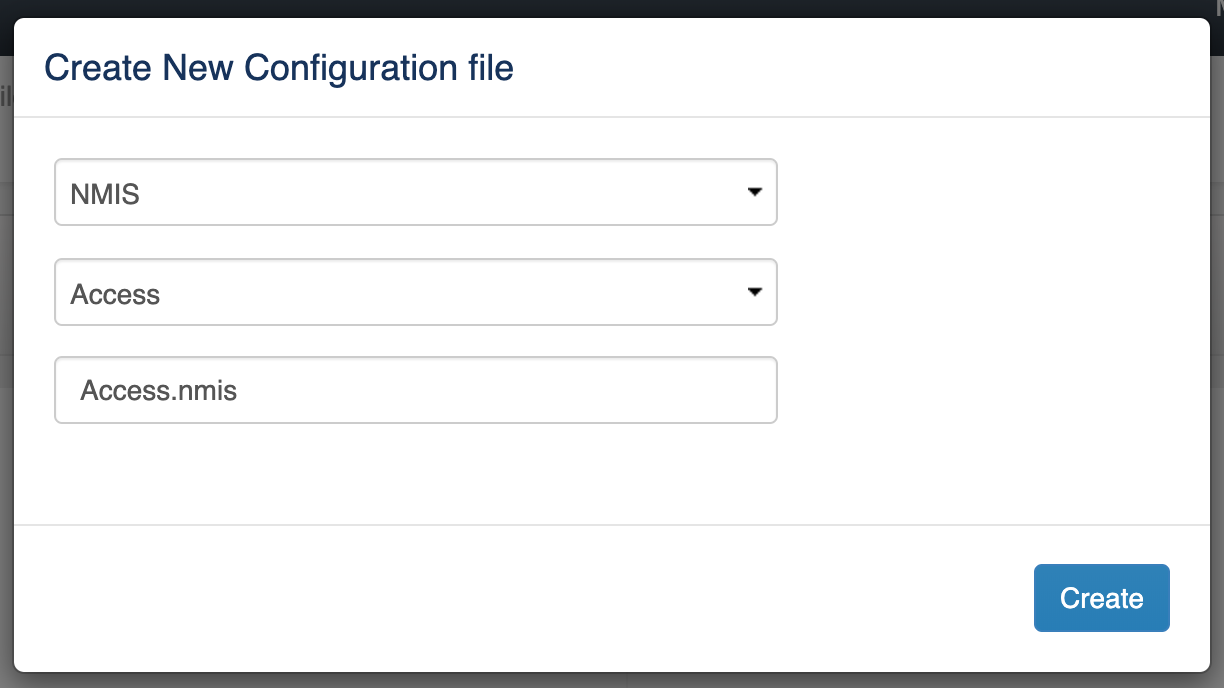
Click Create.
This will open the template in an editor. A generic templated will be loaded if the file is not opCommon (OMK) or Config (NMIS).
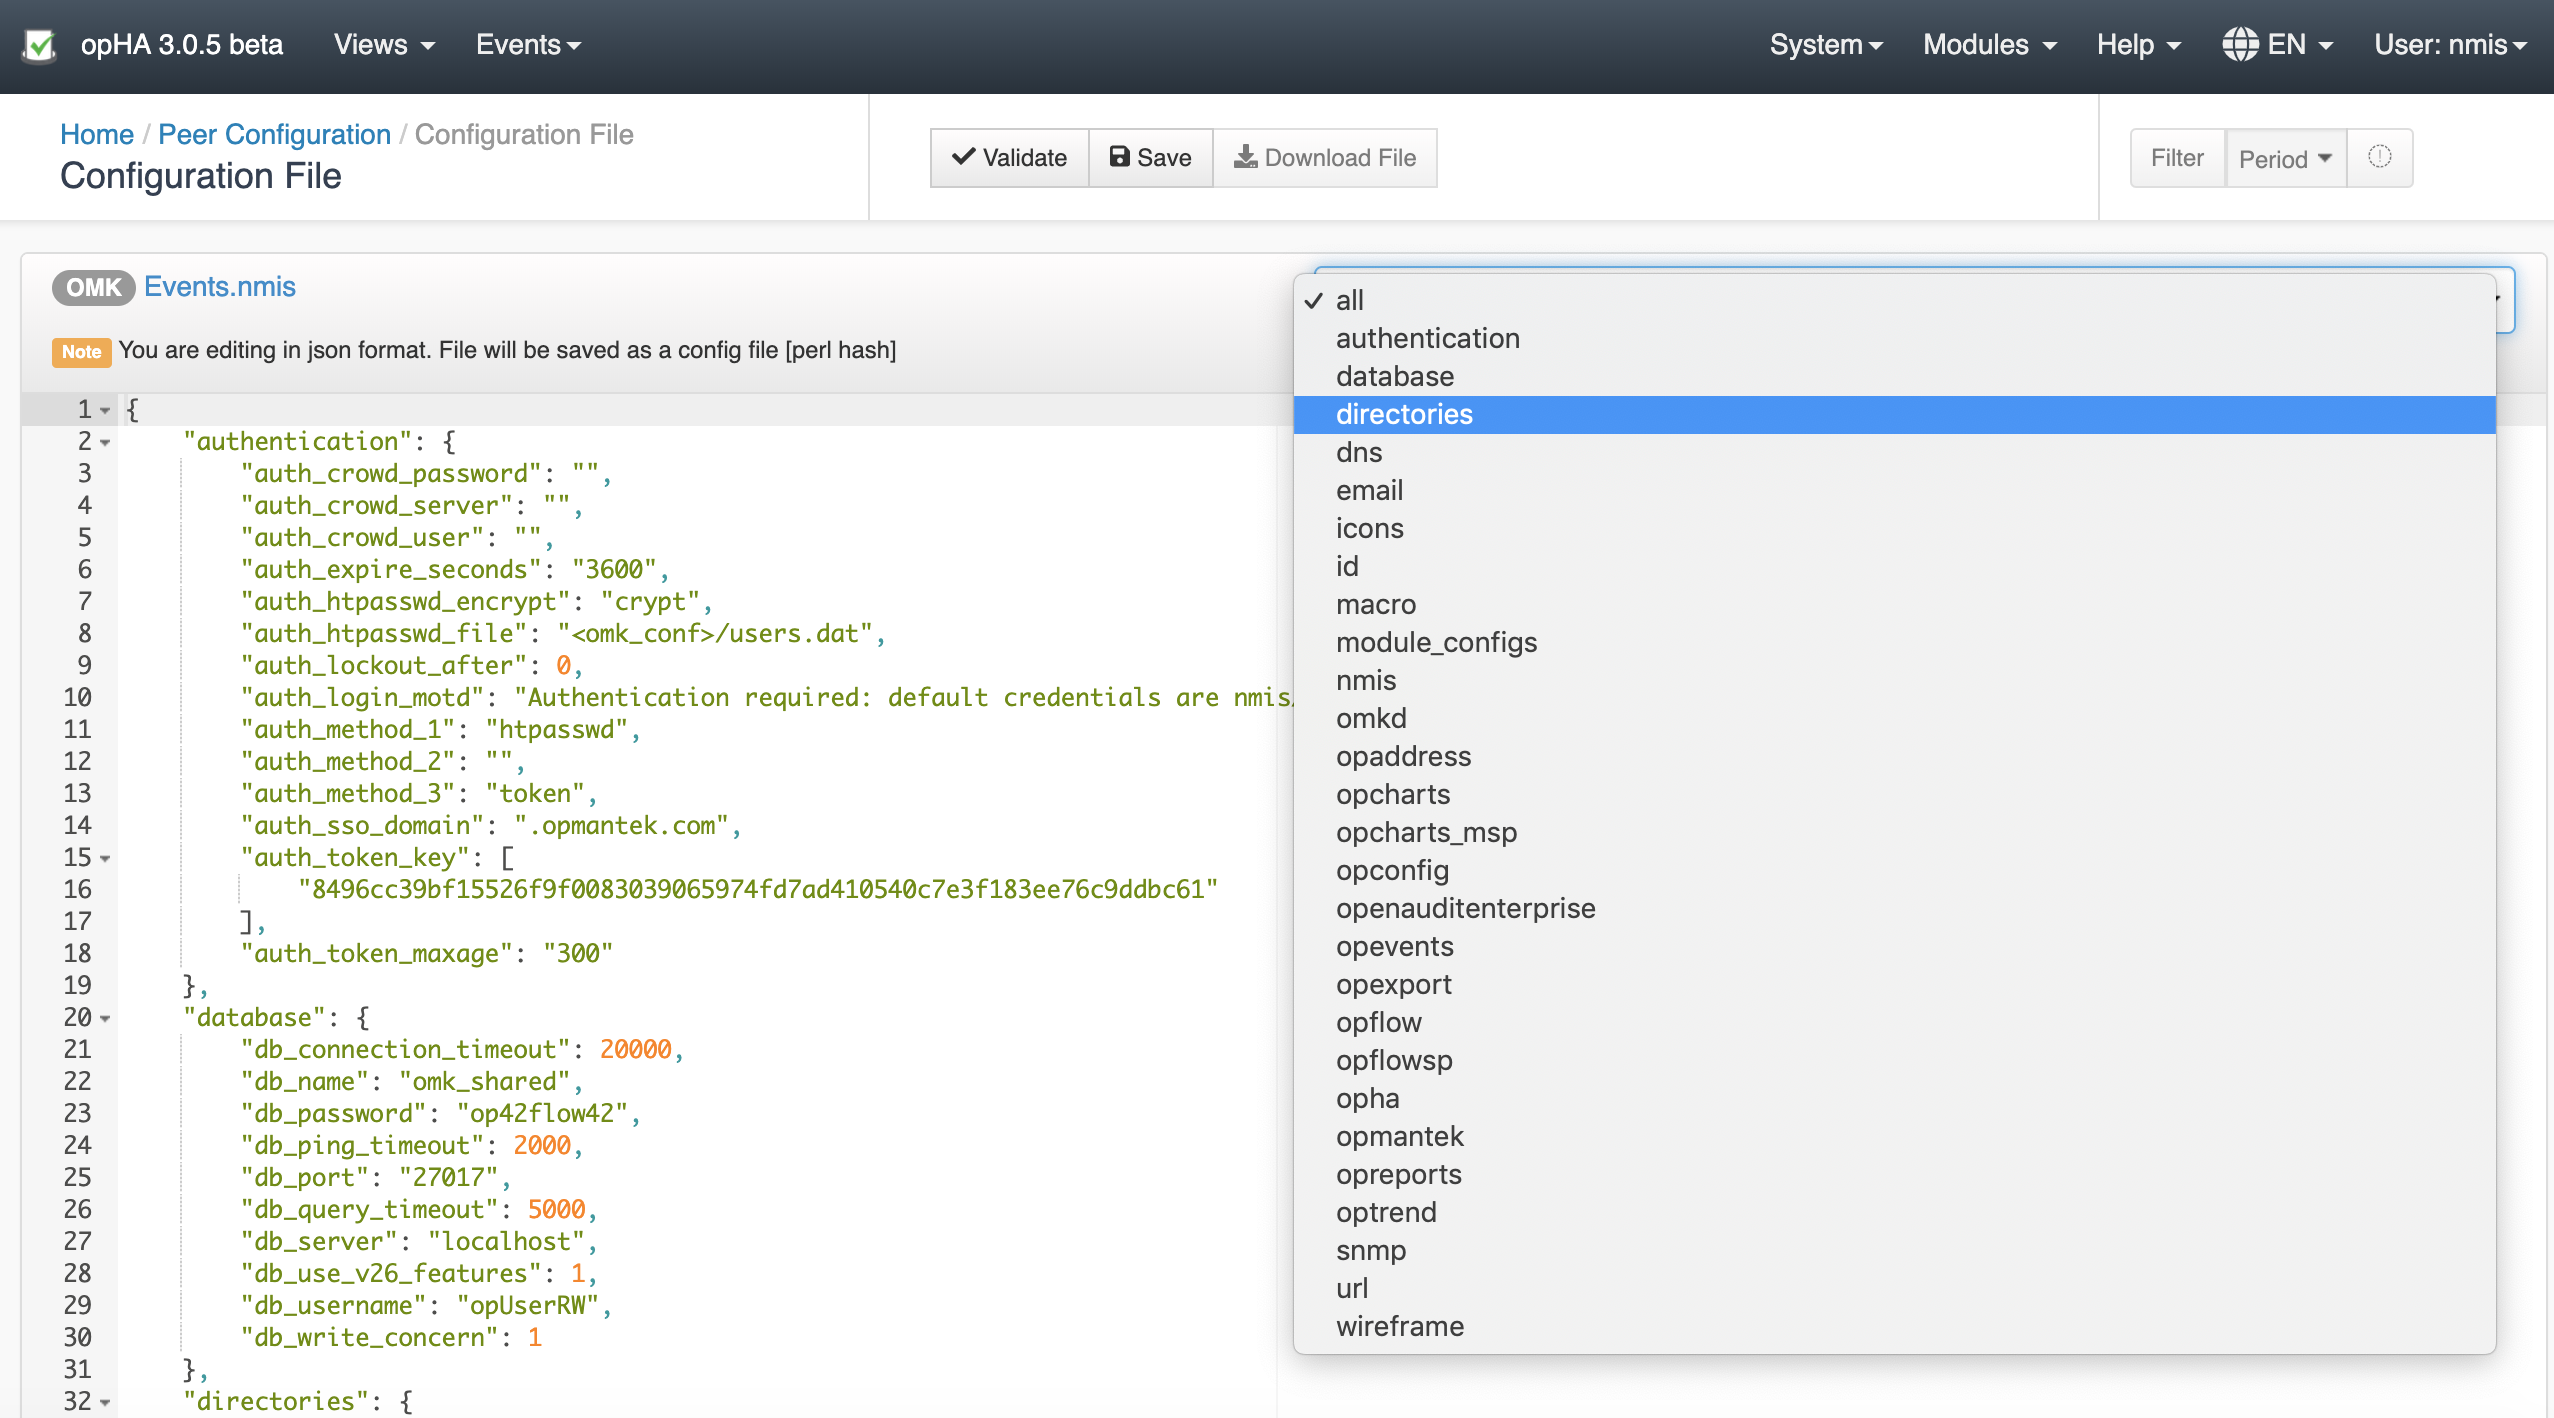
IMPORTANT considerations:
- The file is edited in json format, but it is being saved as a perl hash. You can download the file as it is being saved by clicking the Download File button.
- You can remove/add sections if you have selected the Section "all".
- Click Validate and see the Console Output below the editor, to know if the file you have edited is valid or not.
- After validating, Save the file. By default, once the file is saved, it will create a backup file, with a maximum of two.
Pushing a configuration file
To view a list of configured files, from the menu, click Views > Configuration and open the Cluster Configuration page.
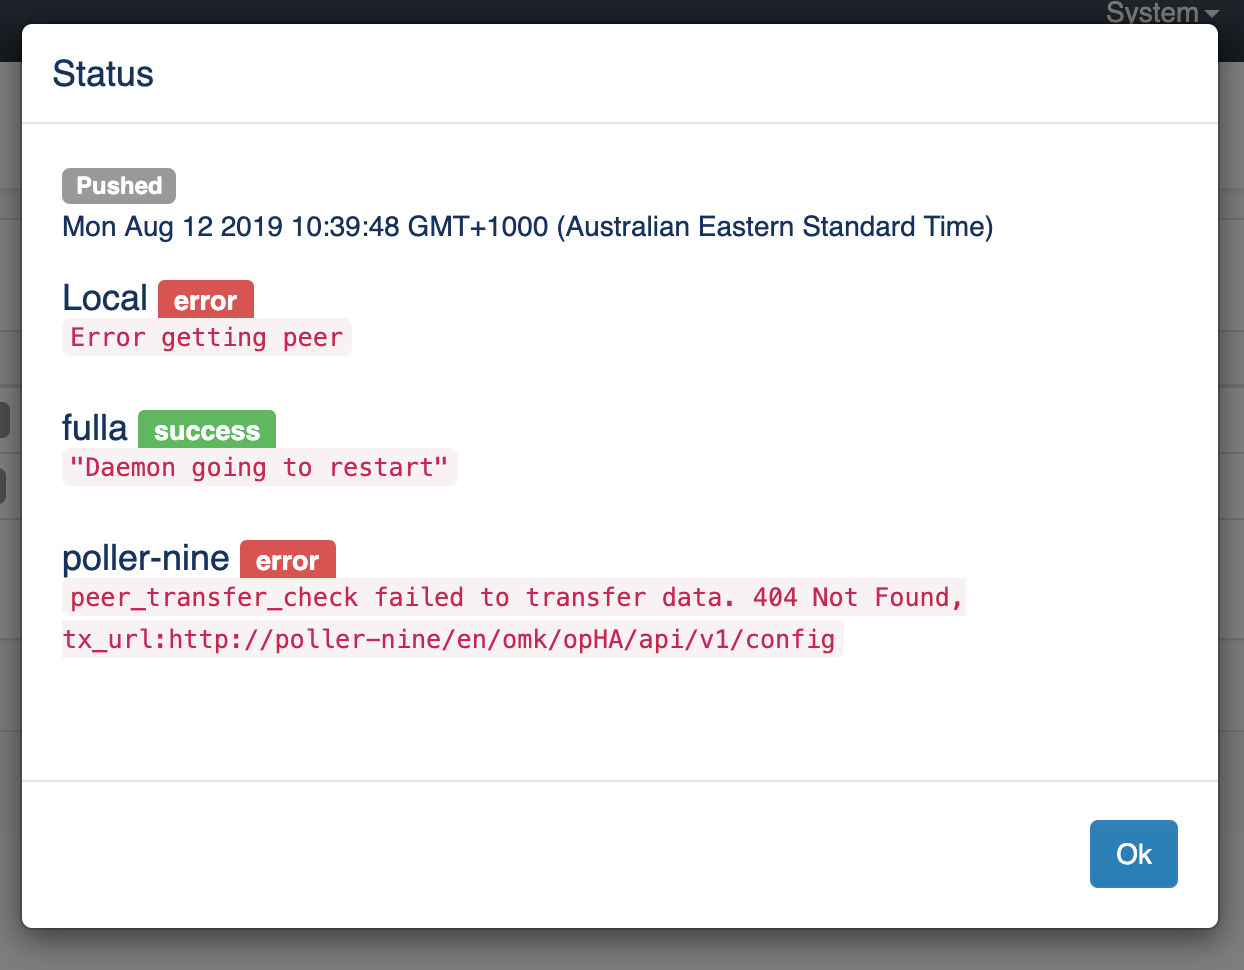
Click the Push button ![]() icon to push the required configuration file to the configured groups.
icon to push the required configuration file to the configured groups.
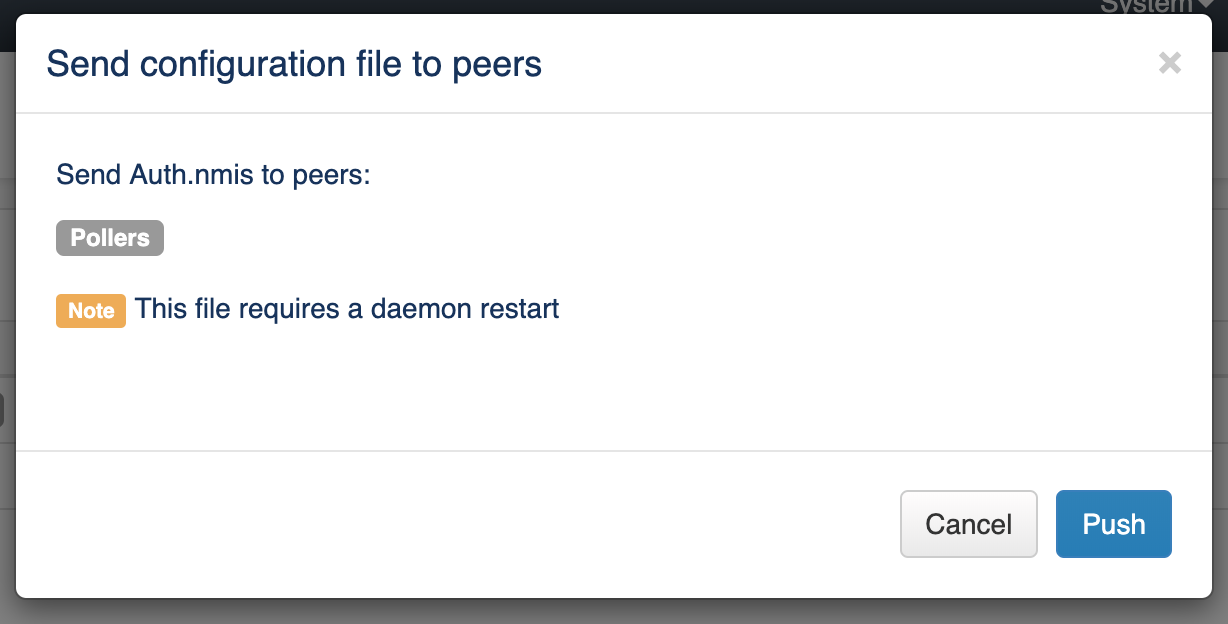
On the "Send configuration file to peers" window that opens, you can see if any daemons need to be restarted.
Click the Push button to complete the configuration push. Open the Log to see the push status and errors, if any.
Removing a configuration file
To remove a configuration file from the peers it was successfully sent to earlier -
- Open the Cluster Configuration page from Views > Configuration.
- Press the Remove
 icon against the required configuration file under the Actions column.
 - On the "Remove configuration file from peers" window that opens, select the peers from which you want the file to be removed and click Remove.

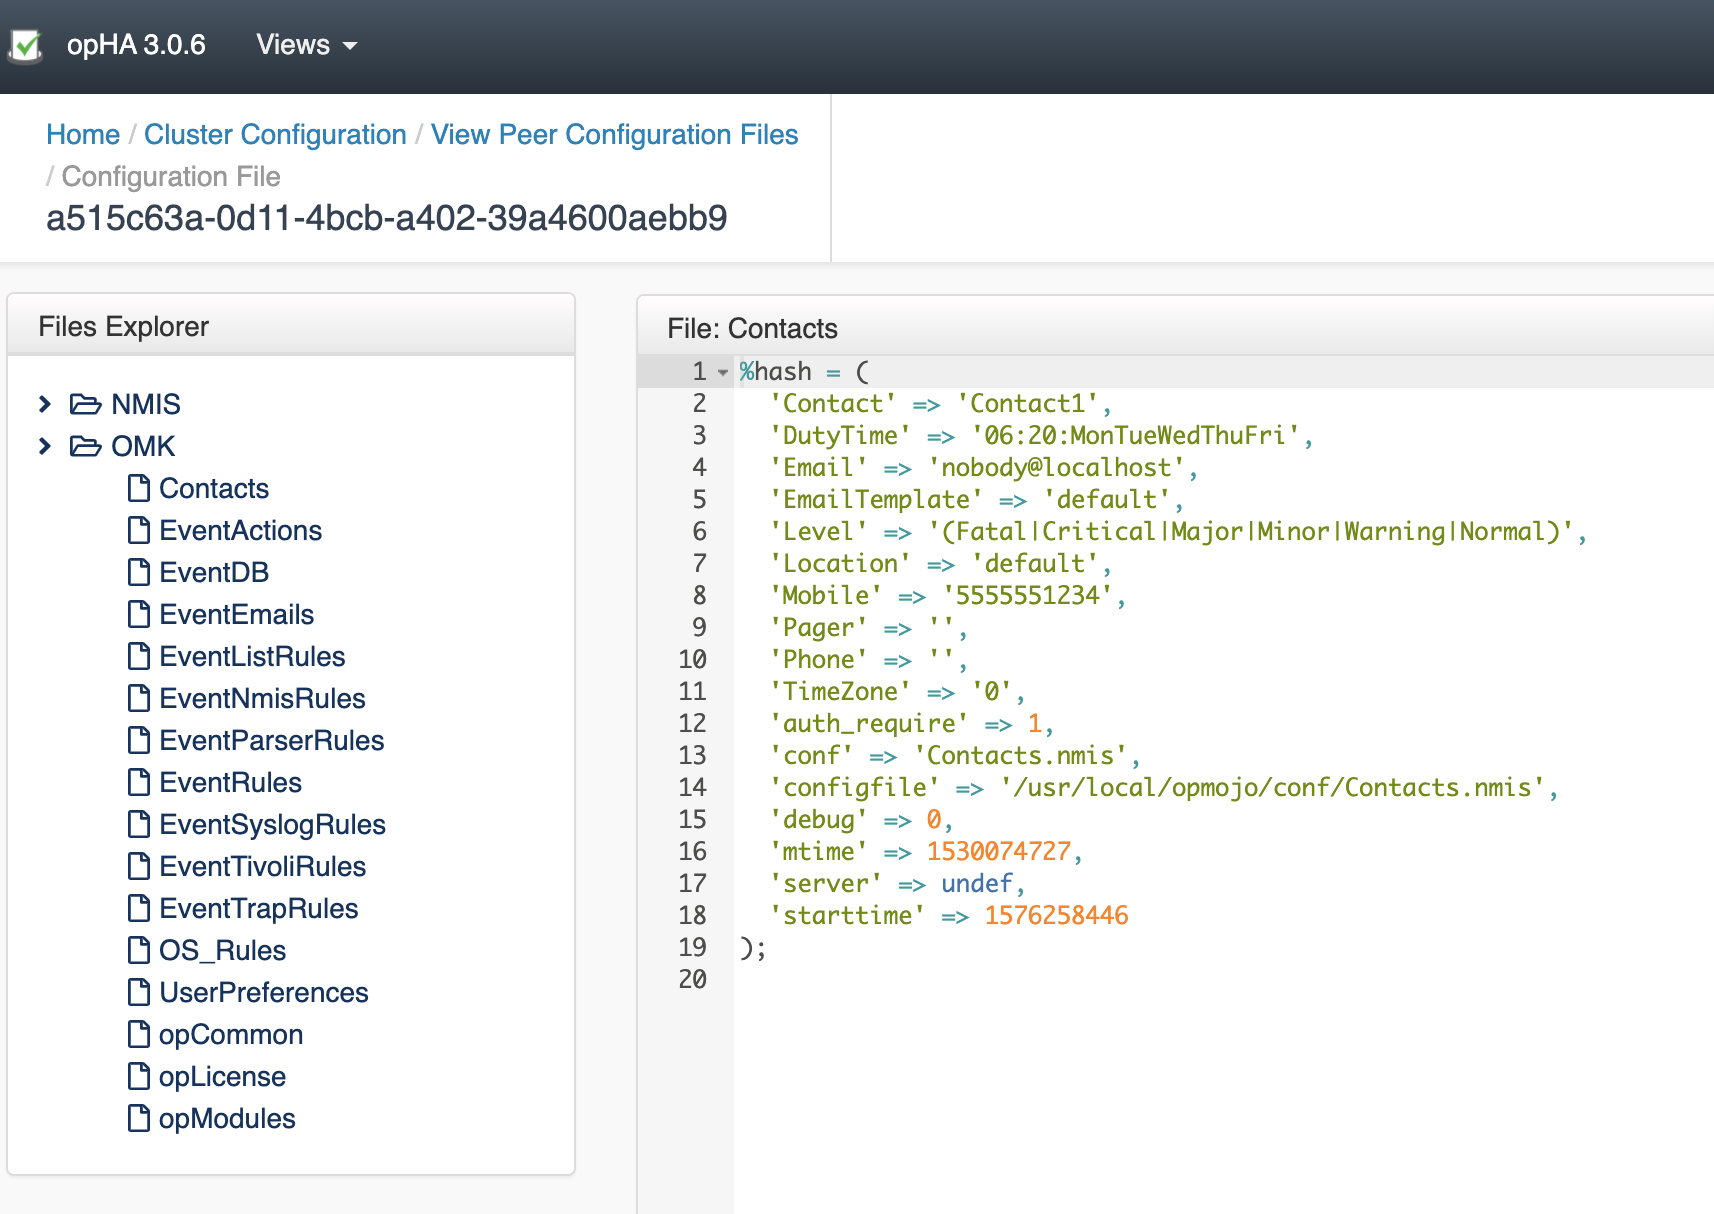
Viewing the resulting configuration
To see the result configuration of a peer, click the View Conf. file button.
Select the peer.
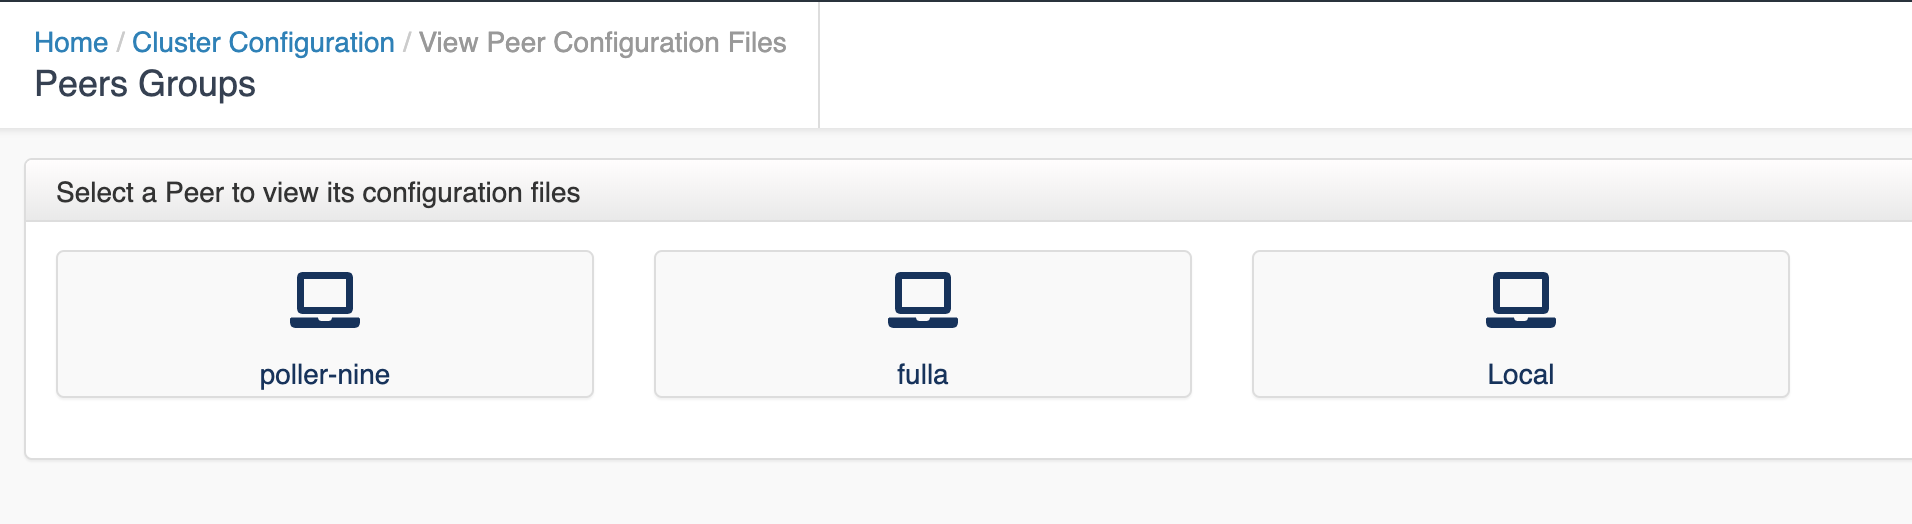
And select the file from the file browser.
Groups
Adding/Editing Peers in a Group
To add/edit a peer in a group -
- Access the Cluster Configuration page from Views > Configuration.
- click the Peers Groups button in the menu.
- On the Peers Groups page that opens, you can see all the groups available and the peers added to them.
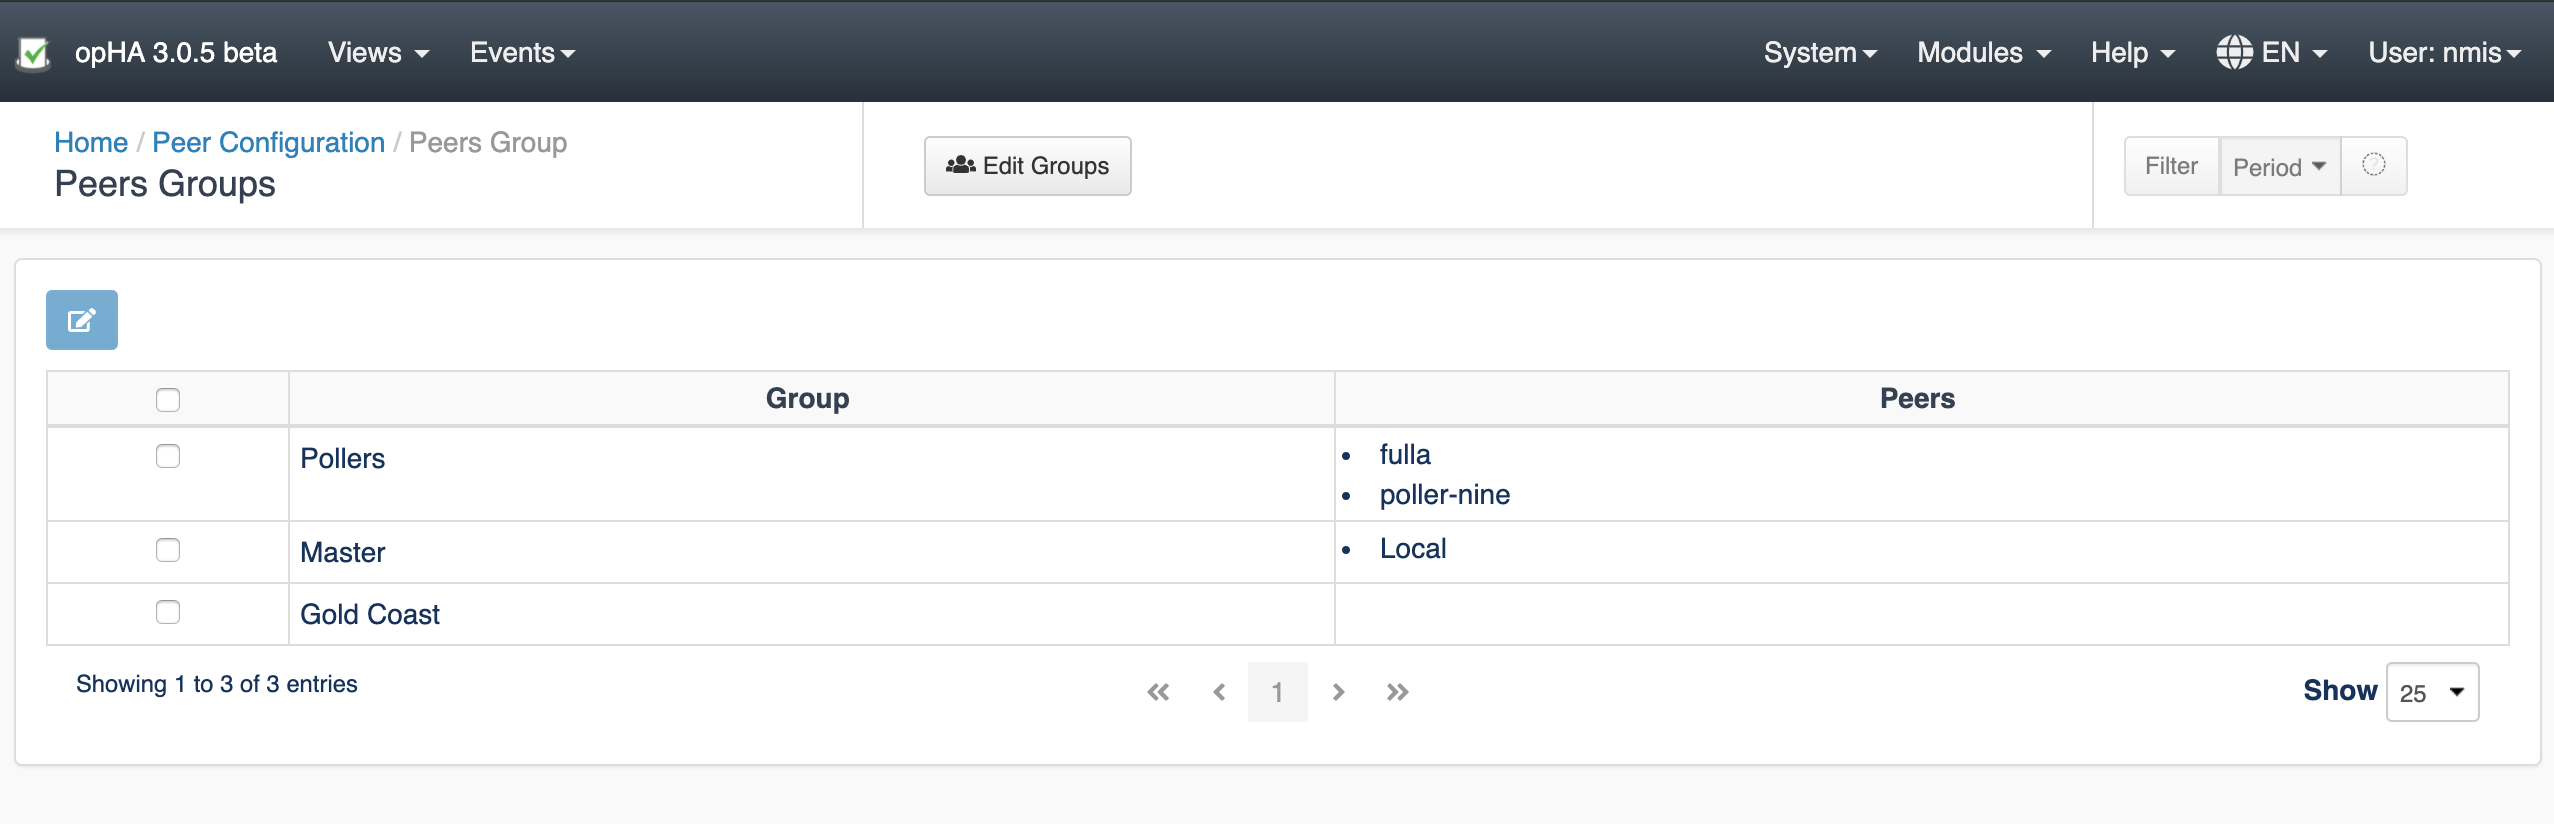
To add/edit members in an exiting group, select the Group and click the Edit icon above the table.
On the "Add group members" window that opens, add, edit, or remove the peers and click Save.

Creating/Editing a Group
To create a new group or edit an existing group, on the Views > Configuration > Peers Groups page, click the Edit Groups ![]() icon.
icon.
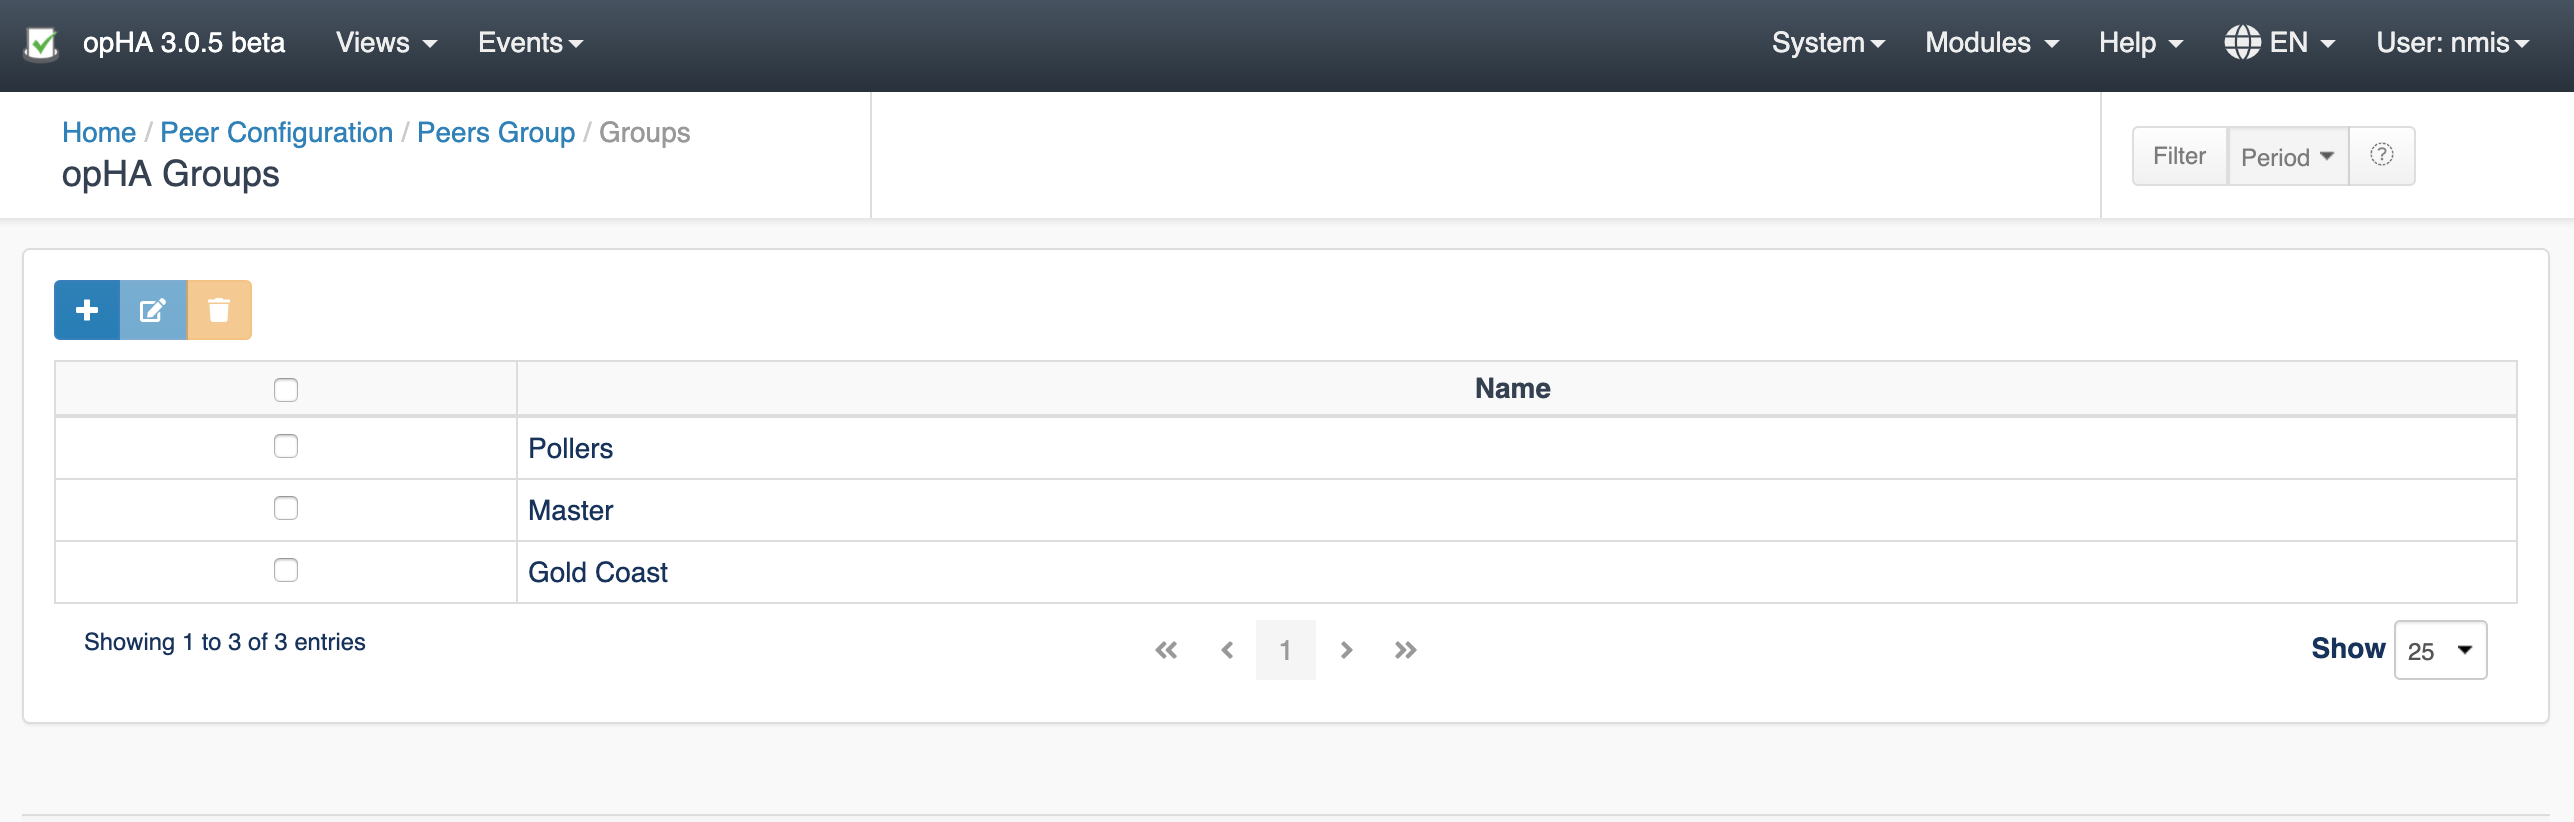
To create a new group, click the Create ![]() icon.
icon.
To edit or delete an existing group, select the group and use the respective icons above the table to edit/delete them.
Please be aware that, if you remove a group, all group associations will be lost.
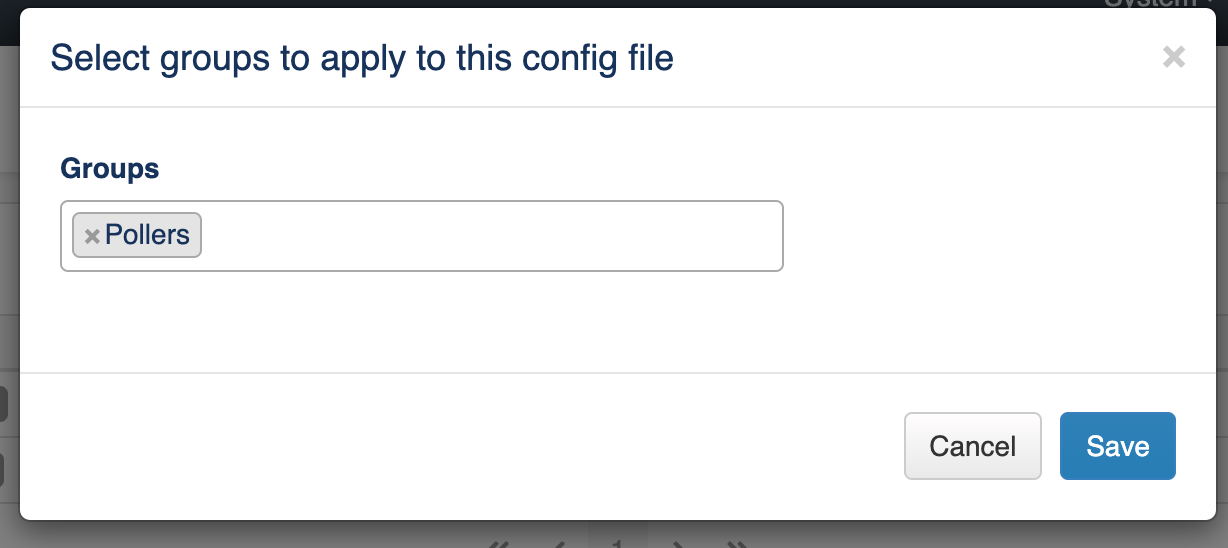
Assigning a Group to a Config file
You can assign a group to a Configuration file on the Views > Configuration > Cluster Configuration page. Click the Edit ![]() icon against the required configuration file and add groups on the "Select groups to apply to this config file" window.
icon against the required configuration file and add groups on the "Select groups to apply to this config file" window.
Roles
Role Mapping
To assign a peer to a role, click the Role Mapping button from the Configuration menu.
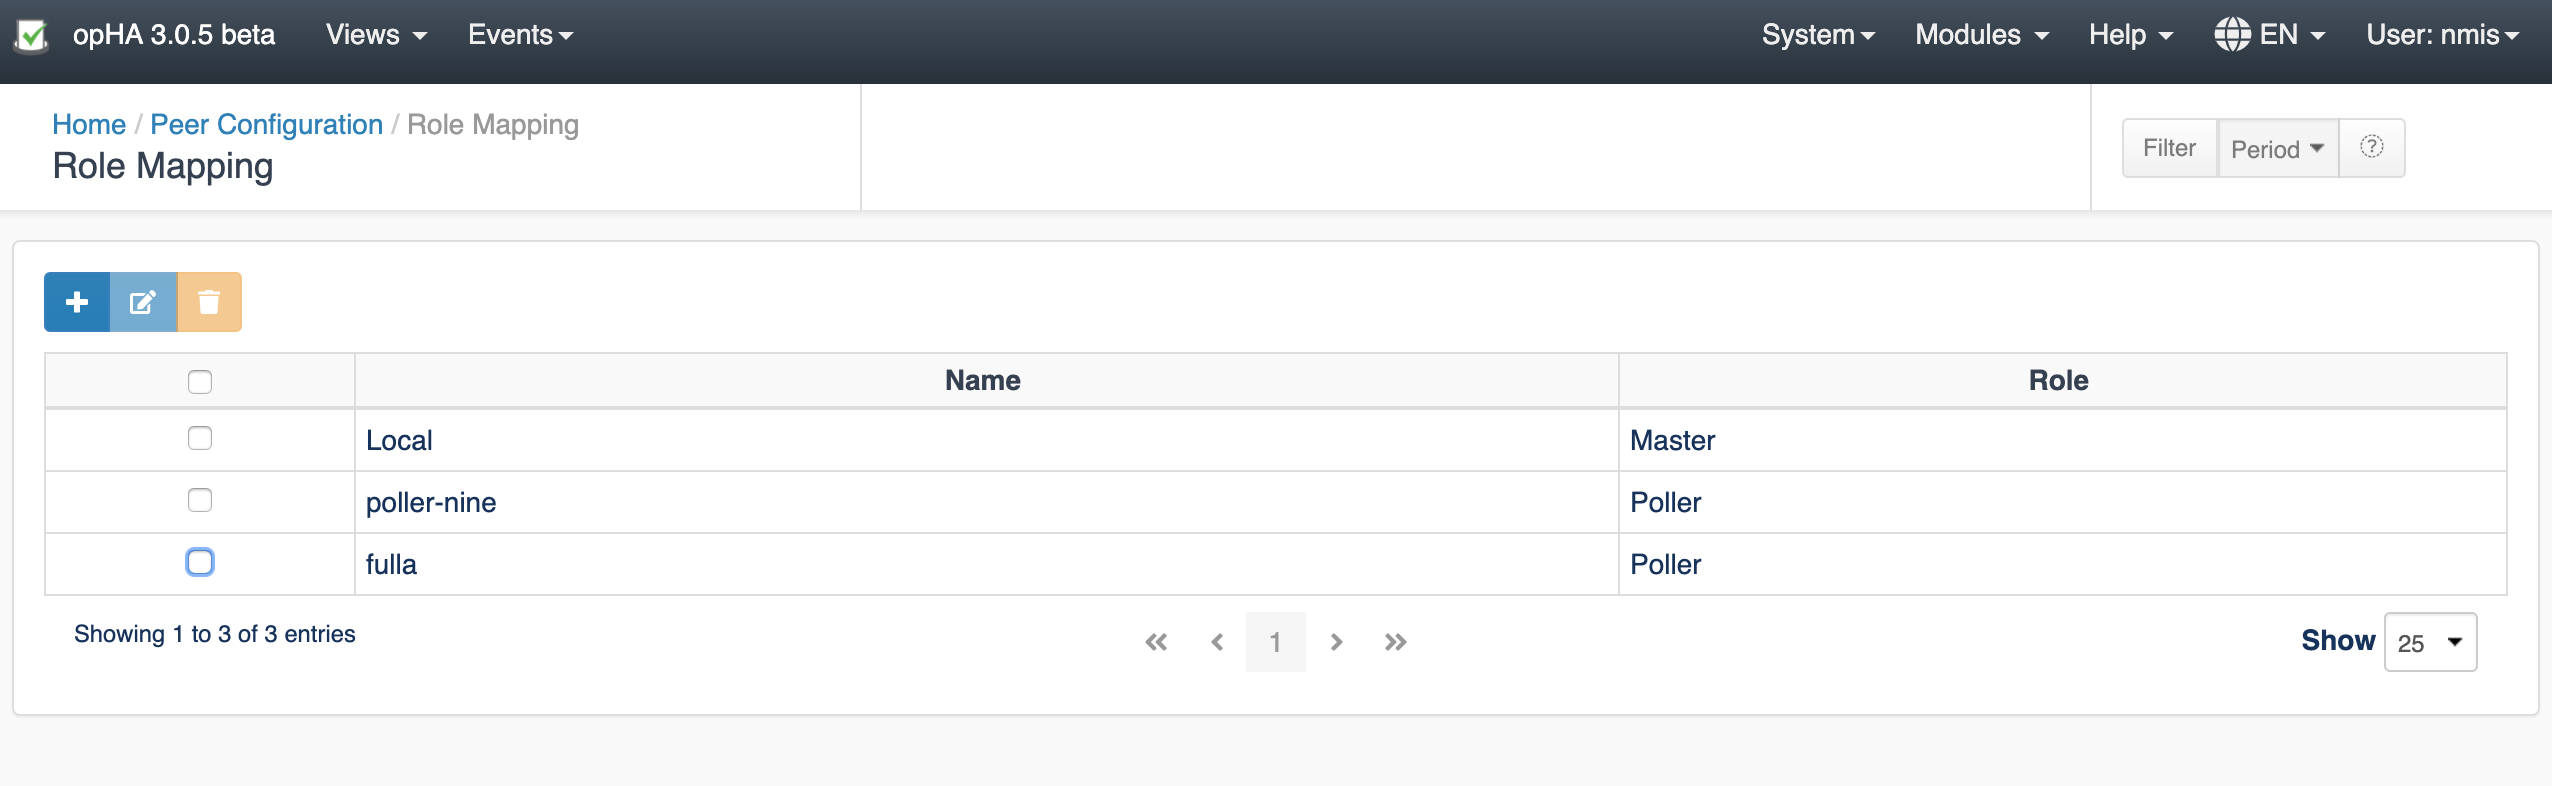
On the Role Mapping page that opens, you can add new mappings, edit or remove the existing ones.
Note that if a peer has a role assigned, it will not appear under the add button; you will need to edit it.
What Central Managed Means
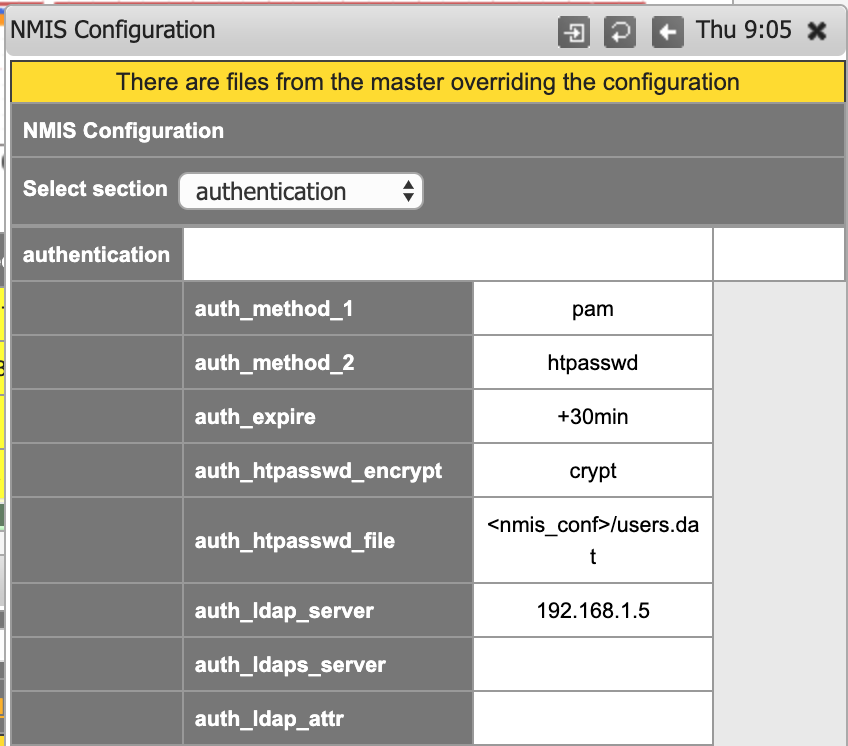
Please note that after you change the NMIS or OMK configuration from the Primary, it shall not be edited from its own poller.
If a peer role is set to be a poller, opHA menu will not be available:

When you update the configuration in NMIS from a Primary, you cannot edit/update the config from NMIS (on the NMIS configuration screen).
Restoring a Backup
opHA, by default saves two backup files in every poller in the <nmis>/backups directory or <omk/conf/conf.d/backups> directory. You can change the backup location by editing the opha_backup_master_location file.
Similarly, you can also change the number of backup files by modifying the same in opha_max_backup_files.
Restoring a backup can only be done manually, in each poller where required. To do so -
- Go to the backup directory in the Primary. By default, the backup directories are -
- NMIS:
<nmis>/backups - OMK:
<omk/conf/conf.d/backups>.
- NMIS:
- The backup file would be named in the file_name.nmis.version format. For example, authentication.nmis.3.
- Remove the version number from the file name. For example, authentication.nmis.
- Move the file to the external configuration folder. By default -
- NMIS:
<nmis>/conf/conf.d - OMK:
<omk>/conf/conf.d
- NMIS:
- For some of the changes to take effect, the corresponding daemon should be restarted. For example:
- service nmis9d restart
Cleanup Utilities
opHA has two utility tools to cleanup orphaned files and orphaned metadata:
- <omk>/bin> ./opha-cli.pl act=cleanup : The purpose is cleaning Primary files and metadata. Must be run from the Primary. Will check for:
- Metadata without a file associated in the file system
- Orphan files in the file system
- Backup files
- <omk>/bin> ./opha-cli.pl act=cleanup_poller : The purpose is cleaning poller files. Will check for:
- Orphan backup files from OMK.
- Check for duplicated configuration items in OMK: This means that there is the same configuration item in different configuration external files. This could led us to errors, as the one which is loaded first is going to override the other.
- Check for duplicated configuration items in NMIS.
- <omk>/bin> ./opha-cli.pl act=clean_orphan-nodes : Will remove the nodes with no cluster_id associated. Will ask for confirmation for each node if simulate=f is specified.
Important: Cleanup utilities run in simulation mode by default. It is a good practice to run as simulation to check all the files that are going to be removed. simulate=f will remove all files and metadata.
New configuration Items
These are new configuration values:
- opha_conf_templates_url: '/install/templates'
- opha_backup_master_location: $self->{app_path}/conf/conf.d/backups
- opha_master_config_location: $self->{app_path}/conf/conf.d
- opha_conf_files_url: $self->{app_path}/conf/peers
- opha_max_backup_files: 2
- opha_restart_nmis_needed_sections: The sections for NMIS that require a daemon update.
- opha_restart_omk_needed_sections: The sections of the configuration for OMK that require a daemon update.
- opha_config_file_types: ['NMIS', 'OMK']
New configuration items for nmis:
- '<nmis_conf_ext>' => '<nmis_conf>/conf.d'
Considerations
Once a peer is edited from opHA, is important to know:
- Backup files are saved, but it is not possible to rollback from the GUI. By default, configuration files have 2 backup files.
- Once you edit NMIS configuration, it is not possible to edit from the GUI. You will see a message when there are some configuration files overriding the local configuration.
- If the daemon is going to be restarted, it is not going to see the result on the log. But you can check the opHA landing page to see the daemon's state.