...
Backup old installation
Code Block cp -r omk omk-backup-<date>/
Stop the current service (note, if your server is running multiple omkd then you will need to use ps -ef to find the correct one). The opmante.exe WITHOUT the webserver is the one we want.
Code Block #more than one omkd use these instructions, note: do not use service omkd stop if you have more than one opmantek.exe ps -ef | grep opmantek.exe [root@server ~]# ps -ef | grep opmantek.exe root 944 742 0 20:44 pts/0 00:00:00 grep opmantek.exe root 16533 1 8 Dec12 ? 09:44:54 opmantek.exe root 20229 1 0 Dec06 ? 00:02:10 opmantek.exe webserver kill 16533 # (leave 20229, it is not opExport) ps aux | grep opmantek.exeUntar the new version
Code Block cd /usr/local tar -zxvf /tmp/opExport-New-Version.tar.gz
Upgrade the configuration
Code Block cd /usr/local/omk ./bin/opupdateconfig.pl ./install/opCommon.nmis ./conf/opCommon.nmis
Start the service back up
Code Block service omkd start
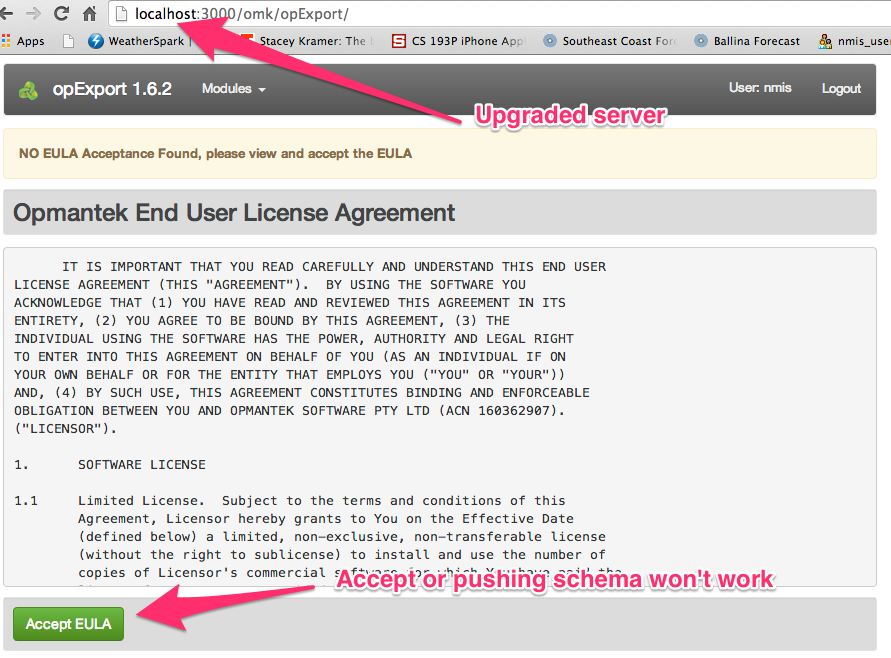
- Load the upgraded GUI in a web browser http://your.upgraded.server.name.or.ip:3000/omk/opExport, this is required to accept the EULA, if this is not done schemas will not be saved in the next step!
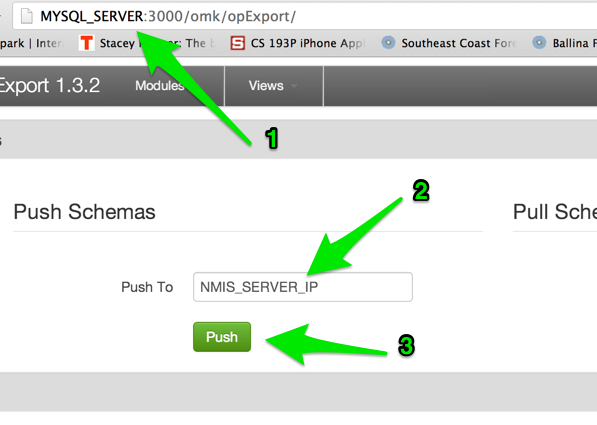
Load the MySQL Server GUI in web browser http://your.MySQL.Server:3000/omk/opExport, push the schema to the upgraded server
Push schema to NMIS server from MySQL (only if the upgraded server is NMIS server) .

