Versions Compared

Key

  • This line was added.
  • This line was removed.
  • Formatting was changed.

...

namestringName which is shown at the top of the quick action element
descriptionstringText shown under the quick action name, useful to describe what the action does
command_setsarray of stringsCommand set keys which you wish to be run
nodesarray of stringsNames of nodes which you wish the command sets to be run against
buttonLabelstringText of the run button
buttonClassstring

Css class applied to the button to colour it.

  • btn-default
  • btn-primary (default, blue)
  • btn-success (green)
  • btn-warning (orange)
  • btn-danger (red)

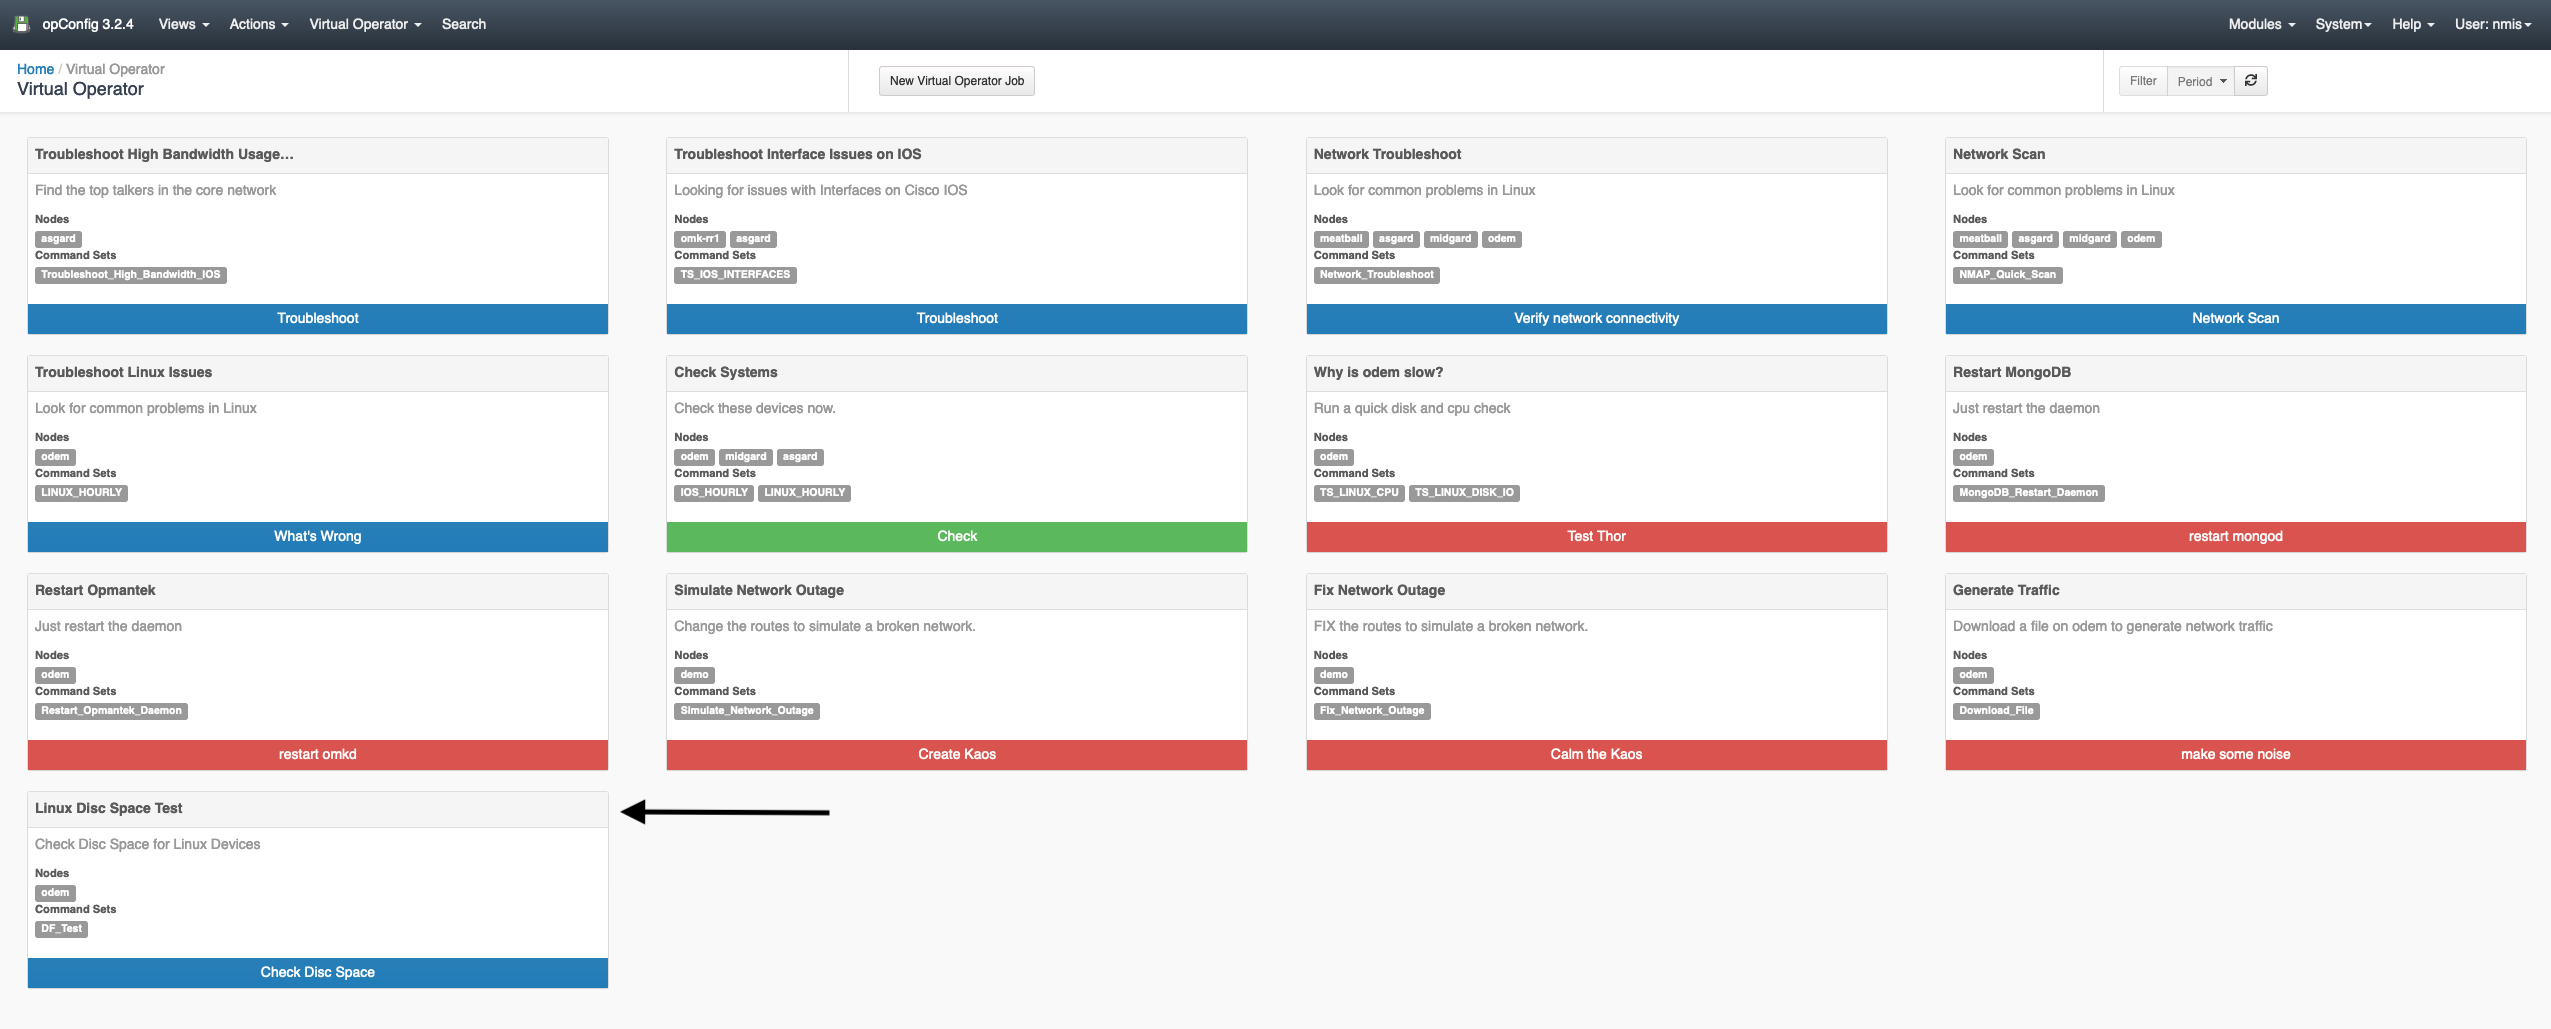
Step 3: Confirm your Quick Action is working

After adding your Quick Action entry to the opConfig_action-elements.json file, navigate to your opConfig GUI. As shown in the screenshot below the newly created Quick Action 'Linux Disc Space Test' is now displaying. Click on the button to start the Quick Action.

Image Added

After clicking the Quick Action button the page below will auto fill the nodes provided in the opConfig_action-elements.json file as well as the Command Sets we created in the df_test.nmis file. Schedule a time for the Quick Action to run, give it a name and a description then click 'Schedule'.

Image Added

Once the job has been completed you can view the results and details of the Quick Command. To view the command output click on the command in the Commands table as indicated by the arrow in the screenshot below.

Image Added

The page below displays the command output as well as the Command Summary and the Most Recent Revisions.

Image AddedImage Removed

...