...
- The individual performing this installation has a small bit of Linux experience
- Root access is available
- Internet access is required for installing any missing but required software packages
- NMIS must be installed on the same server that opHA is being installed on. Here you can read the NMIS installation guide.
- You will need a license for opHA ( CONTACT US for an evaluation license )
- opHA has to be installed onto the Primary and each Poller NMIS server
- If using opCharts on Primary each poller will also need opCharts.
Getting Started
...
Download the latest product version from opmantek.com
| Info |
|---|
Prior to attempting to install opHA and undertaking configuration it is CRITICAL that clock synchronisation via ntpd or chronyd is fully operational and all systems validate as being synchronise off a similar clock source linked to the global clocking infrastructure. chronyd is purported to be better suited to virtual environments and contains additional reporting features to assist with troubleshooting when used in a private clock distribution setup. ChronyD is the default for RedHat. The requirement for good timekeeping is a basic logging element however, SSL crypto is time dependent and variation in time beyond a couple of minutes can cause various rejections, timeout responses and failures. Having the time of day clock synchronised is an underlying design feature of streaming cryptography such as SSL as a component of the protection mechanism. |
Installation Steps
...
Download or transfer the .run using wget, scp or sftp or any transfer tool. Repeat this process for each server involved.
...
| Code Block |
|---|
If your browser is running on the same machine as opHA was installed onto, this would be http://localhost/omk/opHA/ |
This URL should present you with a webpage that allows you to enter a license key and accept a EULA. This This step will need to be completed on each opHA instance. !
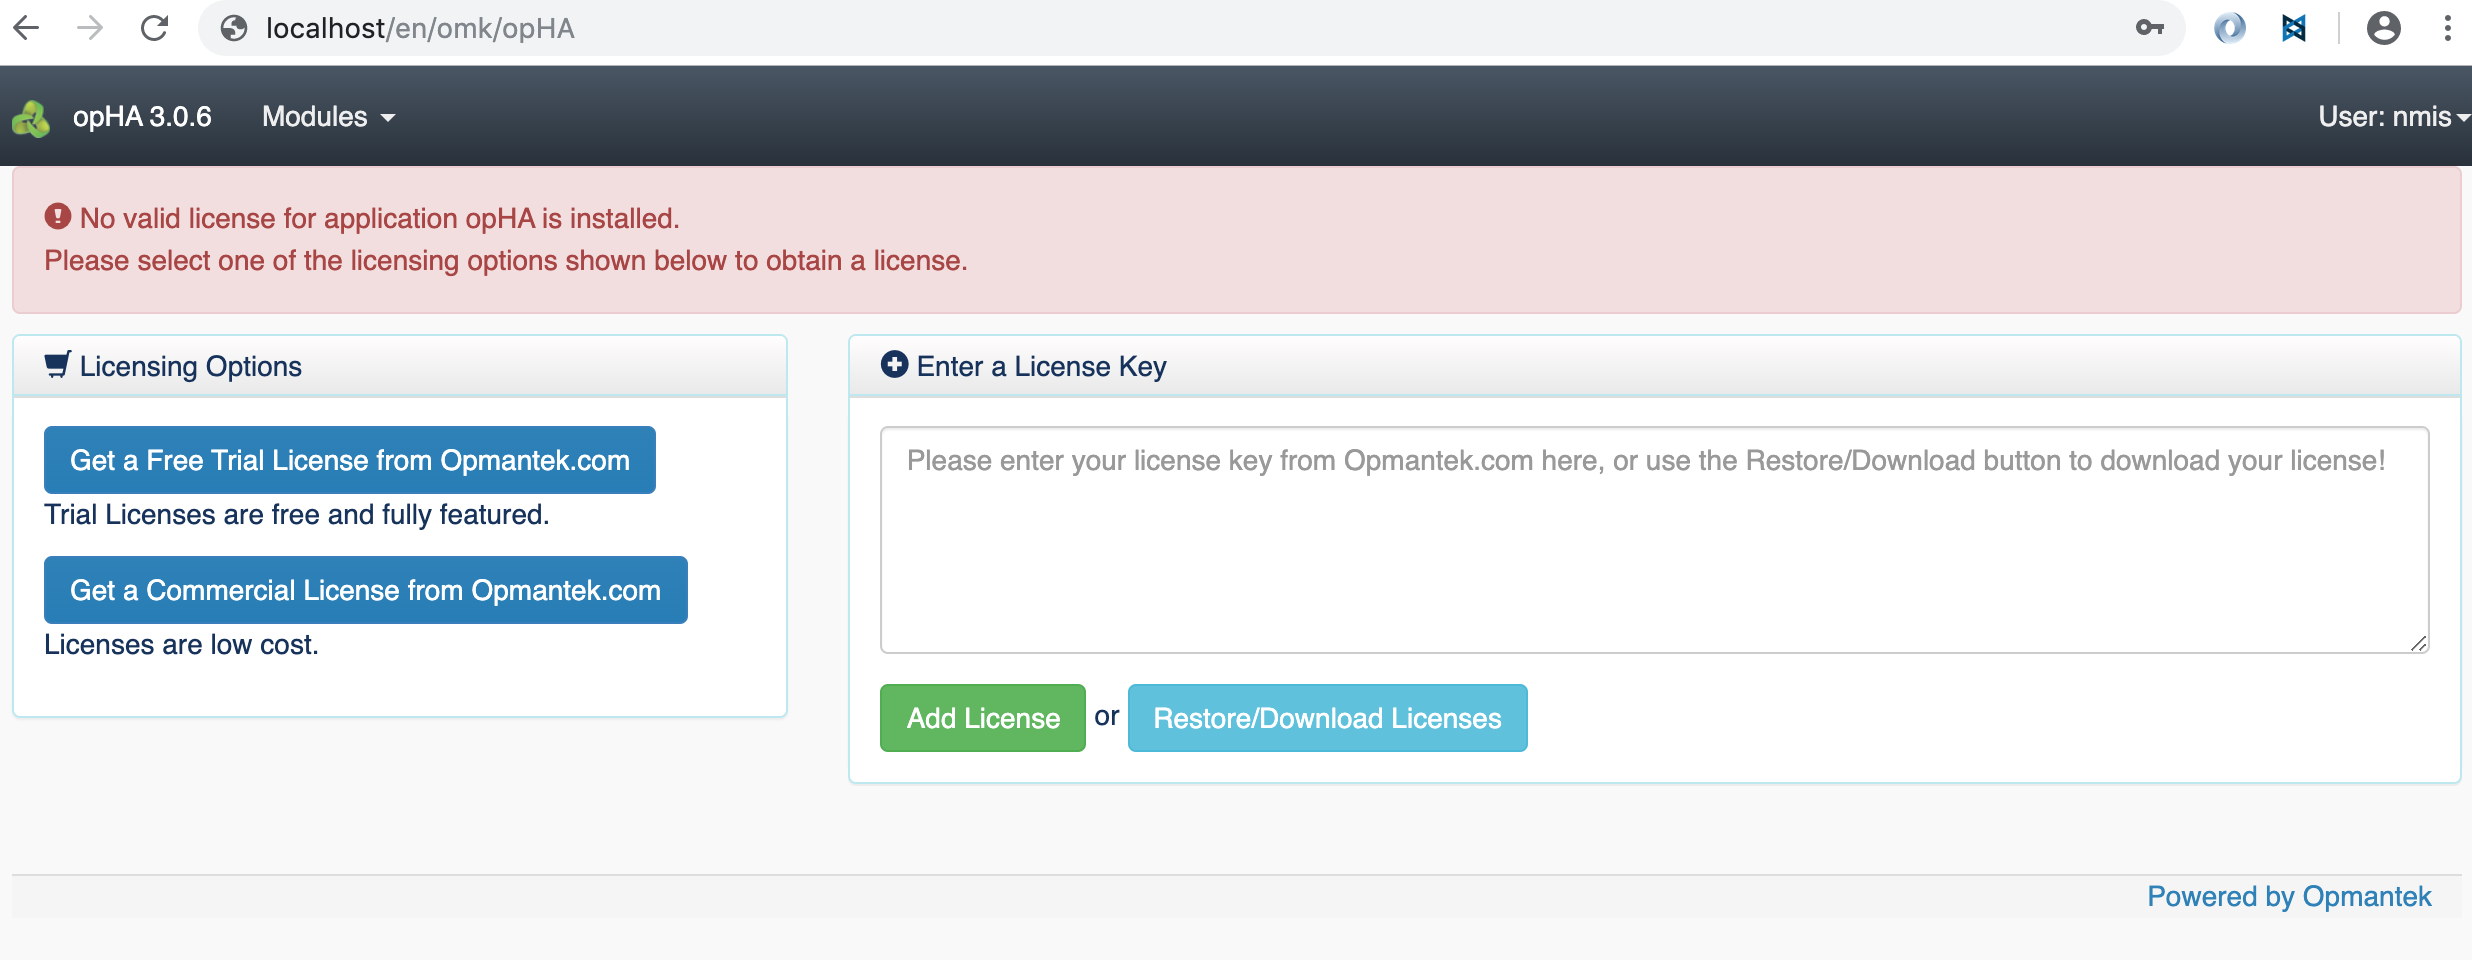
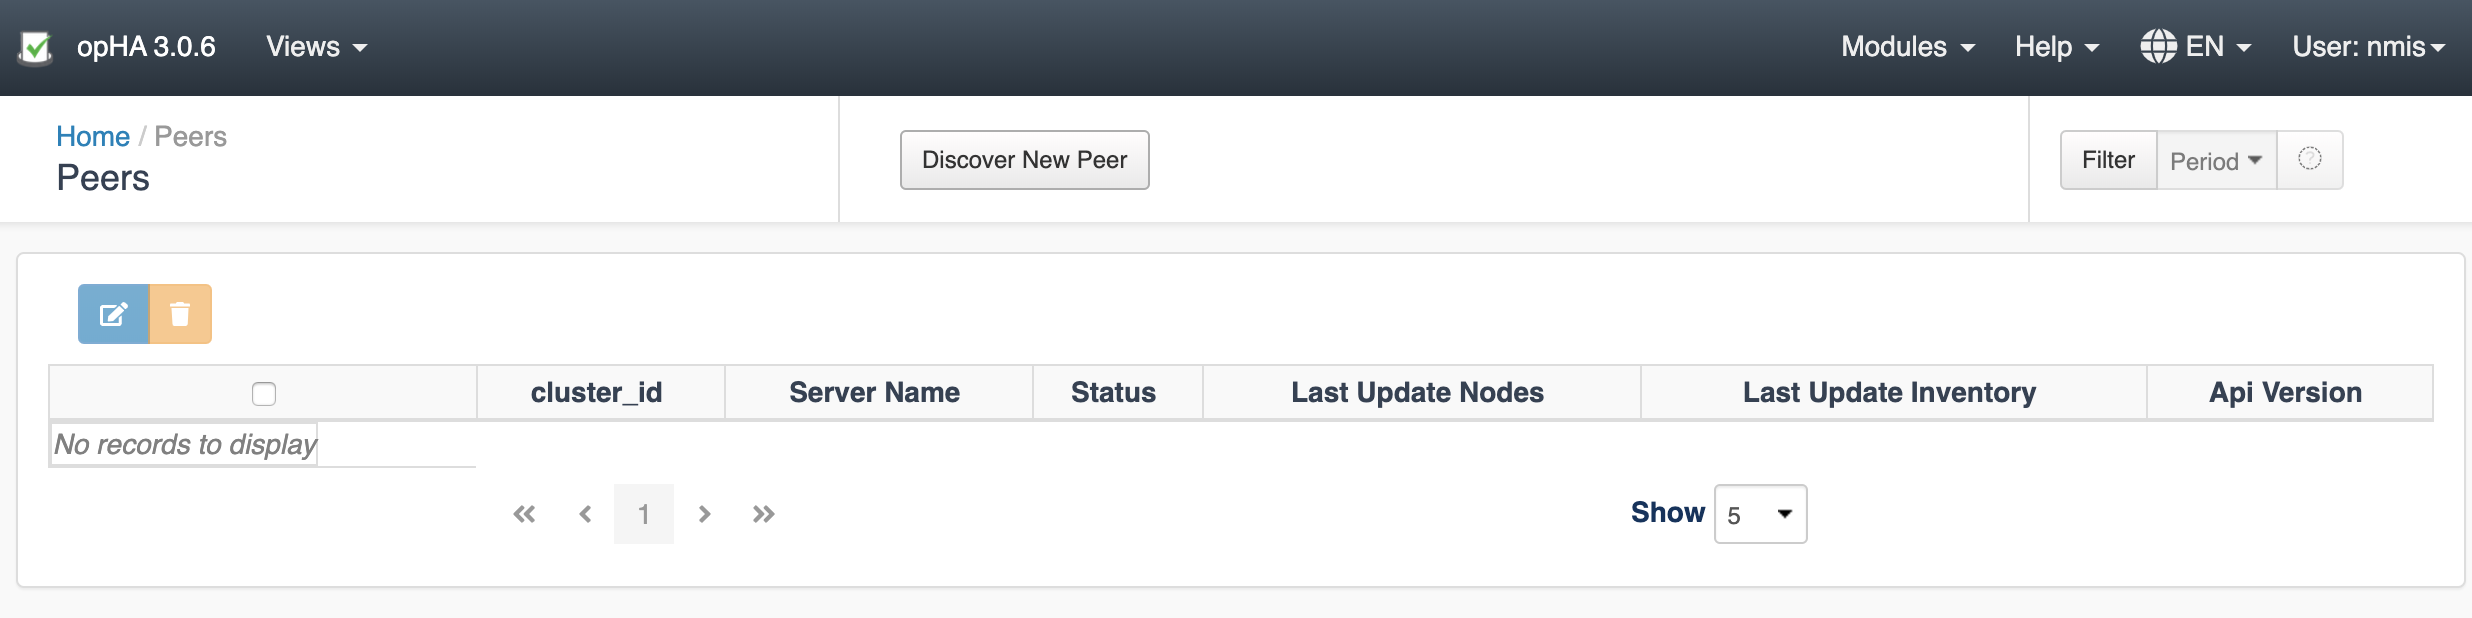
After successful license key and EULA acceptance you will be presented with a dashboard that looks like this:
...
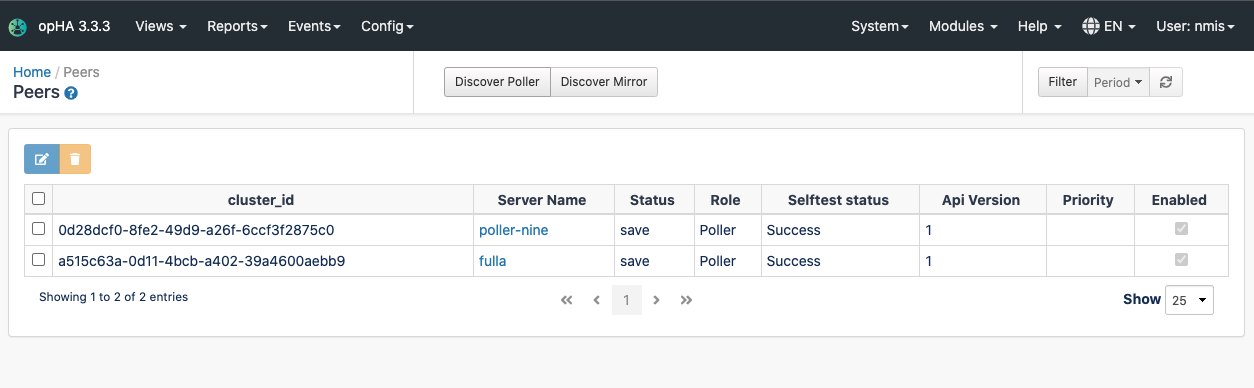
We can add pollers using the Peers screen, in Discover New PeerPoller button:
We need to introduce the follow information for the Discovery:
...
- URL of the peer
- Username and Password OR the SharedKey
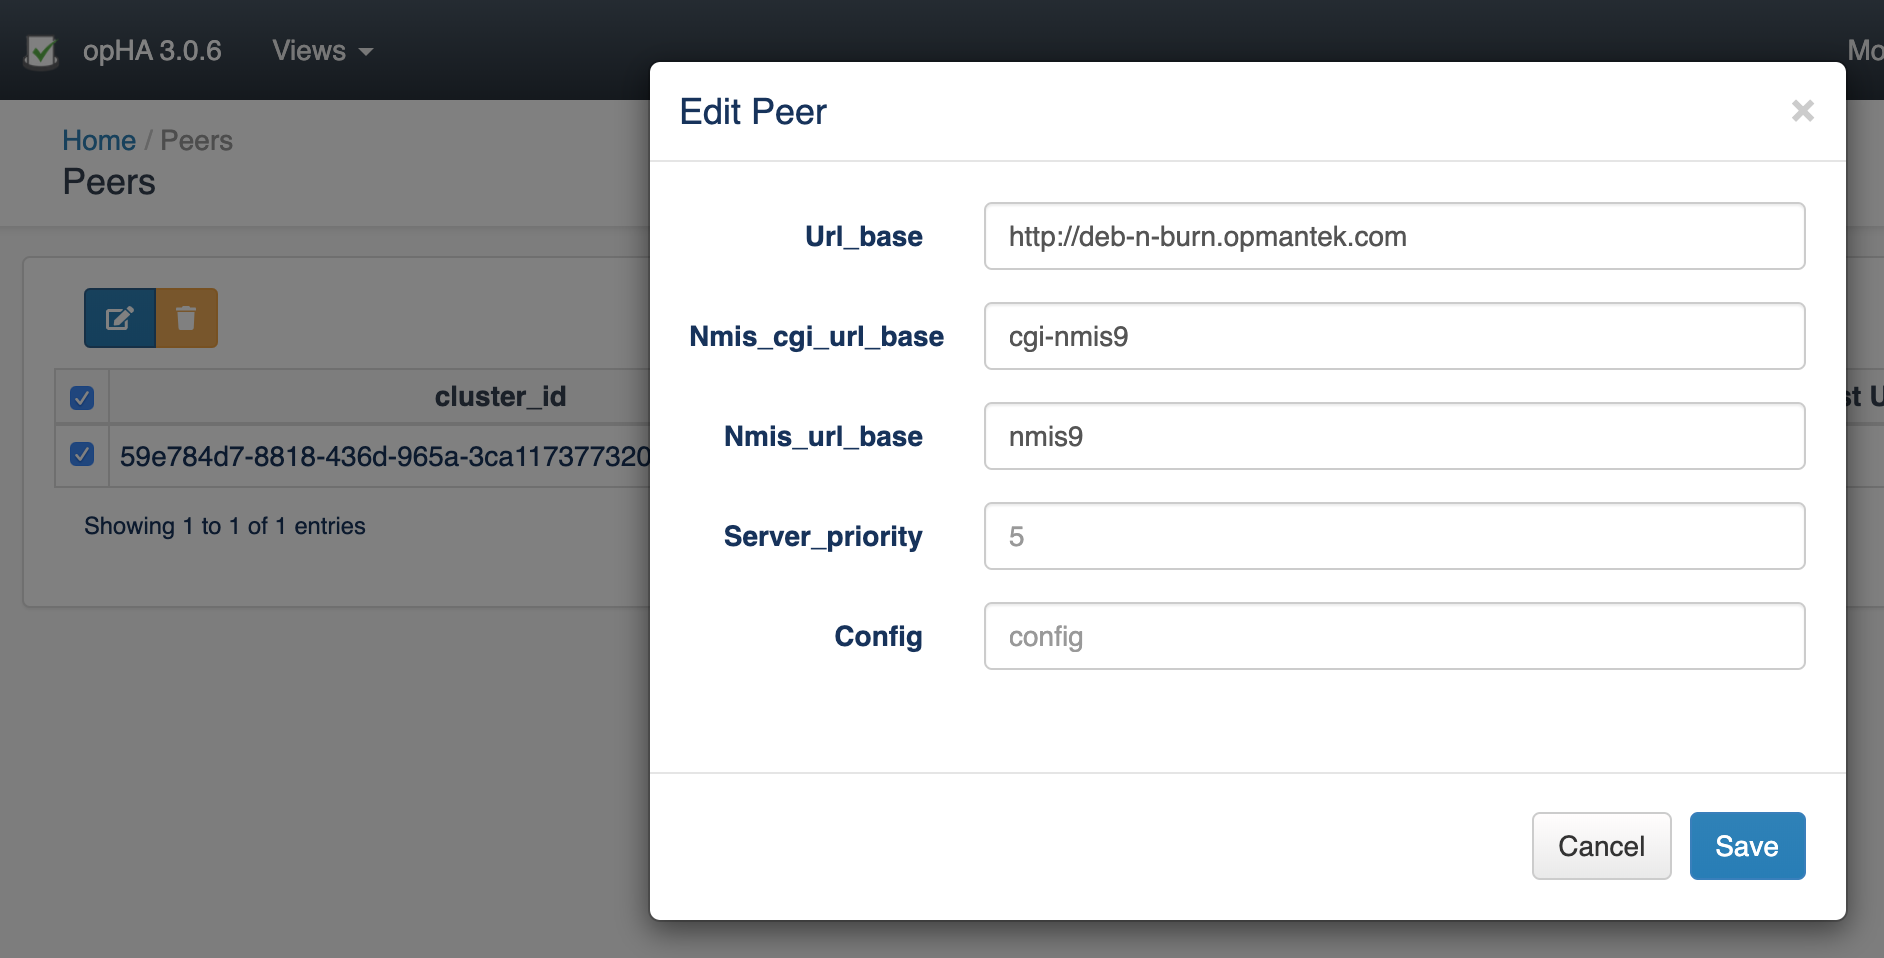
opHA Edit a Peer
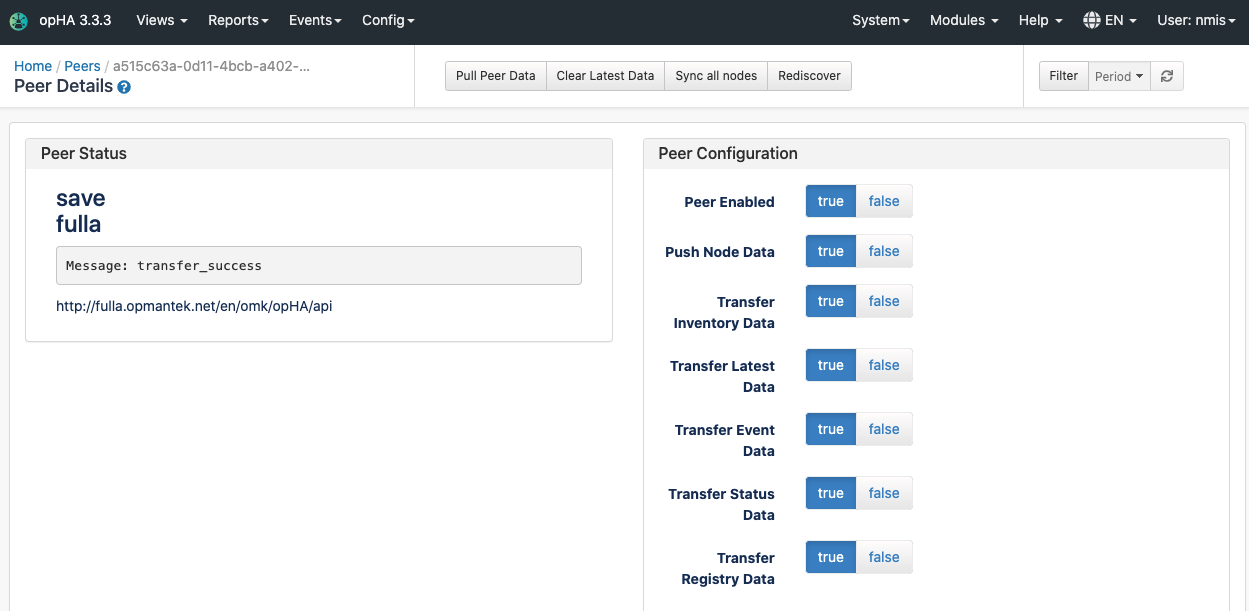
Once the peer was successfully discovered, we can edit the peer configuration - but it is not needed by default:
...
For Shared Key this for the value of omkd_secrets set in the /usr/local/omk/conf/opCommon.json of the poller you are doing a discovery on.
| Info | ||
|---|---|---|
| ||
You MUST set the "opha_url_base" on the POLLER to the https:// url for the poller before doing discovery. In setting opha_url_base you must also set the opha_hostname to match the fqdn. If the opha_url_base is blank the Primary will connect to the poller but on receipt of the pollers information it will swap the https:// URL for http:// and the discovery will then fail. |
opHA Edit a Peer
...
Once the peer was successfully discovered, we can edit the peer configuration - but it is not needed by default:

This will edit the nmis information for the poller. It will be used in NMIS to redirect a node to a poller.
opHA Data Synchronisation
...
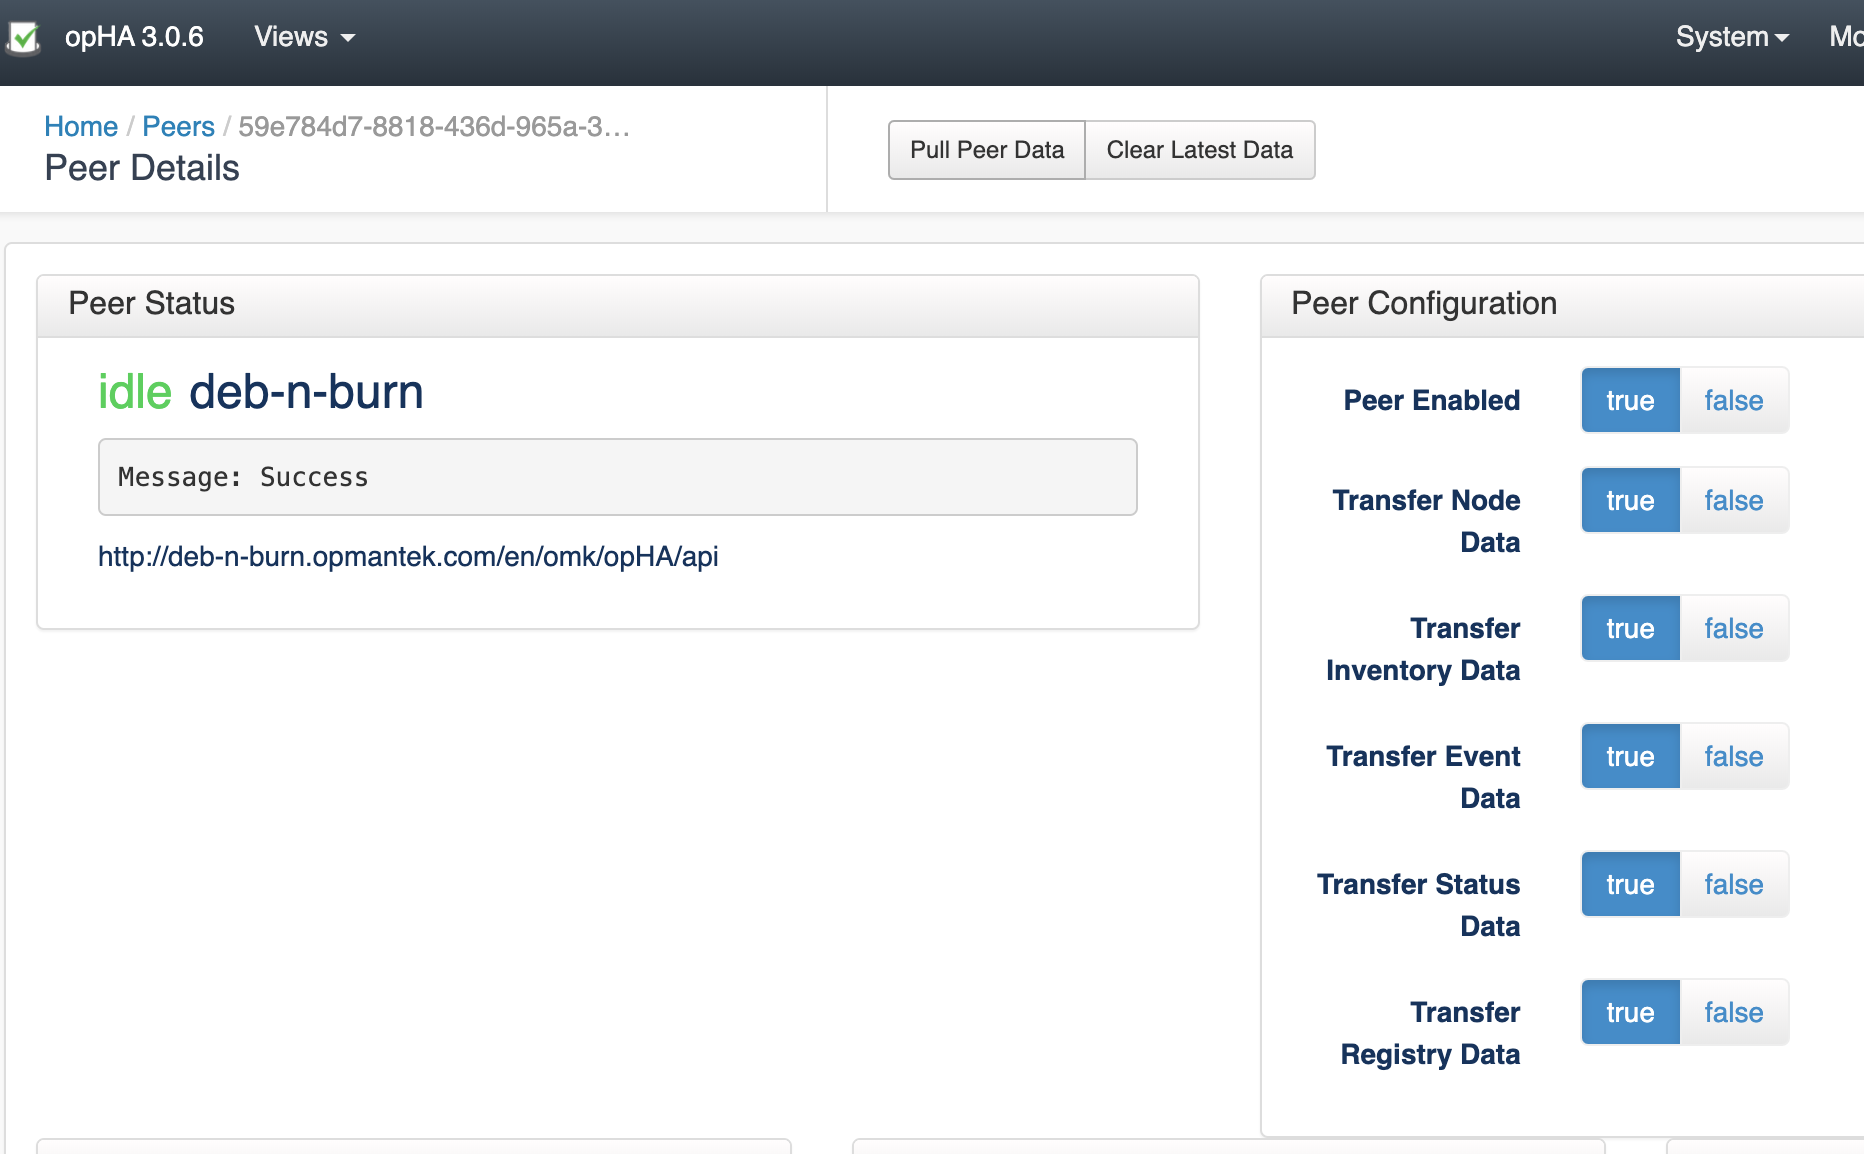
Once a peer is added, we can pull the peer to synchronise all the data:
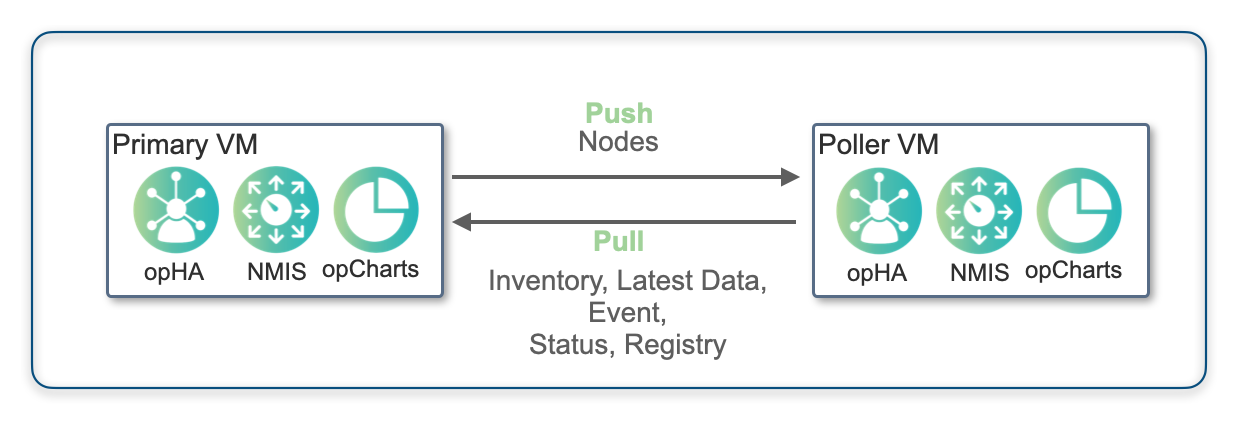
Please note that the nodes are pushed to the pollers, but the other data is pulled:
We can also use the opHA cli tool to synchronise the data - and use it for another other actions:
| Code Block |
|---|
/usr/local/omk/bin# .bin/opha-cli.pl Usage: opha-cli.pl act=[action to take] [options...] opha-cli.pl act=discover url_base=... username=... password=.... opha-cli.pl act=pull [data_types=X role=... mirror=...] opha-cli.pl act=<import_peers|export_peers|list_peers> opha-cli.pl act=delete_peer {cluster_id=...|server_name=...} opha-cli.pl act=import_config_datapull [data_types=X...] [peers=Y] [force=t] pull data types except nodes primary <-- peers ... |
With this tool we can automate the synchronisation process with a cron job to keep all the data up to date.
Once we have synchronise synchronised a peer we will be able to see its data from NMIS or opCharts from the Primary.

opHA Roles
...
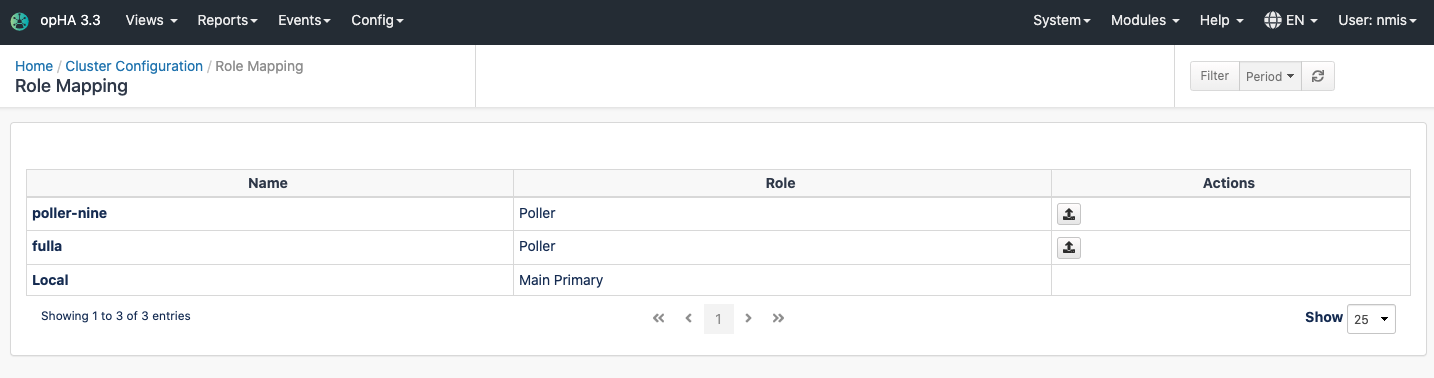
We can assign see the peer roles to peers using the configuration menu > Role Mapping:

By default, the system creates the next roles:
- Poller
- Primary
- Local
- Portal
But it is possible to update them though the configuration file.
Once we add a new peer, we can assign a role through this menu:
All the roles and capabilities are documented in the following wiki page.
When we create a poller, we should choose which role will be a peer, a poller or a mirror. Once we discover a peer, opHA primary will send the role to the peer. From the role mapping menu, we would be able to see a peer server and the role assigned, and also click in the button to resend the role.
Change the role
To set up the local role, we can go to the menu Views > Set Role:
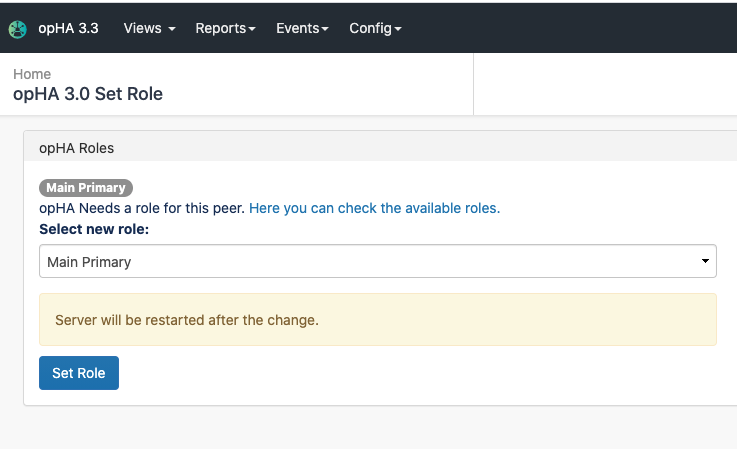
Please note, the server will be restarted after the change, because all the server functionality will change.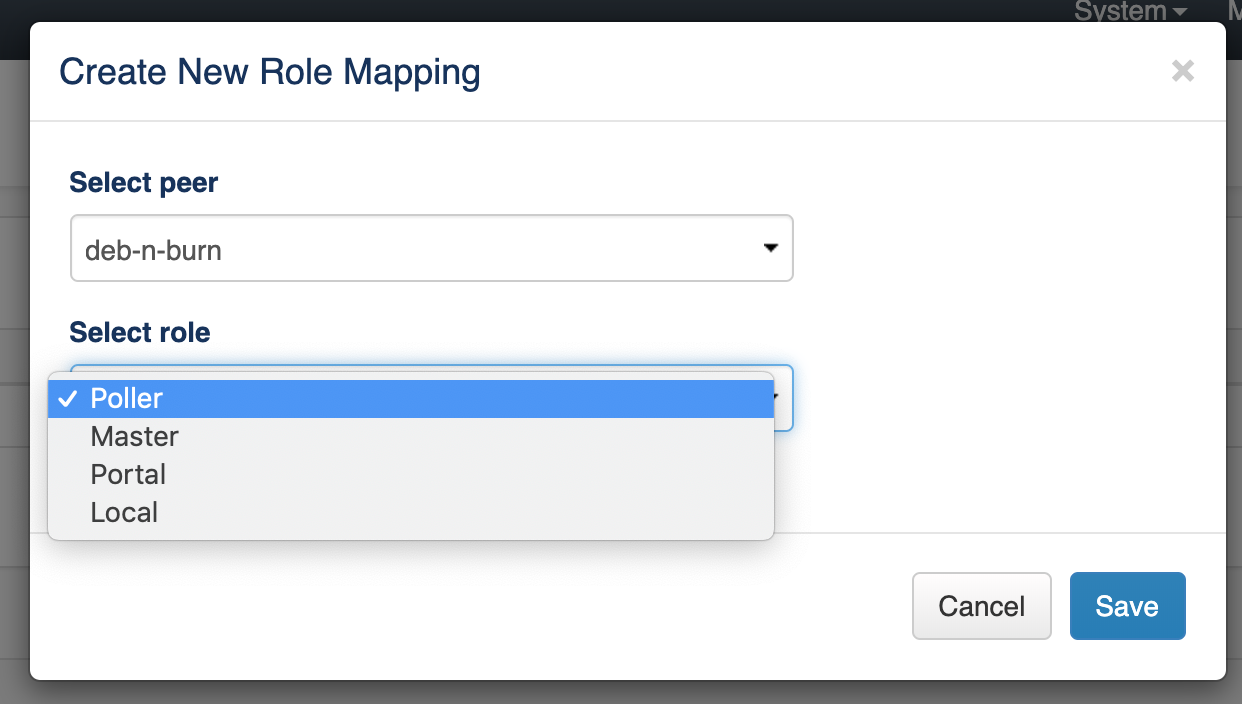
opHA Centralised Configuration
...
opHA version 3.0.5 brings a new feature to modify the NMIS and omk configuration from the Primary server. The centralised configuration feature allows you to easily and quickly manage easy and quick a large network of multi-servers server network.
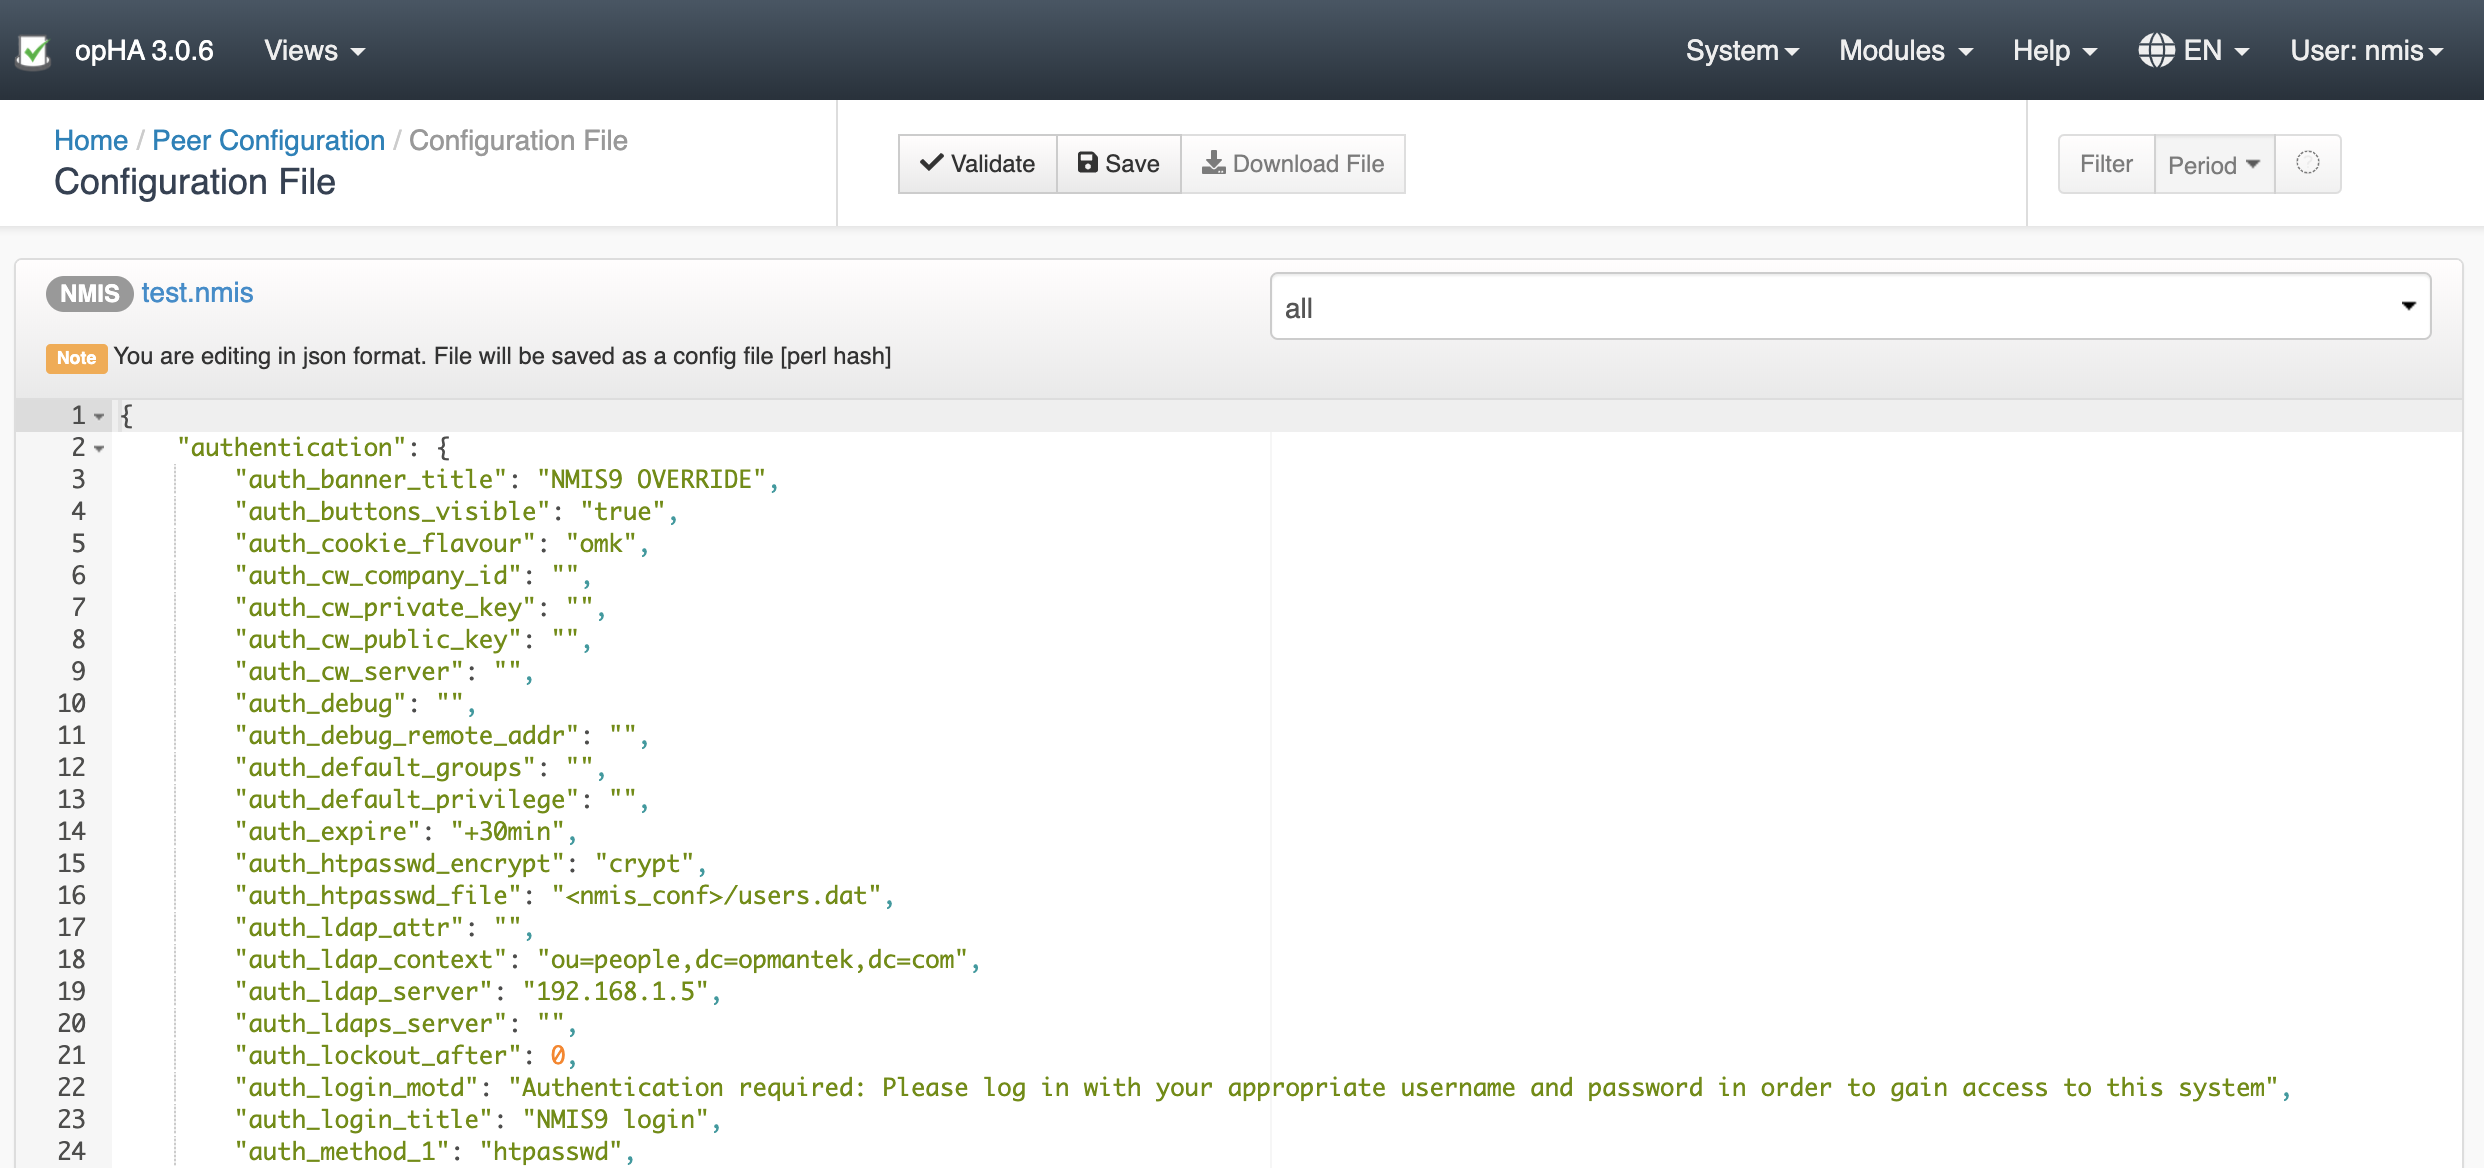
It is important to note that once NMIS is updated from a Primary, it cannot be edited from the poller.
...
We can check the peer status in the opHA Home indexpage:
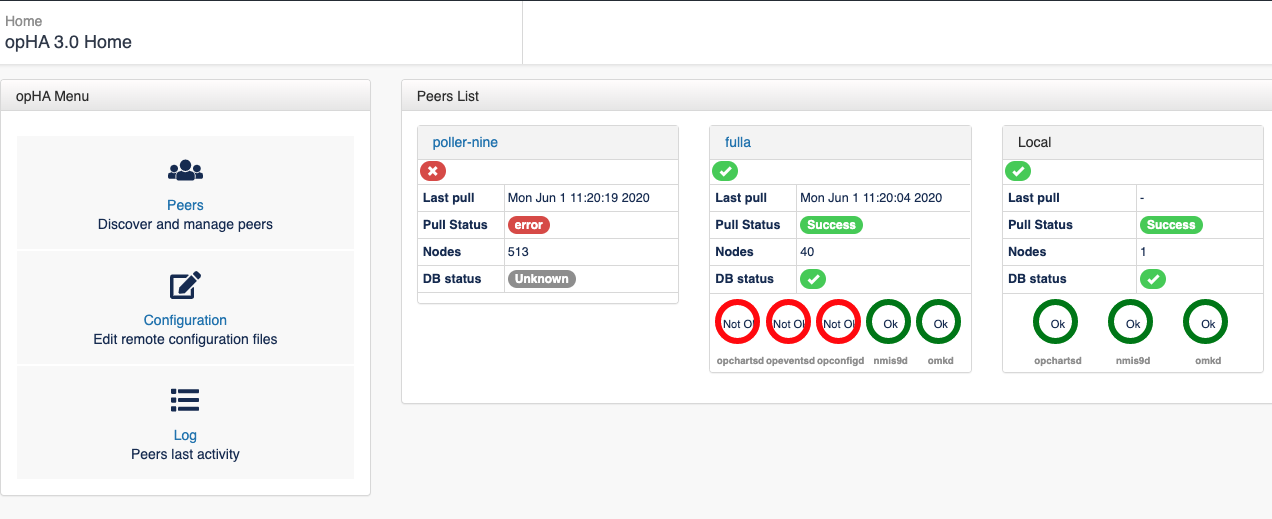
opHA will check in every pull the status of the peer using the endpoint:
...
In the opHA synchronisation, the registry data for each product configured in the server will be send sent to the Primary.
Each registry has a url property. In the opCharts case, it will be used to see the graphs from the poller.
...
What's next
...