| Table of Contents | ||
|---|---|---|
|
...
Overview
Discovery will scan network subnets addresses and audit computers (Windows and Linux computers, Linux, OSX, AIX, HP-UX, Solaris and ESXi), as well as SNMP scan network devices. Discovery runs entirely from the web interface regardless of the Open-AudIT server running on Linux or Windows.
How To
To use Discovery we require access credentials on the target devices. Go to Menu -> Discover -> Credentials -> Create Credentials and create credentials for all the types of devices you have. They may be for Windows, SSH (Linux / OSX / etc), SNMP, etc.
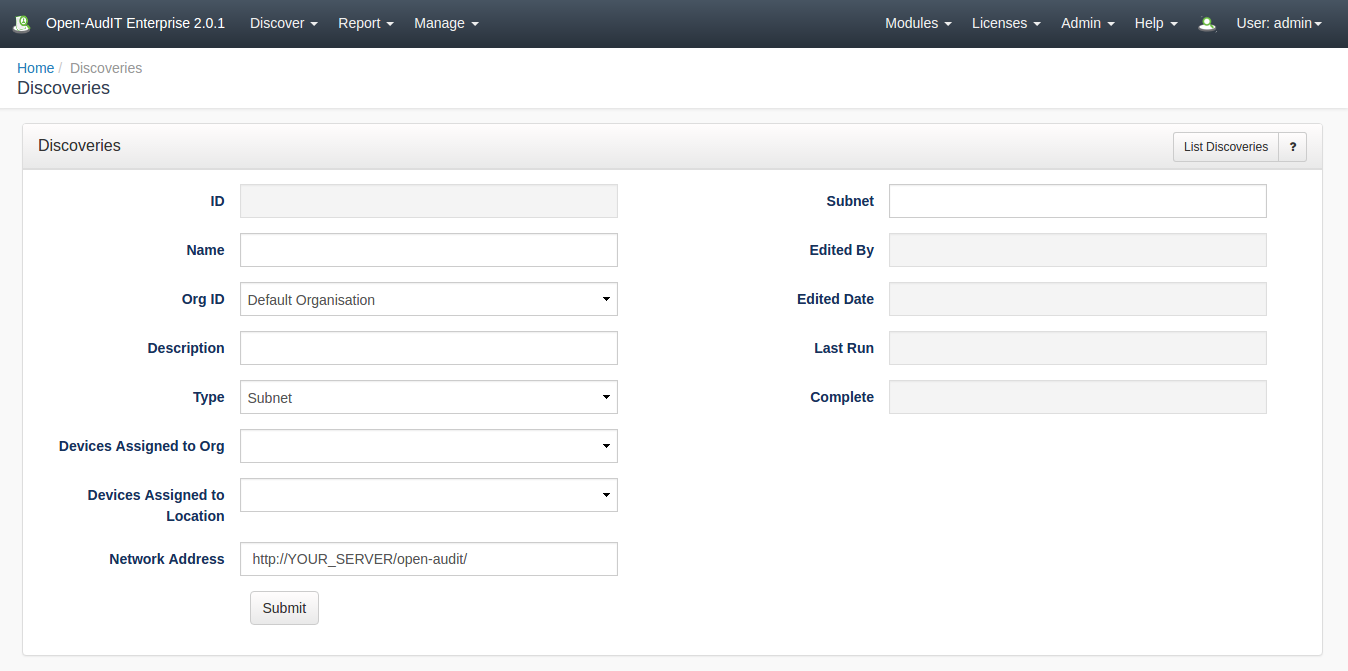
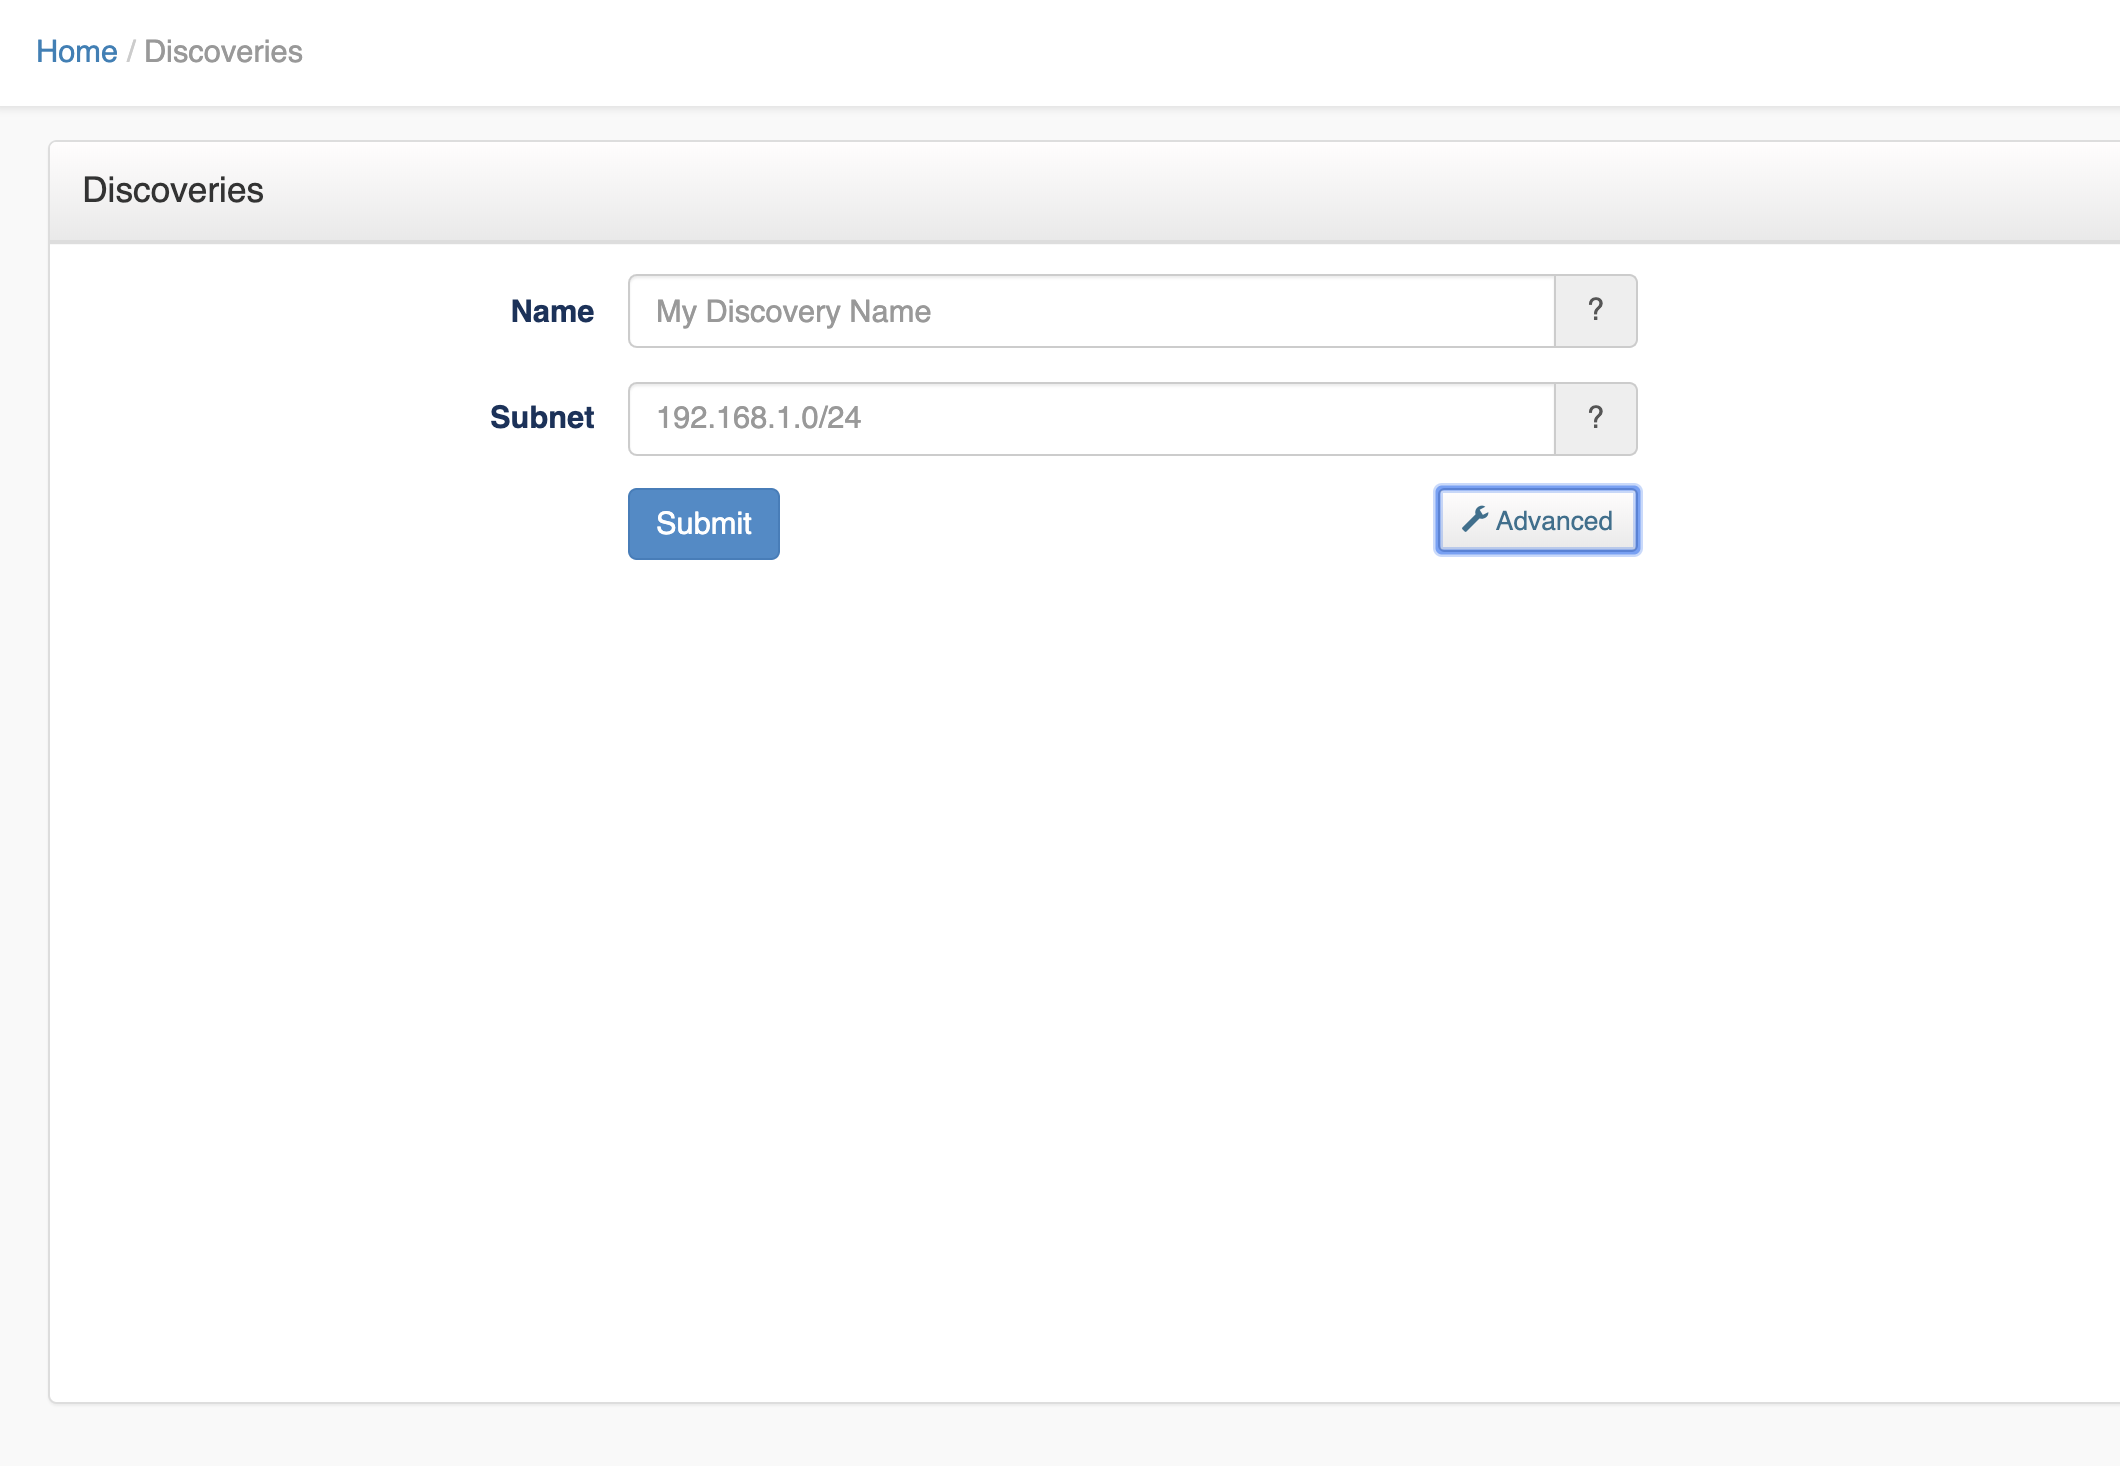
Once these have been completed you should go to Menu -> Discover -> Discoveries -> Create Discoveries.
Provide a name for the discovery and input a range, subnet or IP to be discovered. You can use the following formats: (range) 192.168.1-10.1-254, (subnet) 192.168.1.0/24, (ip) 192.168.1.200.
Click the Submit button and you will be show the discovery details page. Click the Execute button (looks like a "play" button) in the top right button toolbar and the discovery will start.
You will be shown the logs section on the discovery details page. The page will refresh every 20 seconds while the discovery is running. You can cancel the refresh by clicking the X button in the panel header.
Types of Discovery
When you create a new discovery if you click the Advanced button, you have many more options to change, one of them being the type of discovery.Types have always been Subnet (encompassing the above range, subnet, ip options) and Active Directory. As at v4.1, Open-AudIT has a new discovery type called Seed.
A Subnet discovery will scan the IPs provided.
An Active Directory discovery will query Active Directory for a list of computers and scan the associated IPs.
A Seed discovery uses an initial IP to retrieve the IPs of any other devices it knows about, adds those IPs to the list and scans those - again asking for any IPs those additional devices knows about. Rinse and repeat. It is intelligent enough to know if it has already scanned a given IP in its execution and discards any already scanned (or even on the list to be scanned).
How Does it Work
Once you click the execute button, Open-AudIT will spawn a process to initiate the discovery and return the user to the discovery details page. The newly spawned process takes the configured discovery options and executes Nmap commands to determine the initial list of IP addresses to be scanned (or queries Active Directory if that type is used). Each IP to be scanned is placed into a queue. Once the initial process has completed (and there are IPs to be scanned in the queue) a number of processes will be spawned to further scan each IP in parallel. This number of processes is configurable in the configuration, edit the attribute "discovery_limit". By default this is set to 20.
For each spawned process, the below occurs.
Each IP is scanned with the discovery configured options (see Discovery Scan Options and Discovery - Community vs Professional vs Enterprise). In general, Nmap will test for ports 22 (ssh), 135 (wmi), 62078 (iPhone) and UDP 161 (snmp). If 22, 135 or 161 respond the credential list is retrieved and each credential tested in turn. The first working credentials are used for further queries directly from the device. Note - if a device has previously been discovered and has working credentials, those credentials are tested first. Only if those fail are the other credentials then attempted.
The order of information retrieval is snmp, ssh, wmi.
SNMP
For SNMP Open-AudIT can use v1, v2 and v3 credentials. The device is queried regardless of it being a router, switch (regular network devices) or a computer (Linux and Windows often run SNMP for monitoring tools).
SSH
SSH is next on the list and Open-AudIT can use password and key authentication. Open-AudIT can also use a sudo enabled user as opposed to the root use directly (although it can also use root). For best results, the root user or a sudo enabled user should be used (see Auditing Linux without root and Target Client Configuration). Windows devices can also run ssh, however if Open-AudIT detects this it will stop the SSH queries and instead use WMI (assuming working WMI credentials).
WMI
Last up is WMI. For Windows as in Linux, a user with Administrator level access is preferred (see Target Client Configuration).
Scripts
Once those initial queries (snmp, ssh, wmi) are complete, if the device is a supported by the audit scripts (Windows, Linux, OSX, AIX, HP-UX, Solaris and ESXi), the correct audit script will be copied to the target and executed. The audit script will self delete upon completion. The result will be stored on the target machine as an XML file. The Open-AudIT server will then retrieve the result file for processing and delete the result file on the target. The location the audit script is copied to on the target device (at least for SSH audits) is configurable by editing the discovery_linux_script_directory config item. By default it is set to /tmp/. This may need changing if /tmp has noexec set. The result file is then processed and the device details updated within Open-AudIT.
How Long Does it Take
We are often asked this question and the answer most definitely is "it depends". It depends on the number of IPs to be scanned, the network connection speed, the speed of the devices being scanned, the type of devices being scanned, the number of different credentials being tested and the speed of the Open-AudIT server. We do not have a calculator that would allow us to input those variables and return a value. It is simply too complex. Generally I limit my discoveries to 256 IP addresses - ie, a /24 subnet. We have had customers scan /16 subnets (65k addresses) and it does work - but it takes a long time. You are much better off scanning in /24 blocks. If you simply do not know what your address ranges are, then this is a good case for a Seed discovery.
Notes
When auditing a Linux device via SSH, some Linux distributions do not allow sudo commands to be passed without a TTY (which we are doing). To completely audit one of these linux distributions it is best to supply the root user credentials. If no root is supplied and sudo without a TTY is not possible, the audit script will be run but will not contain the amount of data as would otherwise. Subsequent audits using root (or run locally using sudo) will therefore provide extra details about the system and generate several "changes".
You will need the ports for WMI on the Windows firewall opened on each target Windows computer. For Windows Core servers, ensure you allow the firewall connections as per - http://blogs.technet.com/b/brad_rutkowski/archive/2007/10/22/unable-to-remotely-manage-a-server-core-machine-mmc-wmi-device-manager.aspx
For further details information, see:
- Target Client Configuration
- Running Open-AudIT Apache Service under Windows
- Items affecting Discovery times
- Import / Export devices in various formats
- How to use Open-AudIT Discovery on a Subnet
- How to use Active Directory Discovery
- How to discover a single Device
- How to Audit in complex network environments
- How to audit a Computer
- Discovery - Community vs Professional vs Enterprise
- Credentials for Microsoft Azure used in Cloud Discovery
- Credentials for Amazon AWS used in Cloud Discovery
- Configuring Open-Audit with HTTPS/SSL
- Collector / Server
- Auditing Linux without root
Outdated below as at v4.
How To
To use Discovery we require access credentuials credentials on the target devices. Go to Menu -> Discover -> Credentials -> Create Credentials and create credentials for all the types of devices you have. They may be for Windows, SSH (Linux / OSX / etc), SNMP, etc.
...
Once the initial list of target devices has been obtained you should see details of each target as it is scanned and input into Open-AudIT.
Discovery Form
NOTE - If a Windows or Linux machine is discovered (as opposed to audited with a script) and is not currently in the database, you will likely first see a very limited set of information. This will be only the Nmap and maybe the SNMP data. After the actual audit script has been run and processed you should see the complete details about the device.
You can provide subnet ranges in any format that Nmap will accept (not including options). As above, if you provide a range that includes the / character, a network item will be created if none exists.
How Does it Work
A simple BPMN diagram is below to help illustrate the basic process (click for larger image).
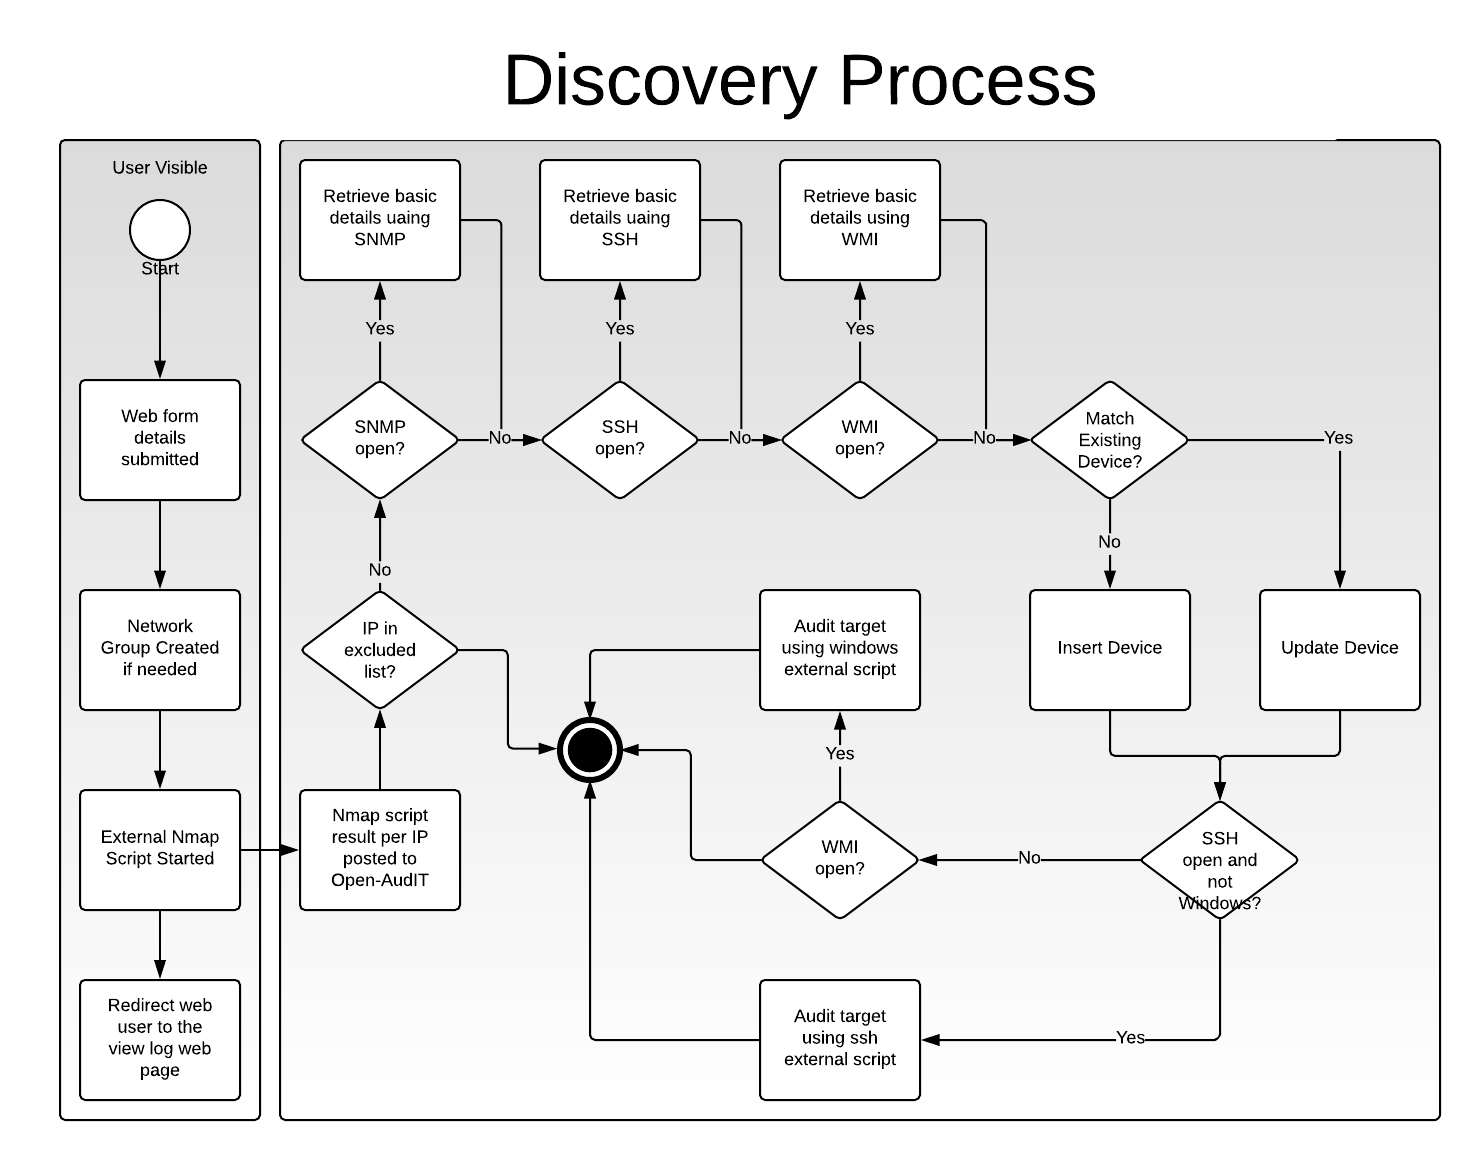
Discovery Form and Nmap Script
When you execute the Discovery, the Open-AudIT server initiates a script and returns control to the web interface - hence no waiting for the scripts to complete before the web interface is again available. The initial script uses Nmap to first ping scan the entire range and stores the responding IP addresses. Then each responding IP address is scanned to determine basic information and if the ports for WMI, SSH and SNMP are active. The individual data per iIPaddress is sent to the Open-AudIT server.
SNMP Scan
The Open-AudIT server processes the data and if SNMP is open attempts to scan the device. The SNMP scan will attempt to connect to the device using stored credentials in the following order: device specific credentials (which must be existing in the database), stored credentials. If any of these work, they are stored against the individual device for subsequent Discovery runs.
Once the SNMP scan has been performed (or not), the data about the device is used to attempt to determine if the device already exists within Open-AudIT. If so it is updated, if not a new device is inserted. A note of the internal system id is made for the next section.
Windows Audit
If WMI is open on the target device and the Open-AudIT server is running Windows, an attempt is made to directly audit the device using credentials. The device id from above is also passed to the audit script. When the audit is complete, it is sent to the Open-AudIT server for processing.
If WMI is open on the target device and the Open-AudIT server is running Linux, the audit script is copied to the target device and a remote processes is started on the target device so it effectively audits itself. The device id from above is also passed to the audit script. When the audit is complete, it is sent to the Open-AudIT server for processing.
Linux Audit
If SSH is open on the target device and the target device is running Linux, AIX, OSX, Solaris or ESXi, the audit script is copied to the target device and a processes is started so the device "audits itself". The device id from above is also passed to the audit script. When the audit is complete, it is sent to the Open-AudIT server for processing.
Audit Processing
The audit processing first attempts to determine if the audit result data matches an existing device. If it does the system id is stored. This is compared to the passed system id. If they match, processing continues and updates this existing device. If they do not match, but an existing system has been determine, the passed system id is deleted. This is because with the limited data available from Nmap and possibly SNMP a match may not be able to be made, but the device may already exist. In that case a new device is inserted. When we later compare the result against a full audit with all the required details and we find a device that matches but it was not the device Nmap/SNMP thought it was, we remove the Nmap/SNMP device.
Notes
NOTE - When auditing a Linux device via SSH, some Linux distributions do not allow sudo commands to be passed without a TTY (which we are doing). To completely audit one of these linux distributions it is best to supply the root user credentials. If no root is supplied and sudo without a TTY is not possible, the audit script will be run but will not contain the amount of data as would otherwise. Subsequent audits using root (or run locally using sudo) will therefore provide extra details about the system and generate several "changes".
NOTE - You will need the ports for WMI on the Windows firewall opened on each target Windows computer. For Windows Core servers, ensure you allow the firewall connections as per - http://blogs.technet.com/b/brad_rutkowski/archive/2007/10/22/unable-to-remotely-manage-a-server-core-machine-mmc-wmi-device-manager.aspx