As at April 2021, all newly released Opmantek products can now use OKTA's OpenID Connect for authentication.
As per other authentication methods, you will need to edit /usr/local/omk/conf/opCommon.json, specifically the authentication section.
Below is a sample entry. It should be modified and copied into the authentication section. You should only change the items in red. Don't be fooled by the "username":"username " and "password":"password" entries. These are not to be changed. They map the Opmantek internal username / password fields to those returned by the OKTA service. This means that going forward, if OKTA changes these response field names or we configure it to use another OpenID provider that returns different field names, it's simply a matter of changing the configuration to support the external service, no code changes are required. Again, you should only change the items in red.
Once you have made the required changes, the omkd service will need to be restarted.
This feature provides authentication only. It does not provide authorization. Your user(s) will need to already exist in the Opmantek suite and be configured for access, prior to using OKTA.
Obviously, your Opmantek server will need internet access to be able to talk to OKTA.
Open-AudIT specifics
For Open-AudIT the username within Open-AudIT must match the username used to sign in to OKTA. No password should be set for the user inside Open-AudIT. This will prevent logon if OKTA is not available. If it is desirable to allow logon if OKTA is not available, set the password inside Open-AudIT and use "openaudit" as auth_method_2.
Configuration Example
In the authentication → auth_method_1 entry of opCommon.json, you should use openid_connect.
"auth_method_1": "openid_connect",
Also, note that your URL may need to be slightly different. We use the URL as below, but some customers have had this fail. Their URL had to be: https://YOUR_SUBDOMAIN.okta.com/oauth2/v1/token (removed /default).
"auth_openid_connect" : [{
"type": "okta",
"url": "https://YOUR_SUBDOMAIN.okta.com/oauth2/default/v1/token",
"password": "password",
"test_error": "error_description",
"test_success": "access_token",
"username": "username",
"post": {
"client_id": "YOUR_CLIENT_ID",
"client_secret": "YOUR_CLIENT_SECRET",
"grant_type": "password",
"scope": "openid",
"password": "",
"username": ""
},
"headers": {
"accept": "application/json",
"content-type": "application/x-www-form-urlencoded"
}
}]
Creating an Application OKTA entry
Sign in to your Okta developer account as a user with administrative privileges.
First, create a new Group (our example below is "FirstWave Monitoring Group").
Assign your user to that group.
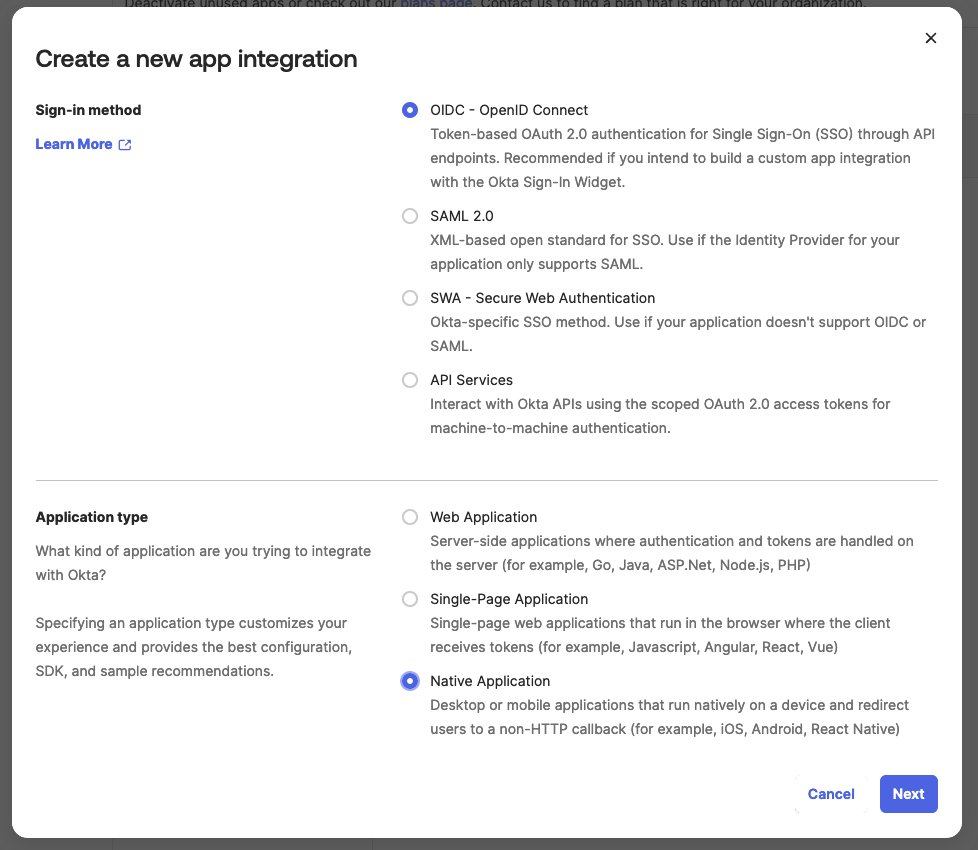
Next, create a new application as below.

Then edit the application and change as below.


And that's all you should need to do on the OKTA side of things.
You can find the values we require for opCommon.json in the OKTA interface.
Edit opCommon.json with these values (as above), restart the OMKD daemon, make sure the users in OKTA have the same username in the FirstWave applications and they should then be able to log in.