In some circumstances you might not wish to monitor a node via SNMP. You might not be able to because of credentials, the node may not be running SNMP or any other reason. But you still want to be able to check various websites are running upon it. This is where a ServiceOnly node comes in.
NMIS is quite flexible, but regardless of how you want to monitor a node, you will need to tell NMIS what to check. To do this we have two options - one node with multiple service checks or multiple nodes with a single service check each.
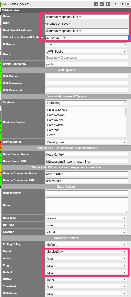
Add the node as normal, but set:
ping: false
collect: false
active: true
You can set the node Name to the URL you want to track - or something else that indicates to you what this node is.
Then set the Hostname/IP attribute to the FQDN (or the IP) of the URL to be monitored.
That combination of attributes will make NMIS automatically declare the node to be a ServiceOnly node. You can see this when looking at the Model node property.

Create the node as per above but supply a node name that makes sense. Maybe something like "Node For WebTest".
From here you can add a service check. We will use the script webtest. If not already it should be copied from /usr/local/nmis9/conf-default/scripts/webtest to /usr/local/nmis9/bin/webtest. It should also be marked as executable if not already.
For each URL you wish to test, you will need to create a new service check. An example of one such service check is below. You can view the list of available service checks by navigating to Menu → System → System Config → Services.
You will need to "hard code" the URL to be checked in to the service test.
In this example we specify the content we want to see on the page with the '-c' flag. We should choose content that is not likely to change. the '-f' flag states how many redirections are acceptable. The 'Max_Runtime' parameter is how long we'll wait before declaring failure. It is recommended to use 5m for the 'Poll_Interval'.

Add a new service check as above for each URL / webpage you want to monitor.
Done!
An example of this in action for a node is below.

For each URL you want to monitor, create a node as above.
Once the node has been created you can add a service check to it.
As above (for a single node with multiple service checks) we will use the program /usr/local/nmis9/bin/webtest.
You can view the list of available service checks by navigating to Menu → System → System Config → Services
If not already webtest should be copied from /usr/local/nmis9/conf-default/scripts/webtest to /usr/local/nmis9/bin/webtest. It should also be marked as executable if not already.
Any service checks that contain node.host will automatically populate the relevant node properties when run. There is no need to create a new service check for each node when the check uses these properties.
In this case, we can utilize a single instance of our service check as below. This will insert the Node FQDN (or IP) into the service check.

Done!
One way or the other, we need to tell NMIS "this is the list of URLs to be checked". Whether you use a single node with multiple service checks or multiple nodes with single service checks is completely your decision. There is no difference in the amount of information you need to provide NMIS, you simply provide it in different ways.
As a result your NMIS GUI will look slightly different (one node or several).
It's all up to you