| Table of Contents | ||
|---|---|---|
|
| Excerpt |
|---|
opConfig ConceptsThe main concepts to bear in mind are nodes, credential sets, commands, changes and revisions |
...
:
|
...
|
...
|
...
|
...
|
...
|
...
|
...
|
...
|
...
|
...
|
...
|
Using current command sets on current nmis devices
General Node management from the Command Line
The tool opnode_admin.pl lets you list, export, create, modify or delete nodes from the command line. Editing operations involve an export to a JSON file, which you then modify using an editor or other tool of choice, followed by an update of the node using that JSON file. The opnode_admin.pl tool is pretty self-explanatory and documented on this page.
Managing Command Sets
As mentioned above opConfig lets you organize whatever commands you'd like it to run into an arbitrary number of groups which we call command sets.
Command sets are stored in the single file conf/command_sets.nmis in opConfig before 2.2.4.
Since 2.2.4 opConfig supports this and individual command set files in conf/command_sets.d/ and the files are now .json rather than .nmis.
It is recommended that you use individual files (as that makes things easier to maintain and more robust, e.g. should one file have syntactical problems). For backwards compatibility the old single file is consulted first, then any individual ones. opConfig loads a command set when it's seen for the first time, and any subsequent occurrences of a clashing config set (i.e. same name) will be ignored but logged.
A command set definition consists of these types of information:
- meta-information like the command set's name (which can be used in CRON to determine when / how often this command set is run),
- optional control information like scheduling constraints and an expiration policy for the commands in that set,
- filters for selecting which devices/nodes the command set should apply to. These are discussed in more detail below.
- and finally the list of the actual commands to be run (which may also have certain modifiers and meta-data attached to them).
Here is an excerpt from the default command set that ships with opConfig (in .nmis, pre 2.2.4 format).
| Code Block | ||
|---|---|---|
| ||
  'IOS_HOURLY' => {
    'os_info' => {
      'version' => '/12.2|12.4|15.\d+/',
      'os' => 'IOS'
    },
        'purging_policy' => {
            'keep_last' => 1000,
            'purge_older_than' => 2592000, # 30 days
            'autoprotect_first_revision' => 'true',
        },

        'scheduling_info' => {
      'run_commands_on_separate_connection' => 'false',
    },
    'commands' => [
      {
        'multipage' => 'true',
        'privileged' => 'false',
        'command' => 'show interfaces',
        'tags' => [ 'HOURLY', 'performance', 'interfaces' ],
      },
      {
        'multipage' => 'true',
        'privileged' => 'false',
        'command' => 'show ip interface',
        'tags' => [ 'HOURLY', 'detect-change', 'configuration' ],
      },
... and lots more |
Below is much the same, but in the post 2.2.4, json format.
| Code Block | ||
|---|---|---|
| ||
   "IOS_HOURLY" : {
      "scheduling_info" : {
         "run_commands_on_separate_connection" : "false",
         "attempt_timeout_recovery" : 1
      },
      "purging_policy" : {
         "purge_older_than" : 2592000,
         "keep_last" : 1000,
         "autoprotect_first_revision" : "true"
      },
      "commands" : [
         {
            "command" : "show interfaces",
            "privileged" : "false",
            "tags" : [
               "HOURLY",
               "performance",
               "interfaces"
            ],
            "multipage" : "true"
}, |
Defining which nodes a command set applies to
This is normally done by filtering by OS info, but not necessarily limited to OS info only:
| Code Block | ||
|---|---|---|
| ||
# Filter using both regular expression and string equality checks:
'os_info' => {
 'version' => '/12.2|12.4|15.0/',
 'os' => 'IOS'
},
# Or just the specific os family/type and that's all:
'os_info' => {
 'os' => '/(Linux|CentOS|Ubuntu)/'
}, |
The examples above specify that the node in question must have an os_info property set, with sub-properties os and version in the first example and just os in the second.
Plain string values indicate string comparison, but regular expressions can be given too. A node is only considered for this particular command set if all filtering expressions match. You can filter on any node property, not just properties from os_info (but the default command sets only use os_info).
Prior to version 3.1.1, opConfig considered command sets without filter blocks as disabled; for these versions you may want a 'wildcard' filter matching anything whatsoever, which can be achieved by adding an os_info filter block with a 'match-everything' regular expression for e.g os,'os' => '/.*/'.
From opConfig 3.1.1 onwards a command set without filter is interpreted as to apply to all nodes without any restriction.
Controlling how the command output is stored
| Anchor | ||||
|---|---|---|---|---|
|
By default opConfig stores all command outputs in its MongoDB database, and only there.
In recent versions two new options let you fine-tune the behaviour and make use of on-disk storage where desired:
- Shadowing outputs on disk is controlled by the option
shadow_file, - and the choice between database storage and disk storage is made via the option
store_internal.
Disk or Database?
If you set the store_internal option to "true" or omit it altogether, then all command outputs are stored in the database.
With this option set to false, opConfig creates a separate file on disk for each revision of the command.
The storage location for such files is configured with the config option opconfig_external_store (default /usr/local/omk/var/opconfig/external).
The actual files are then stored in the directory <opconfig_external_store>/<node name>/<command name>/<revision>.
In version 3.1.1 and newer, an additional symbolic link latest that points to the most recent revision is maintained in that directory.
For externally stored data the visible 'command output' in the GUI is made up from the size and the SHA256 checksum of the contents, and change detection (and the GUI) uses this data instead of the (possibly binary or huge) file contents. This produces much more coarse change detection, but works with binary files. In the GUI you'll see the made up 'command output', and a button to download the actual contents.
All other opConfig capabilities work normally for externally stored data; e.g. scheduling, tags, purging of old revisions, revision creation itself and so on.
Please note that in versions before 3.1.1 store_internal is only supported for Tracking Files.
Commands or Files that cannot fit into the Database?
MongoDB doesn't support documents greater than 16 megabytes. In opConfig 3.1.1 and newer, any command output that is larger than this limit is automatically reconfigured for storage on disk, i.e. store_internal is overridden and set to "false" for just this one revision.
Both Disk and Database?
In opConfig 3.1.1 an option for shadowing command output on disk was added: if you set the property shadow_file to true (in the command's block, or in the command set's scheduling_policy section), then opConfig will store the data both in the database and also on disk (in the same place as externally stored command outputs).
Please note that shadow_file has no effect for commands that have been configured for disk storage.
Large Command Outputs
opConfig can handle Large Command Outputs, but there are some things to take into account:
- Memory used: Files under 16mb did not use much perl memory, but for a 1.5GB file, the perl process could use up to twice that in memory, depending on how it was being handled.
- Storage: MongoDB doesn't support documents greater than 16 megabytes. So command outputs larger than that size will be stored in the path specified in opconfig_external_store configuration option ("<omk_var>/opconfig/external" by default).
- Time: The file has to be transferred over the network, so it will be dependant on the transfer rate.
For example, a file up to 100 MB can be obtained with a cat command, but there are more efficient ways to track the file content. Using a command output will be done with ssh, but opConfig can use scp for that purpose (See below section - Tracking Files). Choosing the right protocol can make a difference.
Tracking Files
opConfig version 3.0.3 introduces a new capability: Arbitrary files can now be downloaded from a node (with SCP), stored and tracked by opConfig.
Here is an snippet from the example command set named file_store.nmis that ships with opConfig:
| Code Block |
|---|
# ...other command set structure
scheduling_info =>
{
  # indicates work to be performed by and on the opConfig host
  run_local => 'true',
},
commands => [
  {
    command => '_download_file_ scp:///var/log/secure',
    store_internal => 'false',
    tags => [ 'detect-change', 'other', 'custom', 'tags' ],
  },
  {
    command => '_download_file_ scp://file_in_user_homedir',
    store_internal => 'true', # is the default,
    tags => [ 'detect-change' ],
  },
],... |
To instruct opConfig to track one or more files, you have to
- set up a command set with the scheduling property
run_localset to true, - and add a separate special
_download_file_command for every file you want to track. - If the file data is binary or larger than 16 megabytes, set
store_internalto false.
The run_local option indicates that all commands in this command set are to be run on the opConfig server, instead of on the node in question.
The special/pseudo-command _download_file_ requires an scp URI to be given. Note that the first two "/" characters in scp:///some/abs/path.txt belong to the URI, and the path in question is /some/abs/path.txt. In the second example above, the path is a plain relative file_in_user_homedir which means scp will look for this file in the user's home directory.
The store_internal option works as described in the previous section.
Grouping commands into sessions
By default all commands for a node will be run sequentially, one after another within the same session/connection to that device. This can save time as connecting to the device (and authenticating) often takes longer than running all the commands one by one.
But this is not always the case, some devices have weird shell command processors which don't take well to this kind of scripted remote control; and then there are certain commands that do run for a longer period of time (for example system statistics gatherers like vmstat or top). These commands would cause long delays in a sequential run, and opConfig lets you adjust this behaviour to your liking.
Separate sessions for some commands
You can specify which commands should have their own separate connections. Separate connections can be opened in parallel, if opconfig-cli.pl is run with mthread=true.
If you would like to change the default behavior and have opConfig run all commands in all command set in separate session/connection, simply modify opCommon.nmis like this:
| Code Block | ||
|---|---|---|
| ||
# to run each command in it's own session, change this to true
'opconfig_run_commands_on_separate_connection' => 'false', |
It makes a lot more sense to tell opConfig to run a set of commands on their own or, in most cases, just a single command on its own. Here is how to make a command or command set have their own sessions/connections:
| Code Block | ||
|---|---|---|
| ||
# for all commands in a set, define this in the command set - note the S in run_commandS_...!
'scheduling_info' => {
 'run_commands_on_separate_connection' => 'true'
},

# for just a specific command, set this for the command in question - no S in run_command_...!
commands => [
 {
 'command' => 'show version',
 'run_command_on_separate_connection' => 'true',
}] |
Dealing with particular slow commands: Recovering from timeouts
opConfig doesn't block indefinitely if a command on a device doesn't return a response; instead the session times out after a configurable period (see config item opconfig_command_timeout, default 20 seconds) and the command is marked as failed.
From version 3.0.7 onwards, opConfig handles timeouts in long-lived sessions robustly; earlier versions could, under certain circumstances, get confused into associating the wrong outputs with commands if a timeout had occurred earlier during that session.
Version 3.0.7 lets you decide how to react to a command timing out:
- If your command set activates the
attempt_timeout_recoveryoption, then opConfig will attempt to re-synchronise the session state for a little while longer.
It does so by looking for your device's prompt for a little while. If none is forthcoming (ie. the problematic command is still blocking progress), then opConfig will send a newline to "wake" the device. This is repeated a few times, unless a prompt is found. - If that option is off or the resynchronisation is unsuccessful, then opConfig will close the session (and open a new one, if further commands are to be run for this node).
The value of the attempt_timeout_recovery option must be a nonnegative integer; it defines how many wait-and-wake-up cycles opConfig should perform. Each such cycle takes up to opconfig_command_timeout seconds.
You may set the attempt_timeout_recovery for all commands belonging to a set or for individual commands. Individual commands' setting override the ones for the set. The default if neither are given is zero, i.e. no extra recovery grace period.
Here is an example config set snippet, whose commands all get one extra timeout cycle for recovery, except some_brittle_command gets up to five extra timeout periods.
| Code Block |
|---|
%hash = (
  'my_first_config_set' =>  {
    'os_info' =>  {
	# ...node conditions
    },
    # add one extra timeout period for all commands
    'scheduling_info' => {
       'attempt_timeout_recovery' => 1,
    },
    'commands' => [
       { 'command' => "uptime" },
	   # any number of commands, treated equal wrt. timeouts
       # but the following command is more prone to timing out, so we give it up to 5 x timeout
       { 'command' => 'some_brittle_command',
|
...
How to add (or modify) a Node
To tell opConfig to run commands for a node it needs to be told about the node's existence and what properties the node has (e.g. what platform, what OS, whether to use Telnet or SSH to contact the node and so on). Adding a node for opConfig can be done using the GUI or the command line tools opconfig-cli.pl and . You can provide the node's information manually, or you can import a node's info from NMIS.opnode_admin.pl
opConfig will connect to any node (and run commands for it) that has valid connection settings and which isn't explicitely disabled for opConfig.
Using the GUI
In the GUI simply select the System menu, then Edit Nodes. The buttons "Import new Nodes from NMIS" and "Add Node" let you create node records, which will however need some adjustment for full functionality. Most entries on these editing pages have tooltips with explanations.
If you edit an imported, existing node or click on Add Node you'll likely see some entries in the red "Configuration Problems" tab. Here is an example:
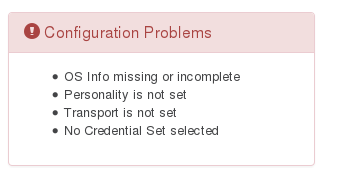
The problem reports are fairly self-explanatory (and clickable), but let's go over them quickly:
- To connect to a node, opConfig needs to know what Transport to use (Telnet or SSH). This is configured in the "Connection" tab.
At this point in time, opConfig supports only Telnet and SSH, and for SSH only password-based authentication is supported. - The Personality is also required to tell opConfig what kind of commands this node understands, e.g. whether it's a Unix-like system with a real shell or whether it's a Cisco IOS device and so on. The Personality includes information about the prompts, line-ending conventions etc. a node is subject to; for example, the 'ios' personality works only on Cisco IOS devices, while the 'bash' personality covers just about all Unix systems with the bash shell.
- Because the default command sets that opConfig ships with do use the Operating System name to select which command sets to apply, it's vital that you tell opConfig about your new node's OS.
If a node is imported from NMIS (or Open-AudIT Enterprise) then the OS Info is prefilled as much as possible (but can be modified by you, of course). If there is no or incorrect OS information, then opConfig will not run any or the right command sets on your node. - And, last but not least: interactive connections to nodes clearly require authentication and authorization in the form of access credentials, hence you must tell opConfig which Credential Set should apply to your new node.
Import (and discovery) from the Command Line
opconfig-cli.pl can import nodes from NMIS, and offers a credential set and transport discovery option. Simply run opconfig-cli.pl without options to see a brief usage help.
To import you'd run opconfig-cli.pl act=import_from_nmis (optionally limited to the names of known nodes with an argument of nodes=nodeX,nodeY). If you have already setup credential sets, then you can let opConfig guess which to use for your node using opconfig-cli.pl act=discover node=TheNewNodeName - if none of the Transport+Credential Set combinations work for the node, opconfig-cli.pl will print an error message.
General Node management from the Command Line
The tool opnode_admin.pl lets you list, export, create, modify or delete nodes from the command line. Editing operations involve an export to a JSON file, which you then modify using an editor or other tool of choice, followed by an update of the node using that JSON file. The opnode_admin.pl tool is pretty self-explanatory, and behaves almost identically to the NMIS node_admin.pl tool which is documented extensively here.
Managing Credential Sets
Credentials for all connections made by opConfig are configurable from the opConfig GUI (only): Select the menu System, then Edit Credential Sets. Credential sets can be shared by any number of nodes.
Each credential set has to have a unique name, by which it is referenced in the nodes' connection settings. The description field is self-explanatory and optional.
A credential set has to specify a User Name property, which is used when logging in to the nodes the set applies to. At this time, opConfig supports only password-based authentication at the node, and the Password property of the credential set establishes the primary password for this user name. Future versions will support SSH Key-based authentication, as well as other mechanisms.
Some commands cannot be performed by an unprivileged user, which is why opConfig also supports elevating the privileges on demand. To control this, a credential set can optionally include a Superuser/Privileged/Enable Password. Depending on the node's platform and personality, different mechanisms will be used to gain increased privileges:
- On Cisco IOS devices, this password is used with the
enablecommand. - With personality
bash(the default for Unix-like systems), the commandsudois used to become the superuser. Sudo therefore needs to be installed and configured on such nodes, and the User Name in question needs to be authorized for sudo.
Naturally not all commands require elevated privileges; see the section on Command Sets for how to determine and configure those.
Please note that the Credential Set editing dialogs do never show existing passwords (or their legth or existence); You can only overwrite password entries. All credential sets are stored in the database in encrypted form.
Managing Command Sets
As mentioned above opConfig lets you organize whatever commands you'd like it to run into an arbitrary number of groups which we call command sets.
A command set definition consists of these types of information:
- meta-information like the command set's name,
- optional control information like scheduling constraints and an expiration policy for the commands in that set,
- filters for selecting which devices/nodes the command set should apply to,
- and finally the list of the actual commands to be run.
Here is an excerpt from the default command set that ships with opConfig:
| Code Block | ||
|---|---|---|
| ||
'IOS_HOURLY' => { 'os_info' => { 'version' => '/12.2|12.4|15.\d+/', 'os' => 'IOS' }, 'purging_policy' => { 'keep_last' => 1000, 'purgeattempt_oldertimeout_thanrecovery' => 25920005, # 30 days 'autoprotect_first_revision' => 'true', }, 'scheduling_info' => { 'run_commands_on_separate_connection' => 'false', }, 'commands' => [ { 'multipage' => 'true', 'privileged' => 'false', 'command' => 'show interfaces', 'tags' => [ 'HOURLY', 'performance', 'interfaces' ], }, { 'multipage' => 'true', 'privileged' => 'false', 'command' => 'show ip interface', 'tags' => [ 'HOURLY', 'detect-change', 'configuration' ], }, ... and lots more |
Defining which nodes a command set applies to
This is normally done by filtering by OS info:
| Code Block | ||
|---|---|---|
| ||
#filter using both regular expression and string equality checks:
'os_info' => {
 'version' => '/12.2|12.4|15.0/',
 'os' => 'IOS'
},
# or just the specific os family/type and that's all:
'os_info' => {
 'os' => '/(Linux|CentOS|Ubuntu)/'
}, |
The examples above specify that the node in question must have an os_info property set, with sub-properties os and version in the first example and just os in the second.
Plain string values indicate string comparison, but regular expressions can be given too. A node is only considered for this particular command set if all filtering expressions match. You can filter on any node property, not just properties from os_info (but the default command sets only use os_info).
Grouping commands into sessions
By default all commands for a node will be run sequentially, one after another within the same session/connection to that device. This can save time as connecting to the device often takes longer than running all the commands one by one. But this is not always the case, and there are certain commands that run for a longer period of time (for example system statistics gatherers like vmstat or ). These commands would cause long delays in a sequential run, therefore opConfig lets you specify which commands should have their own separate connections. Separate connections can be opened in parallel.top
If you would like to change the default behaviour and have opConfig run all commands in all command set in separate session/connection, simply modify opCommon.nmis like this:
| Code Block | ||
|---|---|---|
| ||
# to run each command in it's own session, change this to true
'opconfig_run_commands_on_separate_connection' => 'false', |
It makes a lot more sense to tell opConfig to run a set of commands on their own or, in most cases, just a single command on its own. Here is how to make a command or command set have their own sessions/connections:
| Code Block | ||
|---|---|---|
| ||
# for all commands in a set, define this in the command set - note the S in run_commandS_...!
'scheduling_info' => {
 'run_commands_on_separate_connection' => 'true'
},

# for just a specific command, set this for the command in question - no S in run_command_...!
commands => [
 {
 'command' => 'show version',
 'run_command_on_separate_connection' => 'true',
}] |
...
}, |
Dealing with slow nodes: using Device Presets
opConfig cannot let one misbehaving device block progress for all others; therefore all interactions with remote devices are subject to a timeout (configuration item opconfig_command_timeout, default: 20 seconds). This timeout is shared by all nodes.
From version 3.0.7 onwards, opConfig offers Device Presets: a more fine-grained mechanism for adjusting the timing for each node.
Device presets are configured in conf/opCommon.nmis, under the key opconfig_device_presets. Here is the default setting as shipped with opConfig 3.0.7:
| Code Block |
|---|
'opconfig_device_presets' => {
  'normal' => { wake_up => 0, settling_time => 0, timeout_factor => 1 },
  'slow' => { wake_up => 2, settling_time => 5, timeout_factor => 1.25 },
}, |
A device preset can provide adjustments using the following three properties:
wake_upcontrols whether a slow login process (that has timed out) should be 'revived' by sending an 'enter' keystroke to wake the device.
The default is 0, or no extra 'wake up' keystrokes and if the login times out, the connection is terminated.
With a positive value N forwake_up, opConfig will send a wake up keystroke, then wait for a prompt up to the configured timeout, and retry this sequence up to N times.
If no prompt is detected during that sequence, the connection is terminated.
Please note that the default for versions before 3.0.7 forwake_upwas 1, ie. one login retry. Under certain circumstances and with devices responding excessively slowly this could lead to misinterpreted command outputs and data corruption.settling_timecontrols whether opConfig should wait an extra N seconds for stray output after the login is done but before issuing the first command.
This setting is meant for compensating for overly slow and/or complex logins with extra banners and the like, which can cause opConfig to mis-trigger on a premature, undesirable prompt if the device in question responds overly slowly. Any output that arrives between the login and the end of the settling period is consumed and discarded. The default values is 0, or no extra compensation delay.timeout_factorallows the setup of a longer or shorter interaction timeout for particular devices.
This option accepts positive values, and the configuredopconfig_command_timeoutis scaled by that factor for any device that uses this device preset.
The default value is 1, i.e. no scaling. In the example above and with the defaultopconfig_command_timeoutof 20 seconds, devices marked with the "slow" preset would get a timeout of 25 seconds.
In the GUI, assigning a device preset to a device is done on the Edit Node page, on the Connection tab.
On the command line you can use opnode_admin.pl act=set node=<somenode> entry.connection_info.device_preset=<presetname> to select a preset for a node.
A node without preset is subject to the default values.
Privileged Mode
Many types of devices distinguish between a normal and a privileged/superuser/elevated mode, and allow certain commands only in privileged mode. opConfig needs to know whether that applies to your device and which commands are affected.
In opConfig 3.0.2 and newer, every credential set indicates whether it grants direct and permanent access to privileged mode (always_privileged true), or whether opConfig needs to switch between normal and privileged mode (possibly repeatedly). Older versions only support the dual, mode-switching setup.
Commands affected by this distinction need to be marked with the privileged property, in which case opConfig will attempt to gain elevated/superuser privileges before attempting to run the command.
When connected to a device in always privileged mode, opConfig ignores the privileged property.
Non-interactive commands
Before version 3.0.3 opConfig would always open an interactive session to the device, then issue commands one by one. Amongst other things this requires a working phrasebook for the type of device, and imposes certain constraints - but when it works it's very efficient.
Recently we've run into a few devices (types and versions), where remote controlling the shell processor is unreliable - which can cause opConfig to fail to properly communicate with the device, e.g. if the prompt cannot be determined reliably.
Version 3.0.3 introduces an alternative, but for SSH only, which bypasses the shell/cli command processor on the device as much as possible.
You can adjust this behavior for a whole command set (or an individual command) with the command set property run_commands_noninteractively. Default is false; if set to true, opConfig will issue every single command 'blindly' and independently in a new SSH connection just for this command. For transport type Telnet this property is ignored.
This option is similar to what run_commands_on_separate_connection does, except interactive prompts and the like are not relevant here: opConfig starts a new ssh client for each command, and each ssh client terminates after returning the output of the command execution on the node.
- The advantage here is that opConfig doesn't have to interact with the node's command processor in a command-response-prompt-command-response... cycle; As such it's more robust.
- The disadvantage is that a new SSH connection must be opened for every single command, which is a relatively costly operation in terms of processing.
Furthermore this cannot work with Telnet (which is interactive by design).
Dealing with devices without or insufficient command-line interface
opConfig version 3.1.1 has introduced a new plugin mechanism for collecting configuration data, which can help with devices whose command-line interface is found lacking for any reason; Please consult this separate document for information about how Plugins in opConfig work.
How long should revisions (and their captured command output) be kept
opConfig 2.2. (and newer) have a flexible purging subsystem which is described in detail on a separate page here. The example above shows roughly how it's controlled: a command or command set can have a section called purging_policy which controls whether and when a revision should be removed from the database.
What constitutes a change, and when should opConfig create new revisions
Not all output is worthy of change detection; configuration information generally is while performance information generally is not. The configuration for a router, for example, is - but the usage counters on an interface likely are not. As mentioned above, opConfig can deal with both of these types of commands, the "one-shot" ones as well as the change-indicating ones.
...
| Code Block | ||
|---|---|---|
| ||
'privileged' => 'false',
'command' => 'ifconfig -a',
'tags' => [ 'DAILY', 'configuration', 'detect-change' ],
  'command_filters' => [
    '/RX packets/',
    '/TX packets/',
    '/RX bytes/',
    '/TX bytes/'
] |
In the example above, the output of the "ifconfig -a" command would be checked and any changed lines that match TX/
...
RX packets or TX/RX
...
bytes (i.e. the interface counters) are ignored. Any other changes that remain after applying the filters are used to figure out whether to create a new revision or not.
Please note that command filters are possible for both one-shot commands and commands with change-detect enabled, and behave the same for both.
In opConfig 3.1.1, support for post-processing plugins was added which provides facilities for more flexible filtering (e.g. whole blocks of data may be excluded programatically). The Plugins in opConfig page describes how to make use of this new functionality.
Raising Events when changes are detected
opConfig 2.2 and newer can raise an event with NMIS if a change was detected for a node and a particular command. The event name is "Node Configuration Change Detected" and includes details of the change which has been detected. To activate this feature you have to give the command in question both the tags detect-change and report-change. You may also give a fixed event severity (values as defined in NMIS), like in this example:
| Code Block |
|---|
'privileged' => 'false',
'command' => 'chkconfig',
'tags' => [ 'DAILY', 'configuration', 'detect-change', 'report-change' ],
'report_level' => 'Minor', |
| Info | |||||
|---|---|---|---|---|---|
To enable or disable this feature in general edit /usr/local/nmis8/conf/Config.nmis.
If set to true the feature is enabled; if set to false the feature is disabled. |
In this case, the Redhat/Centos command chkconfig (= list of system services to automatically start on boot) will be checked for changes, and if any are found then a "Node Configuration Change" event with the context node in question, the element "chkconfig" and the serverity "Minor" will be raised in the local NMIS.
If you want a more dynamic event severity, then you can use report_level_min_changes which selects a severity based on the number of changes that were found:
| Code Block |
|---|
{
 'privileged' => 'true',
 'command' => 'vgdisplay',
 'tags' => [ 'DAILY', 'configuration', 'detect-change', 'report-change' ],
 'report_level_min_changes' => {
   1 => "Normal",
   3 => "Minor",
   10 => "Major" },
} |
In this example, changes in the vgdisplay command output would result in an event of severity Normal if there are 1 or 2 changes, Minor for 3 to 9 changes, and Major for 10 or more.
How to categorize command sets (and why)
As seen in the examples above, commands can have a number of pre-defined tags like detect-change or report-change; but you are encouraged to set your own custom tags to characterize the commands according to your preferences.
The default command set shipped with opConfig uses two primary tags for categorization, DAILY and HOURLY.These are used in the example cron invocations of "opconfig-cli.pl act=run_command_sets" so that all commands with tag DAILY are run only once a day, whereas the HOURLY ones run once an hour. Commands with neither tag will not run periodically, for example there are numerous commands tagged with troubleshooting which will only be run in reaction to an event detected in opEvents.
Using tags in this fashion for categorization is much more convenient than having to tell opconfig-cli.pl which command sets to run by name (which is also possible).
General Usage of opconfig-cli.pl
opconfig-cli
Information on what commands are supported is printed when no options are specified. All options support debug=true for debug output and debug=9 for extremely verbose output.
Listed below are the possible options for the act=X argument:
import_from_nmis
| Info | ||
|---|---|---|
| ||
This option is only available from versions < 4.0.0. From opConfig 4.0.0, the data is shared between applications. |
Grabs one or more nodes from NMIS. Identical in function to "Refresh" or "Import Nodes from NMIS" in the GUI.
| Info | ||
|---|---|---|
| ||
When a device is imported we automatically set a number of the devices opConfig attributes such as "connection_info.personality" "os_info.os" etc. The matching of NMIS device attributes and the subsequent setting of opConfig attributes is controlled via omk/conf/OS_Rules.nmis You can extend this file to automatically set all sorts of opConfig device attributes when an import is done, e.g you might set all cisco devices to use ssh by setting 'connection.transport' => 'SSH', For more information see Create an OS Rule and OS Rules Help Text |
In the example above, the output of the "ifconfig -a" command would be checked and any changed lines that match TX/RX packets or TX/RX bytes (i.e. the interface counters) are ignored. Only other changes that are left after applying the filters are checked to figure out whether to create a new revision or ont.
Please note that command filters are possible for both one-shot commands and commands with change-detect enabled, and behave the same for both.
How to categorize command sets (and why)
As seen in the examples above, commands can have a number of pre-defined tags like detect-change or report-change; but you are encouraged to set your own custom tags to characterize the commands according to your preferences.
The default command set shipped with opConfig uses two primary tags for categorization, DAILY and HOURLY.These are used in the example cron invocations of "opconfig-cli.pl act=run_command_sets" so that all commands with tag DAILY are run only once a day, whereas the HOURLY ones run once an hour. Commands with neither tag will not run periodically, for example there are numerous commands tagged with troubleshooting which will only be run in reaction to an event detected in opEvents.
Using tags in this fashion for categorization is much more convenient than having to tell opconfig-cli.pl which command sets to run by name (which is also possible).
Raising Events when changes are detected
opConfig 2.2 and newer can raise an event with NMIS if a change was detected for a node and a particular command. To activate this feature you have to give the command in question both the tags detect-change and report-change. You may also give a fixed event severity (values as defined in NMIS), like in this example:
| Code Block |
|---|
'privileged' => 'false',
'command' => 'chkconfig',
'tags' => [ 'DAILY', 'configuration', 'detect-change', 'report-change' ],
'report_level' => 'Minor', |
In this case, the Redhat/Centos command chkconfig (= list of system services to automatically start on boot) will be checked for changes, and if any are found then a "Node Configuration Change" event with the context node in question, the element "chkconfig" and the serverity "Minor" will be raised in the local NMIS.
If you want a more dynamic event severity, then you can use report_level_min_changes which selects a severity based on the number of changes that were found:
| Code Block |
|---|
{
 'privileged' => 'true',
 'command' => 'vgdisplay',
 'tags' => [ 'DAILY', 'configuration', 'detect-change', 'report-change' ],
 'report_level_min_changes' => {
   1 => "Normal",
   3 => "Minor",
   10 => "Major" },
} |
In this example, changes in the vgdisplay command output would result in an event of severity Normal if there are 1 or 2 changes, Minor for 3 to 9 changes, and Major for 10 or more.
General Usage of opconfig-cli.pl
opconfig-cli
Information on what commands are supported is printed when no options are specified. All options support debug=true for debug output and debug=9 for extremely verbose output.
Listed below are the possible options for the act=X argument:
import_from_nmis
...
discover
Tests a single given node (argument node=nodeX) and attempts to determine its Transport and Credential Set configuration. The node must already have a Personality set.
...
This command will run all applicable command sets for all nodes (by default).
Options:
- nodes=node1,node2,etc -- only command sets for that apply to the specified nodes will be run.
- command_set_names=command_set1,command_set2,etc – only run the specified command sets (and of course only for nodes matching the command sets' criteria)
- tags=tag1,tag2,etc – The matching nodes candidate commands are filtered by the tags specified. If any given tag one or more tags given on the command line is present in the list of the nodea command's tags, then the node command will be usedrun.
get_command_output, Get the last output from a command for a node
...
eg. act=diff_command_outputs node=node1 command="show run" revision_1=10 revision_2=13
import_audit
This action imports audit information from Open-AudIT Enterprise, for all devices known to Open-AudIT.
This requires a licensed Version 1.4 of Open-AudIT Enterprise or newer. The audit information will show up in opConfig as command "audit", and the command output will be the full audit data set in JSON format. Nodes will be consolidated as much as possible with your currently existing node definitions.
To enable this functionality, set the necessary options in conf/opCommon.nmis and run opconfig-cli.pl act=import_audit periodically or as a one-off. The required config settings are as follows:
| Code Block |
|---|
'opconfig_audit_import' => 1, # to enable this altogether 'opconfig_audit_import_url_base' => "http://my.oae.system.com/omk/oae/", 'opconfig_audit_import_user' => "nmis", # needs ro-access 'opconfig_audit_import_password' => "somepassword", |
...