DRAFT
Summary
In this guide we will migrate the data from NMIS8 and OMK Applications to nmis9 and OMK Applications.
- Server: uburnto (ubuntu 18) → deb-n-burn (debian 10)
- nmis 8.7.2 → nmis 9.2.2
- opCharts 2.5.1 → opCharts 3
- opConfig 3.5.2 → opConfig 4
- opEvents 2.6.3 → opEvents 3
- opHA 2.2.2 → opHA 3
- opReports 3.4.2 → opReports 4
Options
- Use a VM for the nmis9 server: We would need to run additional steps to migrate the data.
- Install the apps one the data is migrated: The installers will upgrade the data to the new format.
Upgrade process: Using nmis9 VM (NMIS9)
Prerequisites
- NMIS 9 and OMK apps are installed on the server.
Step 1. Stop all daemons
We first need to make sure all the daemons are stopped in the destination server:
sudo service nmis9d stop
sudo service omkd stop
sudo service opeventsd stop
sudo service opchartsd stop
sudo service opconfigd stop
Step 2. Move and adapt NMIS files
Configuration Files
Copy
Copy the configuration directory from the source server.
Create a conf backup first:
mv /usr/local/nmis9/conf /tmp/nmis9/conf
This can be done really easy with rsync:
rsync -r root@uburnto.opmantek.net:/usr/local/nmis8/conf /usr/local/nmis9
Configure
We need to make some adjustments to the file. This is:
- Replace all nmis8 occurrences by nmis9.
- Remove sql section.
- Add database section.
  'database' => {
    'db_name' => 'nmisng',
    'db_password' => 'op42flow42',
    'db_port' => '27017',
    'db_query_timeout' => 5000,
    'db_server' => 'localhost',
    'db_username' => 'opUserRW',
    'db_never_remove_indices' => [ 'nodes' ],
  },
...
 '<nmis_base>' => '/usr/local/nmis9',
 '<url_base>' => '/nmis9',
 '<cgi_url_base>' => '/cgi-nmis9',
..
		'nmisd_max_workers' => 10, # set to zero to disable multiprocessing
		'nmisd_worker_cycle' => 100,	# workers sleep no longer than X between cycles
		'nmisd_scheduler_cycle' => 10, # the supervisor daemon sleeps no longer than X between cycles

		'nmisd_fping_worker' => 'true', # if true, at dedicated worker for fping use used
		'postpone_clashing_schedule' => 30, # if positive, clashing jobs are retried N seconds later, otherwise clashing jobs are discarded
- Review important parameters, as the number of workers (workers parameter in config). We can use this rule to get a starter number, but this will depend on the server resources, the amount of data collected by the node, etc. If the server is too slow we would need to decrease the number. If there are nodes with more than 3x late collects (Check the polling summary), the number should be increased:
(Number of nodes x AVG Collect time) / 300
300 _ Default polling time.
- There is a script to use in opCommon that compares configurations item in a configuration file missing from another.
/usr/local/omk/bin/opcommon-cli.pl act=compare_configs nmis8=/tmp/nmis8.nmis nmis9=/tmp/nmis9.nmis
- Copy tables from conf-default:
/usr/local/nmis9 cp conf-default/Table-* conf
- Then, fix files permissions:
/usr/local/nmis9/bin/nmis-cli act=fixperms
Check
Even with the daemon stop, we can check if the configuration is working. We can access the GUI:
http://server/cgi-nmis9/nmiscgi.pl
If we see any 500 Error, we can review the apache logs, usually in the path /var/log/apache2/error.log
Model Files
We can move all the model customisations in the models-custom directory. We can use rsync for this again.
NOTE Some models may need to be adjusted. Specially if they are using nmis internal functions.
Plugins
We have moved the conf/plugins directory using rsync. But the custom plugins need to be adapted to NMIS9.
Here you can find further information.
Step 3. Copy RRDs
This can be done really easy with rsync:
rsync -r root@uburnto.opmantek.net:/usr/local/nmis8/database/nodes /usr/local/nmis9/database
Then fix permissions:
/usr/local/nmis9/bin/nmis-cli act=fixperms
Run script to adapt names
This script will adapt nmis8 rrd names to nmis9 (From nmis 9.2.1):
/usr/local/nmis9/admin/node_admin.pl act=move-nmis8-rrd-files {node=nodeX|ALL|uuid=nodeUUID} [remove_old=1] [force=1]
Step 4. Import Nodes
We have copied the nodes file from nmis8 using rsync. We would need to import the nodes now:
/usr/local/nmis9/admin/node_admin.pl act=import_bulk nodes=/usr/local/nmis9/conf/Nodes.nmis debug=true
Step 5. Verify
We can start nmis9d. Depending on the number of nodes, we should leave it running for more or less time.
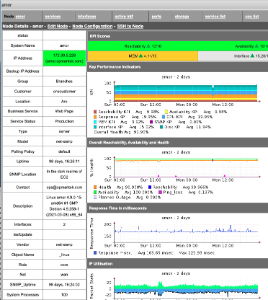
We can open nmis9 and you should see the nodes with the rrd information:
Upgrade process: Using nmis9 VM (OMK)
Prerequisites
- NMIS 9 and OMK apps are installed on the server.
- All the services had been stoped
Step 1. Move and adapt OMK files
Configuration Files
Copy
Copy the configuration directory from the source server.
Create a conf backup first:
mv /usr/local/omk/conf /tmp/omk/conf
This can be done really easy with rsync:
rsync -r root@uburnto.opmantek.net:/usr/local/omk/conf /usr/local/omk
Convert to JSON
It can be done with the following command:
/usr/local/omk# /usr/local/omk/bin/opcommon-cli.exe act=convert_json_dir dir=conf
Configure
Update opCommon.json:
"database": {
   "db_name": "omk_shared",
   ...
    "nmis": {
        "<nmis9_dir>": "/usr/local/nmis9",
        "<nmis9_logs>": "/usr/local/nmis9/logs",
        "nmis9_cgi_url_base": "/cgi-nmis9",
        "nmis9_dir": "/usr/local/nmis9",
Create symbolic link to nmis9 users file:
ln -s ../nmis9/conf/users.dat conf/users.dat
Step 2. Move OMK Database
- Stop services in origin server
- Generate mongodump:
mkdir /data/mongodump
mongodump -u=opUserRW -p=op42flow42 --out=/data/mongodump
- copy the data with rsync:
rsync -r root@uburnto.opmantek.net:/data/mongodump /data
- Restore:
mongorestore -u opUserRW -p op42flow42 /tmp/mongodump/
Step 3. OMK Applications considerations
opCharts
opCharts uses the same database.
TODO Some adjustments needed??
opEvents
Update database name in opCommon.json:
"opevents_db_name": "nmis",
Run migration scripts:
/usr/local/omk/bin/opevents-cli.exe act=migrate-nodes debug=8
/usr/local/omk/bin/opevents-cli.exe act=migrate debug=8
opConfig
Update database name in opCommon.json:
"opconfig_db_name": "nmis",
opReports 
NMIS8 opReports and NMIS9 opReports work the same way:
- Report Schedules are stored in /usr/local/conf/schedule
- Reports caching is stored in /usr/local/omk/var/opreports
- Reports are stored in /data/omk/var/reports (unless otherwise specified by the user)
If you followed the instructions above, your Report Schedules are back in place, as you've copied over the entire omk-old/conf directory in step five. The /data/omk/var reports directory should still be where it was at the beginning of the upgrade, as it was never changed.
We can copy the opreports and reports directories into the new application to move all the reports:
rsync -r root@uburnto.opmantek.net:/usr/local/omk/var/reports var/
rsync -r root@uburnto.opmantek.net:/usr/local/omk/var/opreports var/
opHA
opHA 3 works different from opHA 2. The peers would need to be imported manually using the GUI or the cli, using nmis8/conf/Servers.nmis file.
Further information can be found here.
Step 8. Start daemons
sudo service nmis9d start
sudo service omkd start
sudo service opeventsd start
sudo service opchartsd start
sudo service opconfigd start