Installation Prerequisites
- The individual performing this installation has some Linux experience.
- NMIS8 is installed on the same server where opFlow will be installed
- NMIS8 is installed in /usr/local/nmis8
- opFlow will be installed into /usr/local/opmantek
- Root access is available (not always needed but much easier)
Installation Steps
- Copy the opFlow tarball to the server (a tarball is a GZIP'd tar file, e.g. opFlow-Linux-x86_64-1.0.tar.gz)
- You may need to use SCP or FTP to get the file onto the server.
- The file will now likely be in the users home directory.
- If the installation directory does not already exist
- Change into the directory where the tarball was copied
- Untar the file
cd /usr/local
tar xvf ~/opFlow-Linux-x86_64-<version>.tar.gz
cd opmantek/
cp install/opCommon.nmis conf/
cp install/opFlow.nmis conf/
bin/opfixperms.pl
cp install/01opmantek.conf /etc/httpd/conf.d/
service httpd restart
Alternate Installation Directory
opFlow can be installed into another directory if required, e.g. /opt/opmantek, the same process applies, but a few files will need to be changed.
Edit opFlow.nmis and opCommon.nmis and change the <omk_base> to be the new, e.g.
'<omk_base>' => '/opt/opmantek',
Edit the Apache include file, which if already copied to /etc/httpd/conf.d will be /etc/httpd/conf.d/01opmantek.conf and change the following lines to the new installation location
Alias /opmantek/ "/usr/local/opmantek/htdocs/"
ScriptAlias /cgi-omk/ "/usr/local/opmantek/cgi-bin/"
<Directory "/usr/local/opmantek/cgi-bin">
Considerations for NetFlow Data Storage
Install flowd NetFlow Daemon
You will need to compile the NetFlow Daemon flowd, the source code is included with opFlow.
Install Required Packages
yum install byacc
Compiling Flowd
cd /usr/local/opmantek/source
tar xvf flowd-0.9.1.tar.gz
cd flowd-0.9.1.tar.gz
./configure
make
make install
Install MongoDB
Download MongoDB from the Website at http://www.mongodb.org/downloads
At the time of writing the link to download MongoDB for 64bit linux was MongoDB 2.0.7-rc0, copy the file to the Linux server, you could also directly download to the server.
wget http://fastdl.mongodb.org/linux/mongodb-linux-x86_64-2.0.7-rc0.tgz
tar xvf mongodb-linux-x86_64-2.0.7-rc0.tgz
mv mongodb-linux-x86_64-2.0.7-rc0 /usr/local/
cd /usr/local/
ln -s mongodb-linux-x86_64-2.0.7-rc0 mongodb
ln -s mongodb/bin/mongo bin/mongo
Opmantek Setup for Flowd
Now that you have the binaries for flowd we have a bunch of Opmantek goodness to make it work easily. The following commands get this running
adduser _flowd
cp /usr/local/opmantek/install/flowd.conf /usr/local/etc/flowd.conf
cp /usr/local/opmantek/install/flowd.init.d /etc/init.d/flowd
mkdir /usr/local/var
mkdir /usr/local/var/run
mkdir /var/opflow/
chkconfig flowd on
service flowd start
Opmantek Setup for MongoDB
The following commands get MongoDB running. The last command here starts MongoDB, the first time it runs it can take some time to do its pre-allocation of database and journal files. This will depend on the performance of your storage.
cp /usr/local/opmantek/install/mongod.init.d /etc/init.d/mongod
chkconfig mongod on
service mongod start
Installing the Opmantek License and Accepting the EULA
If you haven't already obtained a commercial or evaluation license from Opmantek, now is the time to do so, this will be a license key which is an encrypted string.
At this point you should be able to access the opFlow GUI which will be at a URL like this http://server.domain.com/cgi-omk/opFlow.pl
Access the web page and login in with your NMIS username and password, which by default is nmis/nm1888
opFlow will likely have a message like "A valid license file was not found", and there is a button "View and Enter Licenses" under it, which you should click.
If you have your license key, click on "Enter a License Key" and paste the license key into the text box and click on "Add License".
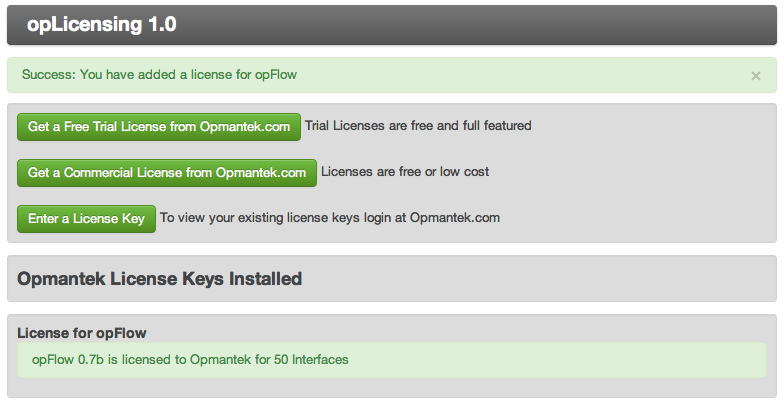
You should now see a screen which says "Success: You have added a license for opFlow"
You can return to the opFlow page a refresh it, you will be now asked to review the EULA (End User License Agreement) and click on the "Accept EULA" button at the bottom.
Once that is done, opFlow GUI will start.
opFlow Setup
To initialise the database, create the default application definitions and many more things, you will need to run opflow_setup.pl, this will also generate a crontab entries for adding to your Cron setup.
/usr/local/opmantek/bin/opflow_setup.pl setup=all
When the crontab entries are displayed, you can copy and paste these into crontab,
/usr/local/opmantek/bin/opflow_setup.pl setup=cron


######################################################
# opFlow Cronfig
######################################################
# Run the DNS resolution every 15 minutes
*/15 * * * * /usr/local/opmantek/bin/opflowd.pl type=endpoints
# Purge the old Flows every 24 hours
0 0 * * * /usr/local/opmantek/bin/opflowd.pl type=purge
######################################################
# Check to rotate the logs 4:05AM every day
5 4 * * * /usr/sbin/logrotate /usr/local/opmantek/conf/oplogrotate.conf

crontab -e

Insert the above text, then save and quit.
Starting the opFlow Daemon
With the license now installed, we can complete the setup of opFlow.
cp /usr/local/opmantek/install/opflowd.init.d /etc/init.d/opflowd
chkconfig opflowd on
service opflowd start
Basic opFlow Configuration
There are many configuration options in opReports, but the only one which must be updated to make everything work is the configuration for "report_server_prefix", this allows the emailed reports to point to the correct web server to load their configurations, this entry is in the opReports.nmis file and should be updated to be the public web prefix of the server, which the people receiving the emails would use to access the server (this might be the portal address).
'report_server_prefix' => 'http://nmis.domain.com',
Access opMaps Web Page
The default URL to access opMaps is http://nmis.domain.com/cgi-omk/opFlow.pl
Any authentication challenges will be the same as to login to your NMIS8 system.
