Introduction
It is possible to push events generated via opEvents to external communication and collaboration tools, such as Slack using a Perl script.
Installation
Install the script
As a pre-requisite, you will need to create a scripts directory located within /usr/local/nmis9 (or where your NMIS9 installation resides), by executing the following command:
mkdir /usr/local/nmis9/scripts
Once complete, then upload the following script to the scripts folder you just created:

Set the script's permissions with the command:
/usr/local/nmis9/bin/nmis-cli act=fixperms
where /usr/local/nmis9 is the path to your NMIS installation.
Create your webhook
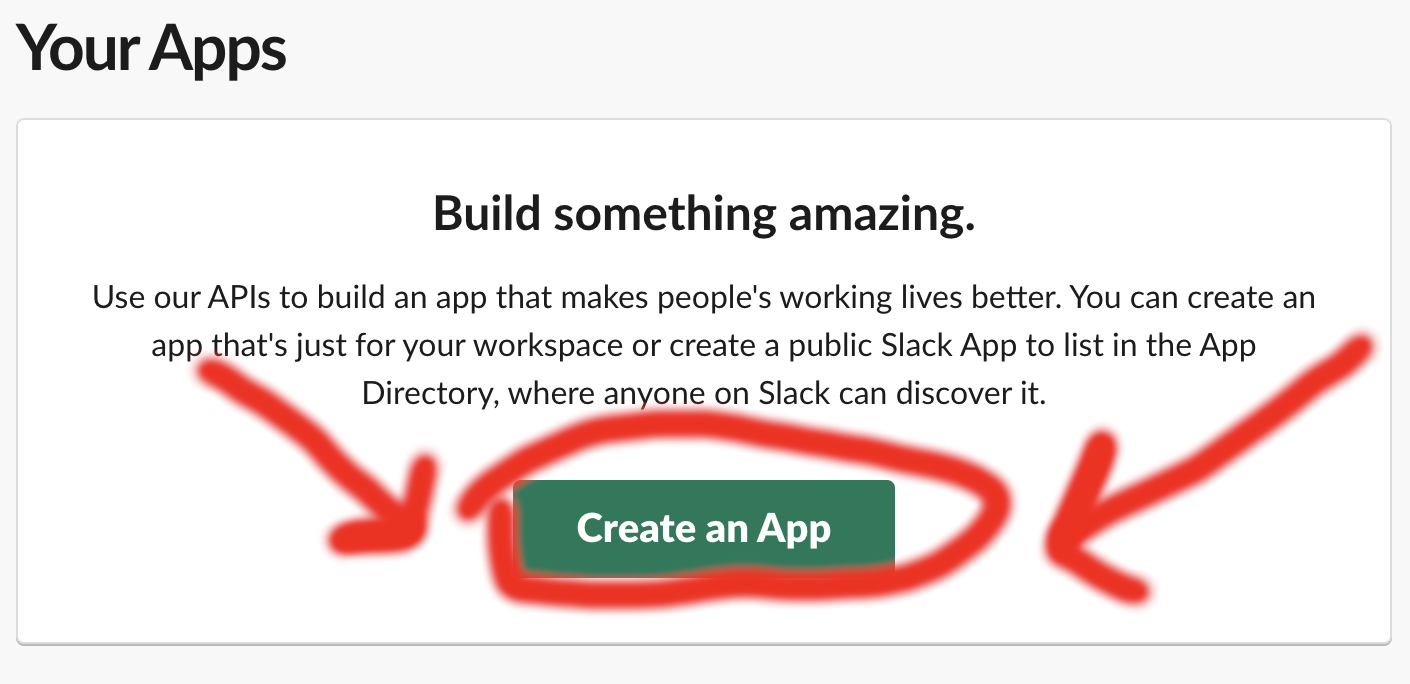
Navigate to the slack app page at https://api.slack.com/apps and click the "Create an App" button.
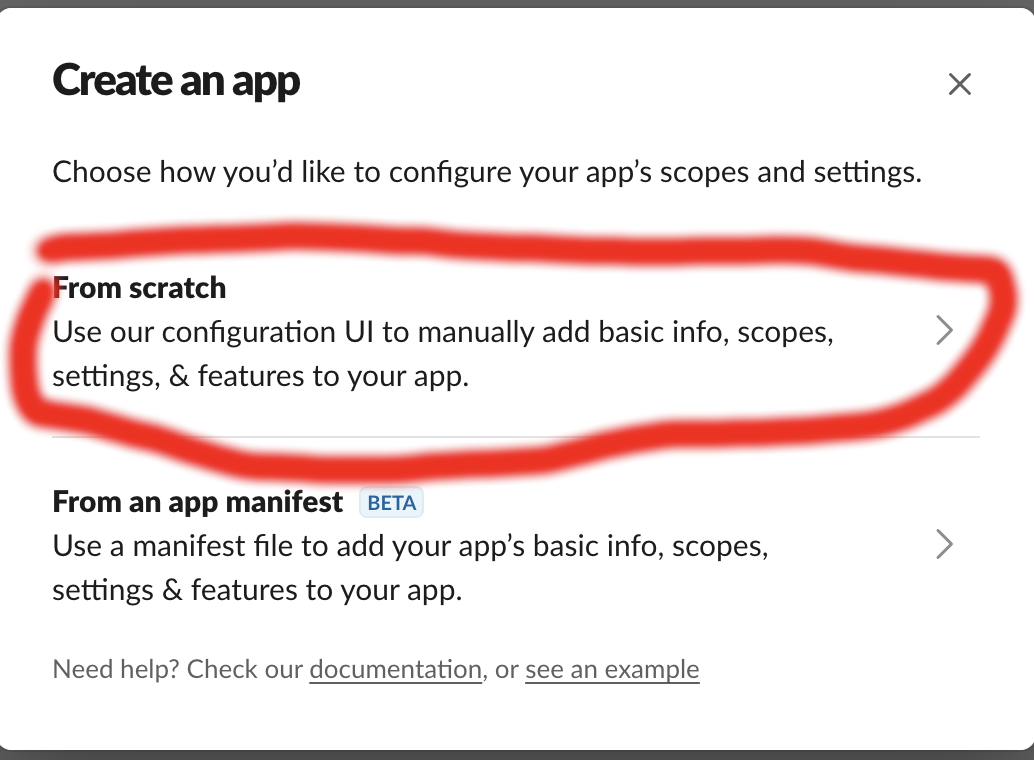
Select "From scratch":
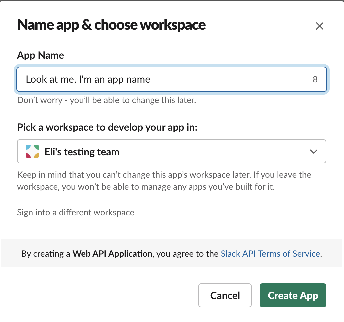
Enter a name for your app and pick the workspace you want to use. Click "Create App" when you are ready.
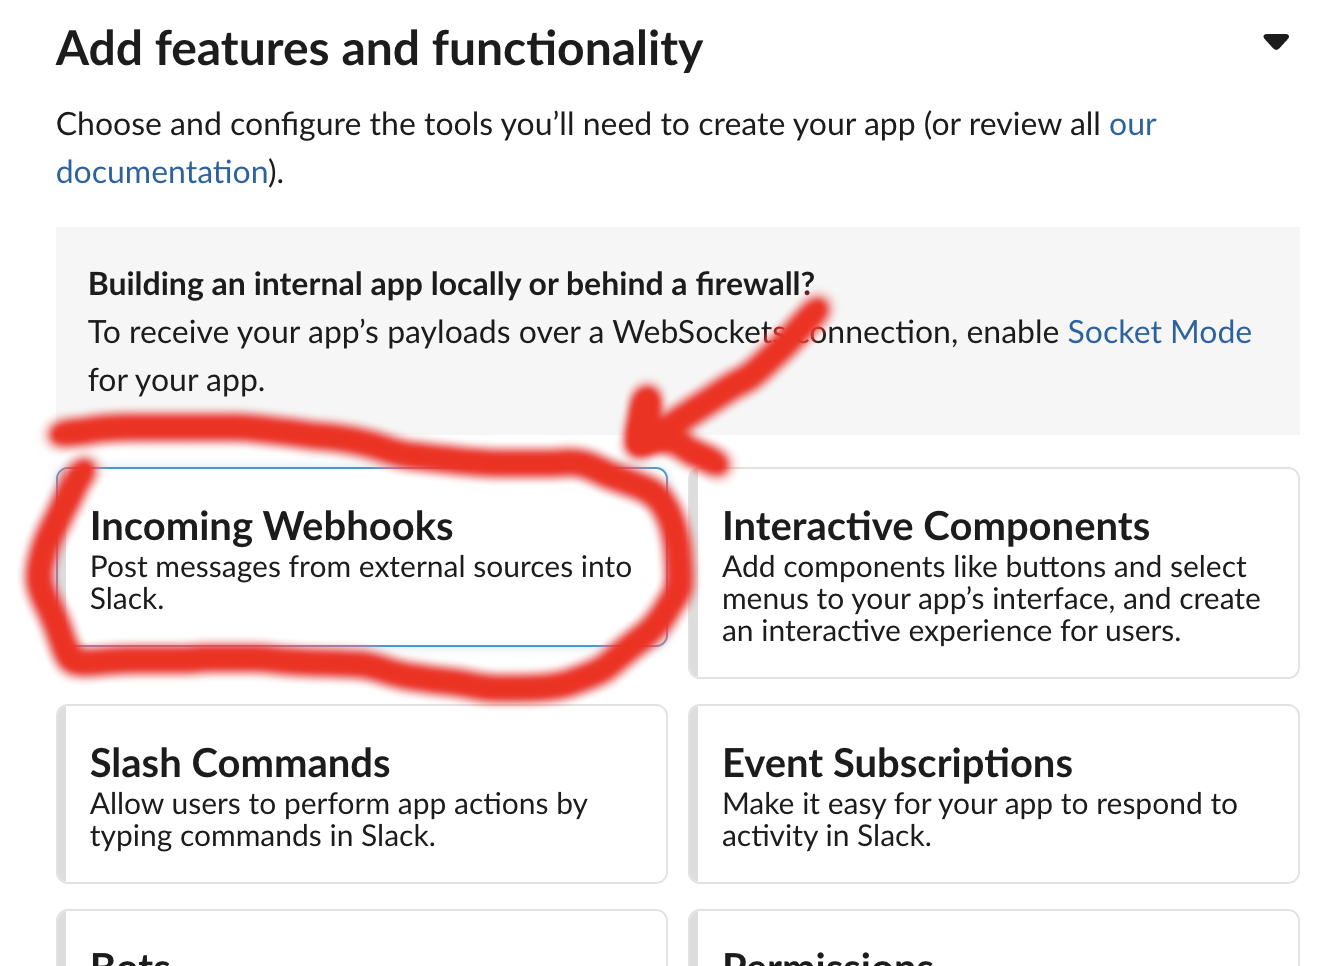
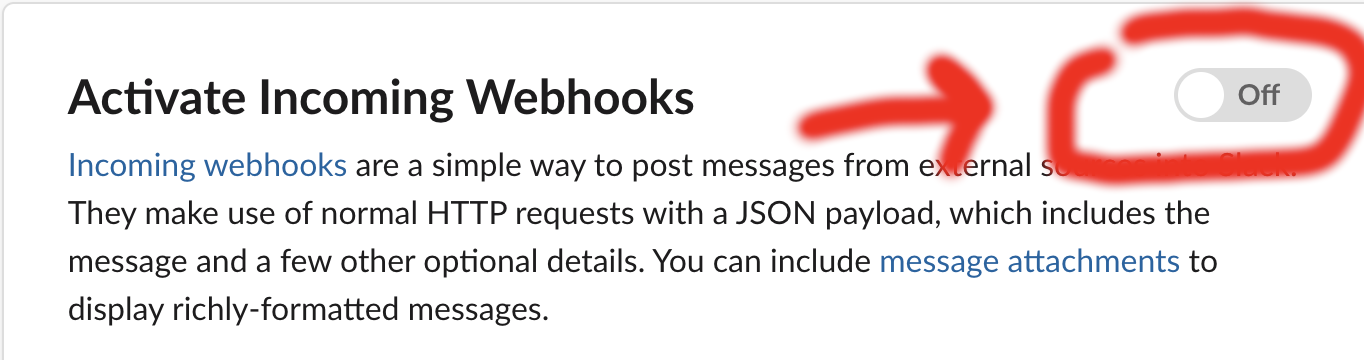
Click "Incoming Webhooks":
Click the switch to "Activate Incoming Webhooks":
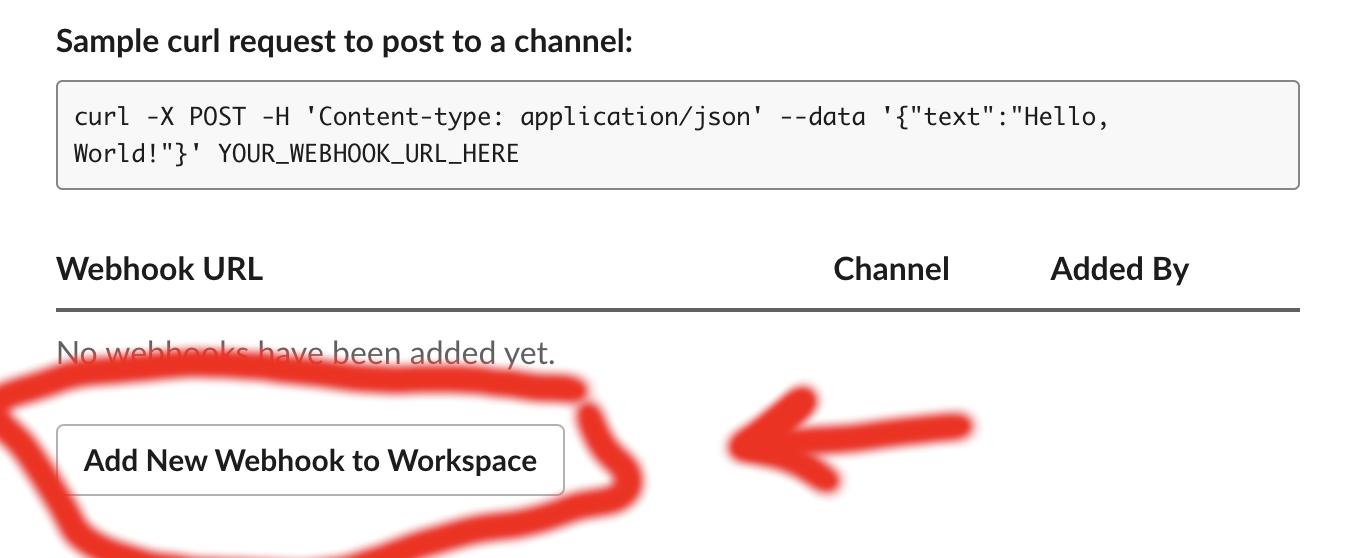
Click "Add New Webhook to Workspace" at the bottom of the page:
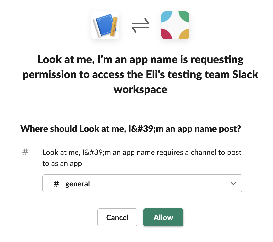
Select the channel you want opEvents to post to and click allow to grant permission:
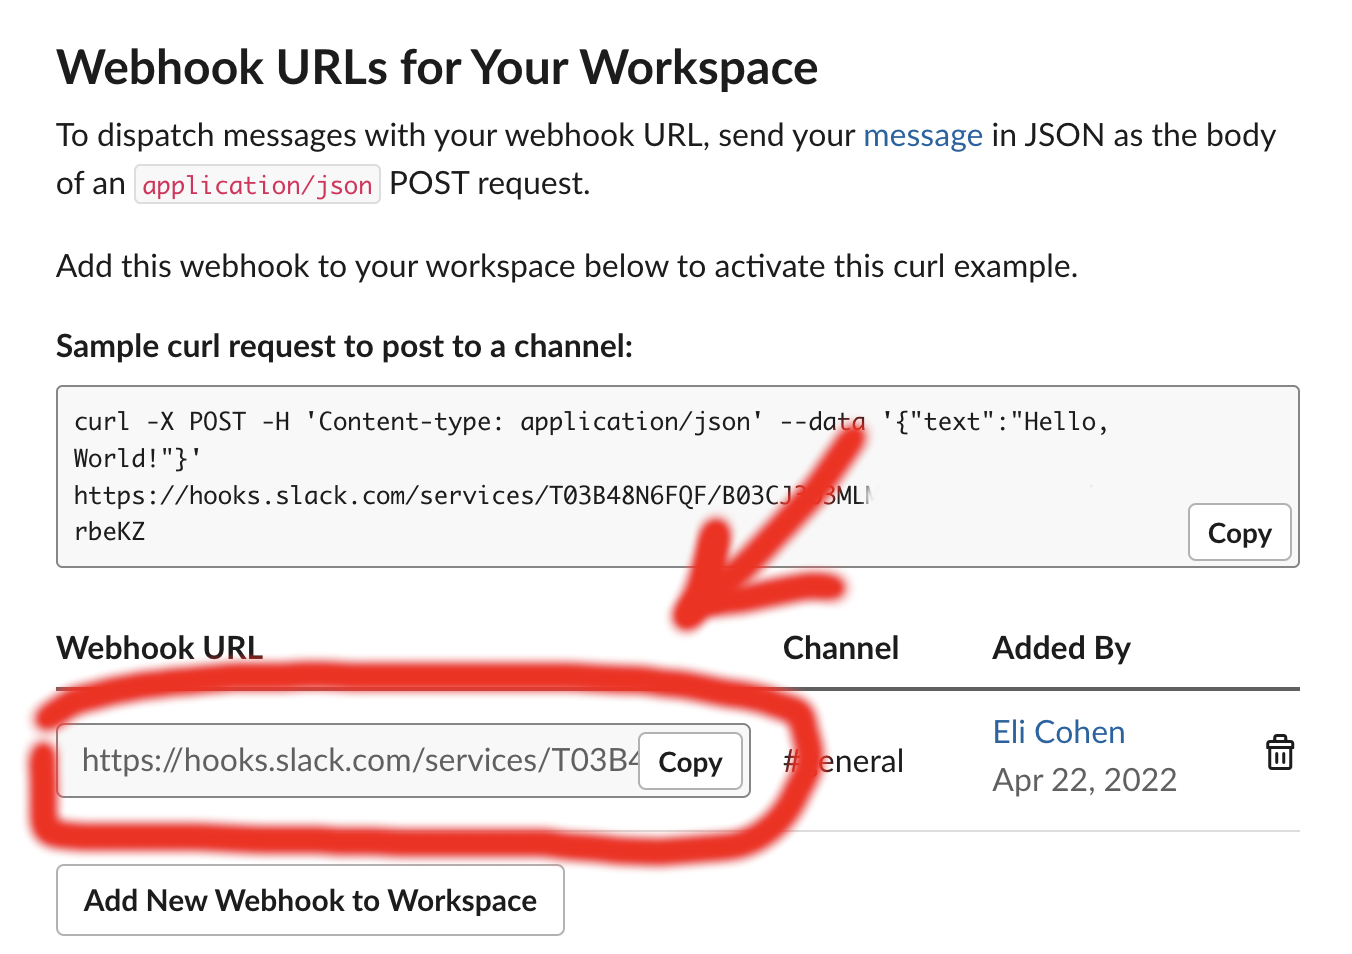
Scroll down to the bottom of the page and copy your webhook URL - you will need it for the next step.
Integrate with opEvents
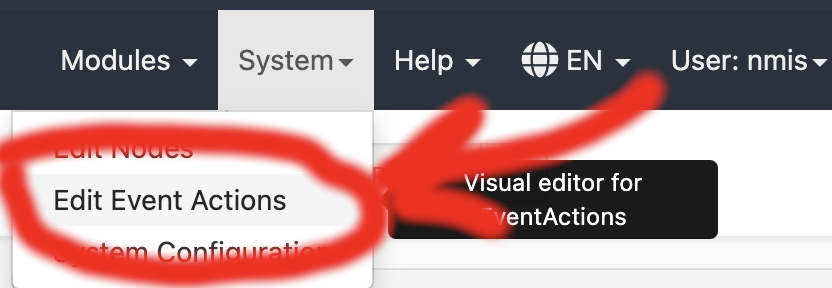
Log into your opEvents installation from your browser. Once authenticated, in the upper right, click System, then Edit Event Actions.
Immediately under the line that reads:
"script" : {Add the text:
      "slacker" : {
         "exec" : "/usr/local/nmis9/scripts/slack_messages.pl",
         "output" : "save",
         "arguments" : "event._id node.uuid SERVER event.name event.priority event.element event.details event.time WEBHOOK"
      }
Where:
- /usr/local/nmis9 is replaced with your NMIS path.
- SERVER is replaced with the IP or domain of your server (eg. 192.168.24.85, or nmis-01.mydomain.net).
- WEBHOOK is replaced with the webhook we copied in the last step.
When complete this should look like the following:

Then click the Validate button. If you see a 'Syntax OK' prompt, proceed to click Save. You can also click Save and this will also check the syntax is OK.
Add calls to the script
You can now call the script through opEvents with the command:
script.slacker()
For example, let's add a call to the script when a node goes down. This would look like the following:
            "30" : {
               "BREAK" : "false",
               "IF" : "event.event eq \"Node Down\"",
               "THEN" : [
                  "tag.isbroken(nodedown)",
                  "tag.verybad(42)",
                  "script.slacker()"
                ]
			}
After modifying the Event Actions to suit your needs, you can then proceed to press the Save button, and verify the Syntax is OK. Once confirmed, you will then need to restart the opEvents daemon (opeventsd).
Testing the integration
If you have applied the integration to an event that may not occur on a regular occurrence, you can run the following command to simulate the event and verify your integration works:
/usr/local/omk/bin/opevents-cli.pl act=create-event node=DC-RTR-01 state=down event="Node Down" stateful="Node"
Troubleshooting
In the Event Context of a Event where you have included the script, you see the following in the Scripts section under slacker:
exec failed: Permission denied
To resolve this, you need to make the following modification to the "exec" section:
     "slacker" : {
        "exec" : "perl /usr/local/nmis9/scripts/slack_messages.pl",
        "output" : "save",
        "arguments" : "event._id node.uuid SERVER event.name event.priority event.element event.details event.time WEBHOOK"
       }
You will need to restart the opEvents daemon after making this change.