...
So you've downloaded the latest version of the Opmantek Virtual Appliance from https://opmantek.com/network-tools-download/ and now you want to set it up and take it for a test drive to see how NMIS and the Opmantek networking modules can help you administer your network. No problem. Easy.
- Unzip the virtual downloaded appliance file (only for releases before Jan 2018)
- Import the OVA (Open Virtual Appliance Format) or OVF file into VMware, Virtualbox,...Use the OVF (Open Virtualization Format) file (VMware and VirtualBox examples provided)
- Start up the new VM, optionally set a static IP address
- Access NMIS and the other Opmantek applications in your browser
Let's assume you've got step 1 under control (unzipping) and move to step 2.
...
Using the OVA/OFV file
OVA vs OVF files
All Opmantek Virtual Appliance releases since January 2018 are published as a single "ova" file (Open Virtual Appliance), which encapsulates all necessary data in a single archive.
The import instructions below can be used to deploy the Opmantek Virtual Appliance straight from that one downloaded file.
Releases before Jan 2018 consist of a ZIP archive that bundles an "ovf" (Open Virtualization Format) file and disk images. This ZIP archive needs to be unpacked before your virtualization platform will recognize the appliance.
After unzipping the file you should see a folder with a structure like this:

Because the OVF file type is in an open format it should be recognized by your virtualization software or by a conversion tool provided by your virtualization software.
How to import the Virtual Appliance into your virtualization infrastructure
VMware
There are several options for VMware software. Options 2 & 3 require the VMware OVF Tool, find the tool by doing a search on google or by visiting VMware's site, the other requires VMware Fusion (for Mac). Options 2 & 3 assume you have it installed and know where it is.
...
VirtualBox will import directly from an OVF/OVA file so you can just start up VirtualBox and select "Import Appliance..."
...
Other Hypervisors
To use OVF/OVA files with other virtualisation systems like KVM you may have to convert the OVF file to a native format; Two well-known tools for this purpose are virt-v2v (available in CentOS6/RHEL) and virt-convert (in Debian).
...
The Windows Hyper-V technology does not fully support the OVF industry standard. Microsoft documents a complex and somewhat limited procedure on their page about converting OVF files to Hyper-V. There are third-party conversion tools available that simplify this deployment scenario, for example StarWind's free V2V Converter which worked well in our tests.
Start up the VM and set a custom IP Address, DNS... (optional)
At this point the VM has DHCP enabled, and therefore it will receive a dynamic IP address suitable for your environment. The easiest way to access the VM at that point is from the virtualization software terminal. So go ahead and boot the VM. After the VM is finished booting you will be welcomed by a login prompt. First, log in using the default credentials.
...
- manual configuration
The VM appliance is a normal CentOS 6 system, hence all the mechanisms for network configuration in CentOS are available.
Most specifically you'll be interested in the files/etc/hosts,/etc/sysconfig/network,/etc/sysconfig/iptablesand/etc/sysconfig/network-scripts/ifcfg-eth0. - use our example network configuration files
Root's home directory contains 2 example network configurations, one for static IP's and one for DHCP. Copy the one you require to
/etc/sysconfig/network-scripts/and edit it to suit:Code Block cp ifcfg-eth0.static /etc/sysconfig/network-scripts/ifcfg-eth0
Now set the IP, netmask, gateway, and DNS if you like ( to add DNS you can add two lines, one for each server: DNS1=ip , DNS2=ip); finally, run
service network restartto activate. - use the menu-based tool
system-network-config
Simply type insystem-config-networkand follow the prompts.
Please note: in Opmantek VM appliances before 8.5.12G the tool is not preinstalled and you have to runyum install system-config-network-tuifirst.
Set Up Firewall (optional)
Please note that by default the Opmantek VM Appliance does NOT have a firewall active. If you would like local firewalling on your VM, you can easily enable that:
The standard iptables tools are installed, and all you would have to do, is enter your desired rules in /etc/sysconfig/iptables, followed by service iptables restart AND a final one-off run of chkconfig iptables on. The service call enables your firewall rules, while the chkconfig call enables activation of the firewall rules on boot. Until and unless the chkconfig step is taken, your firewall rules won't persist when the VM is rebooted. Besides this, somewhat low-level, method of configuring an iptables firewall there are also various user-friendly frontends available for installation with yum.
Troubleshooting Network Problems
The most common problem is with how CentOS 6 handles interface discovery, it wants to hang onto MAC addresses which of course in a virtual environment you want managed by the Hypervisor.
...
| Code Block |
|---|
rm -f /etc/udev/rules.d/70-persistent-net.rules reboot |
Accessing the Application Modules on the VM
By default the VM boots with DHCP enabled, and once you determine the hostname or IP address of the VM you can access it a web browser using a URL like:
http://nmis.domain.com/ or http://192.168.1.8/
You will be presented with a menu of the installed tools, similar to the following screenshot:
For releases before Jan 2018, you'll see this slightly different landing page:
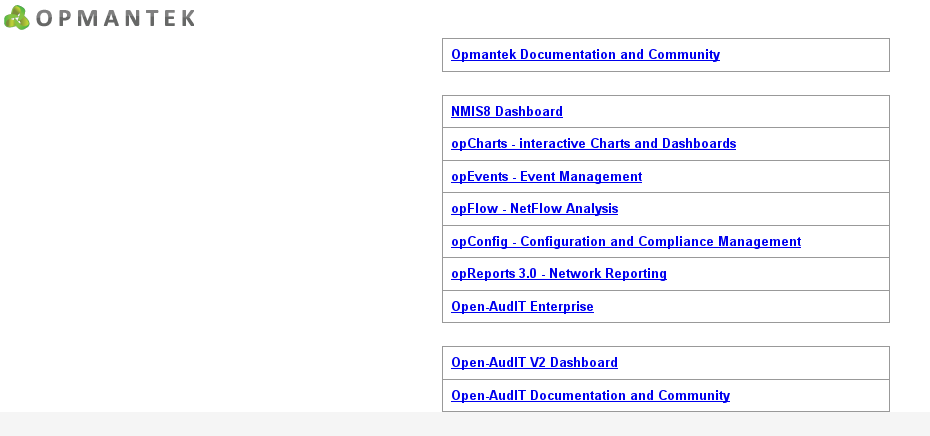
You can either use this menu, or navigate directly to NMIS, Open-AudIT or any of the Opmantek applications.
...
Once you've got either the NMIS dashboard or one of the Opmantek application dashboards open, you can also navigate between modules using the "Modules" and "NMIS Modules" menus, respectively.
Secure Access with https
The VM ships with support for secure https access enabled, and you can use https instead of http in any of the URLs mentioned above.
...
If you want to use https access operationally it is highly recommended that you replace this shared default key-certificate pair with your own (or use an automated certification authority like https://letsencrypt.org/ for example).
Application Module Licensing
The first step to using a module is knowing how to open it, the next is to get a license for it. This process is simple and painless: all products on the appliance (except opFlow) now support free licenses (which are not time-limited but limited to 20 nodes). For these applications the initial dialog offers the generation of such a free license; for opFlow the licensing dialog offers guidance for obtaining a trial or a full license.
You can also use the "opLicensing" module (reachable at http://<vm ip address>/omk/opLicense or from the Modules menu) to manage your licenses comfortably (including the ability to download previously purchased licenses from the Opmantek website). More info about opLicensing can be found here.
Exploring and Configuring Application Modules
All modules on the Virtual Appliance come with their configuration set to very minimal but safe defaults; to explore the full functionality available you will very likely have to make config modifications to suit your environment. These configuration options are all documented on this site, the Opmantek Community Wiki, in the per-application section (or "Application Space"); certain common, shared aspects are discussed in the "opCommon" space.
For all recent Opmantek applications you'll find links to the respective sections of Wiki in the "Help" menu (usually under "Online Documentation"); there's also an online version check on the welcome/landing page, and on each application's "About" page which helps with keeping your modules up to date.
build.opmantek.com_2016-06-08_13-32-03.pngUse Host I:O Cache.png