...
All Opmantek Virtual Appliance releases since January 2018 are published as a single "ova" file (Open Virtual Appliance), which encapsulates all necessary data in a single archive.
The import instructions below can be used to deploy the Opmantek Virtual Appliance straight from that one downloaded file.
Releases before Jan 2018 consist of a ZIP archive that bundles an "ovf" (Open Virtualization Format) file and disk images. This ZIP archive needs to be unpacked before your virtualization platform will recognize the appliance.
After unzipping the file you should see a folder with a structure like this:
Because the OVF file type is in an open format it should be recognized by your virtualization software or by a conversion tool provided by your virtualization software.
How to import the Virtual Appliance into your virtualization infrastructure
...
The Opmantek Virtual Appliance ships with the virtual machine hardware version set very low for maximum compatibility, but you may want to upgrade the hardware version to a higher level (to leverage performance benefits, remove memory limitations, etc.) as described on the VMware website.
VMware ESXi using the older Opmantek ZIP file with OVF inside
1. Importing the OVF to ESXi
If you are using the older Opmantek ZIP VM you will have an OVF file.
| Code Block |
|---|
ovftool --name="NMIS" -dm="thin" -ds=datastore_name-number ./NMIS8-OVF/NMIS8.ovf vi://user:password@host_ip_address |
Remember to set the Virtual Machine name you like, the datastore you want, and point it at the server you want to deploy to.
2. VMware Fusion
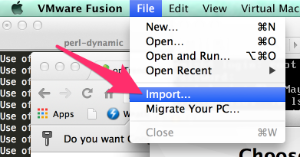
Recent versions of VMware Fusion allow importing .ovf files directly from the application. If this option does not exist or work you will need to use option # 3.
To import: Select File->Import, then "Choose File", find NMIS8-OVF/NMIS8.ovf as the file to import, then select continue. Fusion will import the file and then present you with the VM's default configuration.
2. 3. 4.
3. Convert OVF to VMX
This option is for non-Fusion (or older) VMware products that do not support the OVF format directly; in this case you have to convert the appliance into VMware's native format VMX. As mentioned above this conversion requires the VMware ovftool.
| Code Block |
|---|
mkdir NMIS8
ovftool NMIS8-OVF/NMIS8.ovf NMIS8/NMIS8.vmx |
You should now be able to import/load the vmx file with your VMware software and skip to step 3.
4. Upgrade the Virtual machine hardware version (optional)
The Opmantek Virtual Appliance ships with the virtual machine hardware version set very low for maximum compatibility, but you may want to upgrade the hardware version to a higher level (to leverage performance benefits, remove memory limitations, etc.) as described on the VMware website.
VirtualBox
...


