Organization Conception
Think of an Organization as a pyramid the business as a whole is the top of the pyramid. The organization then branches down into for example a Sales group and a Technology group. From here the group can then branch further into the different departments within the organization. For example, people who work on specific products, or people in the technology departments branching off into networking teams and web development teams. Having organizations break down into smaller subgroups makes it easier to assign users to specific roles within the organization. Having these parameters laid out allows you to organize and figure out what teams should do what within Open-AudIT keeping the information relevant to each user who accesses it.

Building your Organization
1. Create an Org structure relevant to your environment.
a. Once you have an idea of how you want to build out your organization you can continue to this guide HERE to create it.
2. Create a Role
a. Now that there is a parent organization created you can set the roles and permissions (Create, Read, Update, Delete) you want users within it to have.
b. A Role can be created using the Open-AudIT web interface if the current user logged in has a role with Create permissions. Navigate HERE to guide you in creating your Role.
3. Create Users
a. After you have created your Organization and the Roles you want to assign to it's Users it's time to create a User account,
b. Navigate HERE to begin creating your first User.
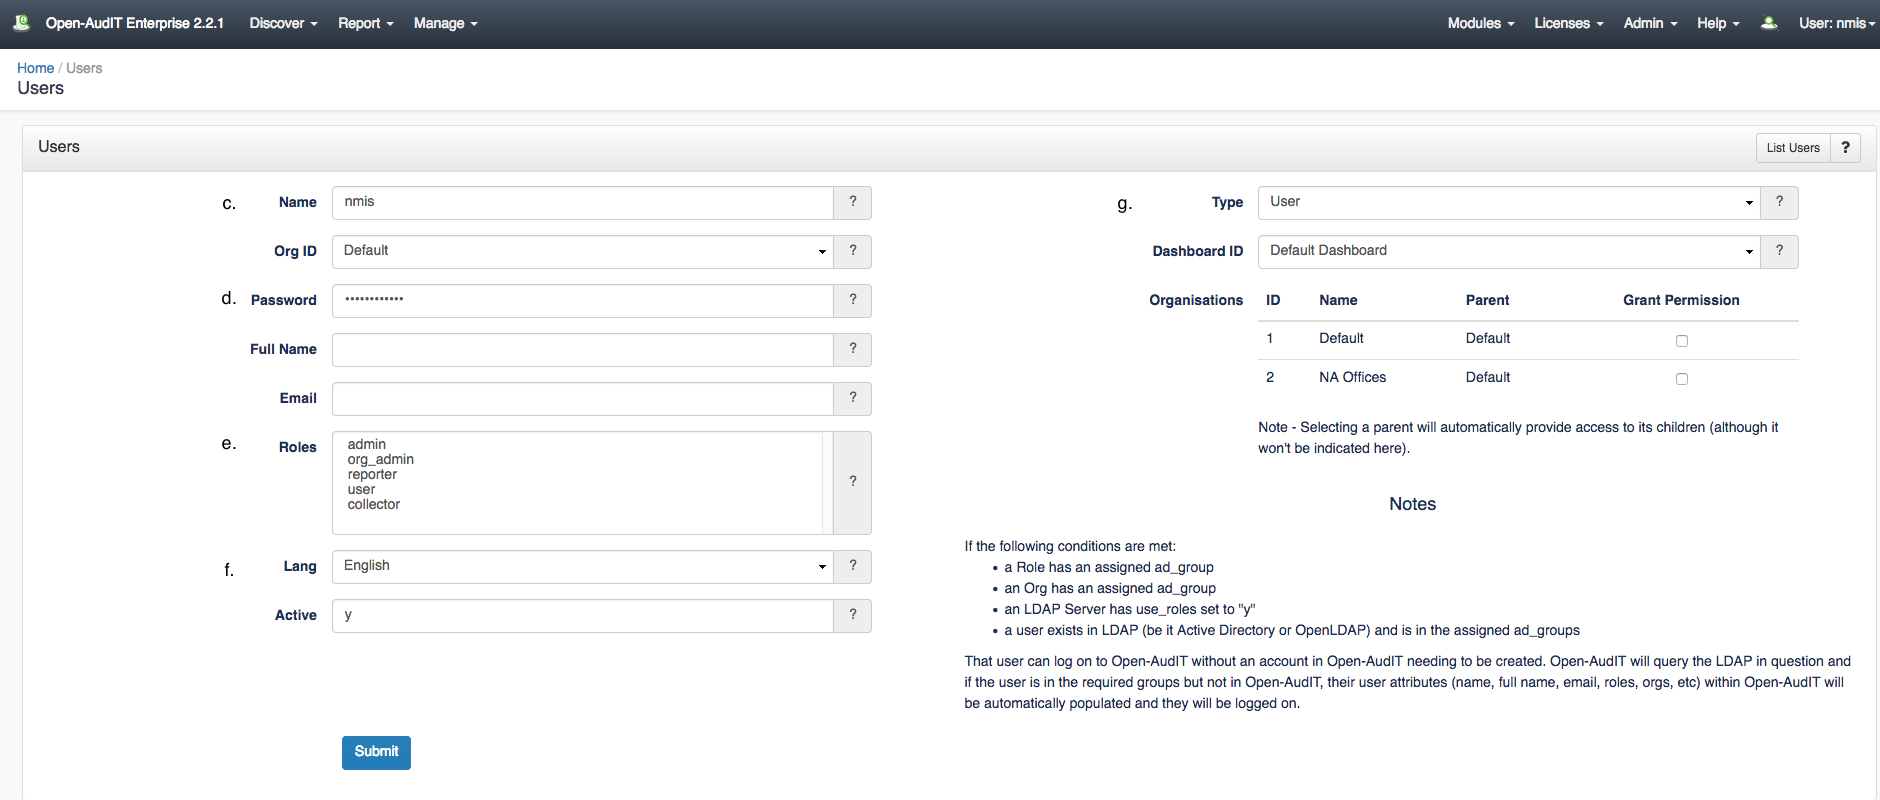
c. Give the User a name and assign it to your newly created Org by clicking the drop down menu next to "Org ID"
d. Set a password for this user and enter the users Name and Email.
e. Assign the User to the Role with the relevant permissions.
f. Choose a Language, set the user to Active by entering a "y" in the Active text box.
g. Ensure the Type is set to User and assign the User to the desired Dashboard by clicking the drop down menu.
Step 4 - Assign users to roles
Navigate to menu -> Manage -> Users -> List Users
Click the blue Details icon to edit user details.
Edit the Roles section and select the Role(s) you wish to assign to the user.
Click the check mark box to confirm changes.