Manage multiple locations - Concept
Many organizations have more than one location that have devices which need to be monitored. These locations can be spread throughout a city, country, or continent depending on the organization. opCharts combined with NMIS allows you to create groups, assign them to locations, and view them on a geographical map. This geographical map gives you a high level view of how many as well as what devices are located where. From the high level view you also have the ability to drill into each location to view device health information, or drill into a specific device even further opening up the nodes detail page in opCharts on the selected device. The goal of this guide is to get you a useful map similar to the one in the image below.
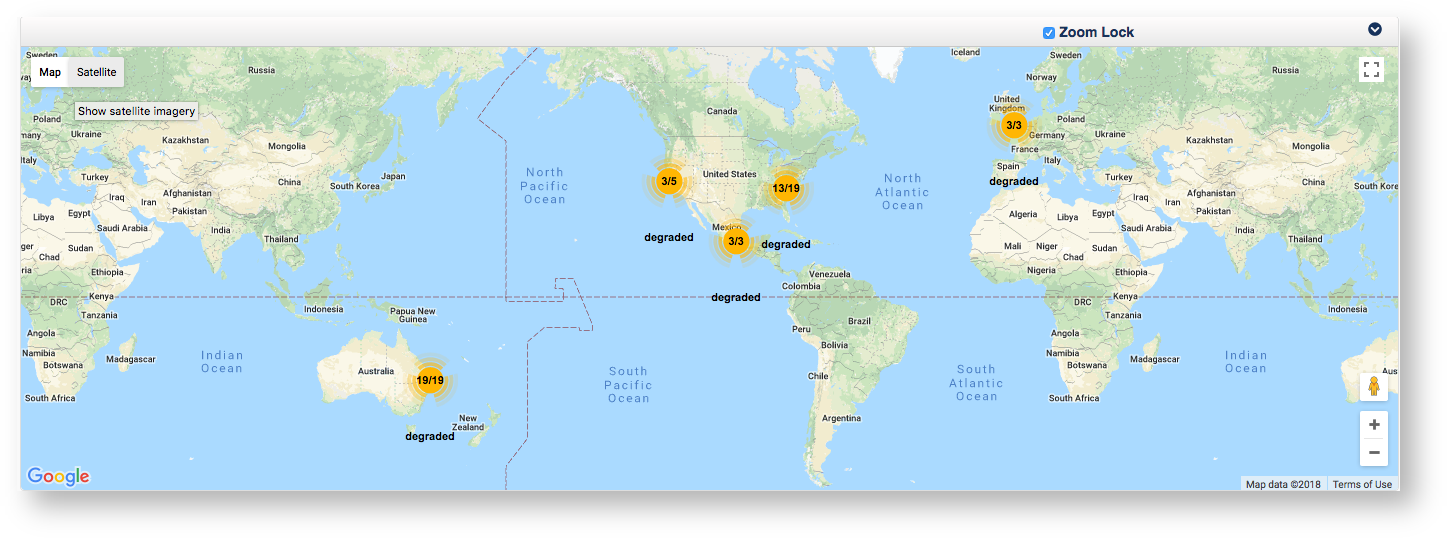
All of these yellow circles on the map are called clusters and are completely interact-able giving you a high level view of what devices are having trouble at what location. Notice some of the clusters display 3/5, 13/19, these are indicating there are 2/5, or 6/19 devices with issues that need to be investigated. These devices could be degraded or unreachable, this view lets you quickly identify which locations need attention. For example, clicking on the cluster seemingly located in California displaying 3/5 generates the map below:
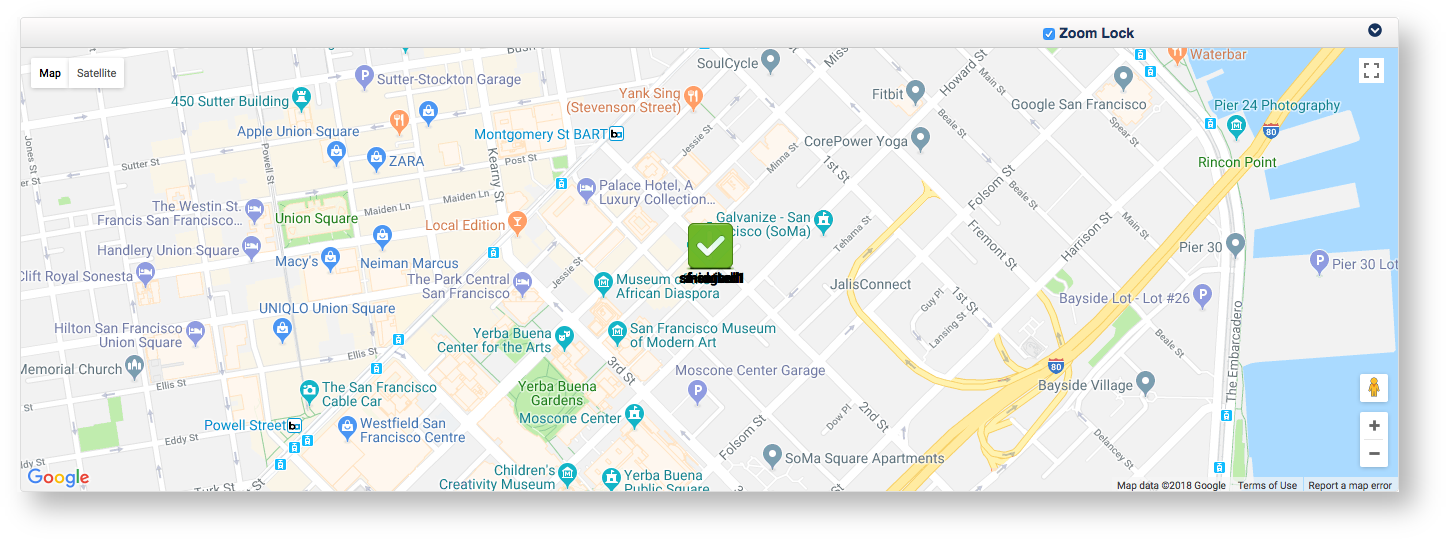
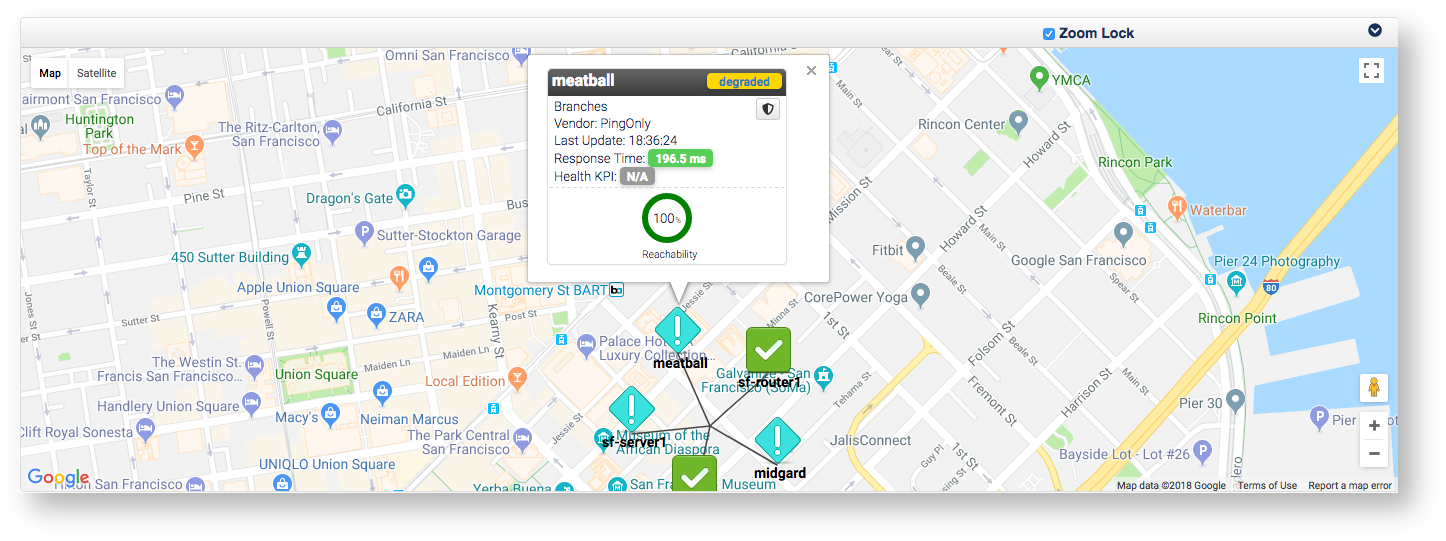
You can see by default all of the devices are stacked on top of each other, this is done on purpose since these devices are in one location and you can drag each device individually on this map. The best way to view every device is to left-click on the device, this spreads the devices out in an easier to view manner as shown below. From this view we notice there are three devices that need attention: meatball, midgard, sf-server1.

Clicking on the device "meatball' generates the image below - you can see this device is degraded, clicking on the device name in this popup window will open the devices Nodes detail page in opCharts allowing for quick investigation into events that may have caused it to become degraded.
Managing multiple locations - Process
To begin to create your interactive geographical map open a web browser and navigate to your servers NMIS install. If you do not have NMIS installed and configured see this guide - NMIS 8 Installation Guide
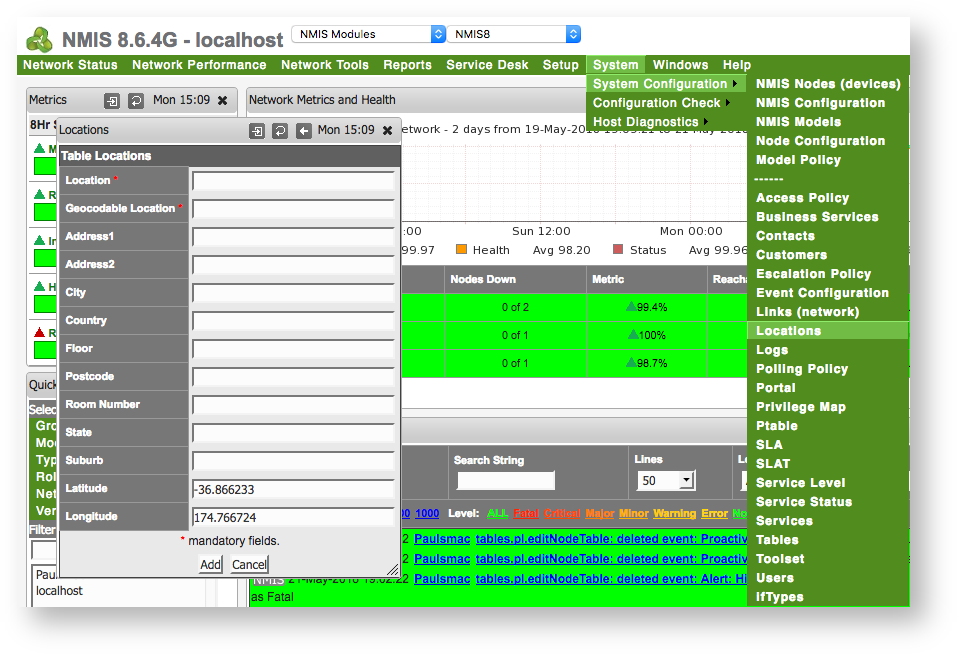
- Navigate to Locations - menu -> System -> System Configuration -> Locations
a. When the menu pops up click add next to Action > add
b. Enter relevant information into the fields.
2. Create a group for the devices at the new Location
a. In NMIS navigate to menu -> Setup -> Add/Edit Groups
b. Enter a name for the group and click Add - More information on creating groups can be found here: NMIS8 Groups
3. Assign the desired devices to the Group and Location
a. In NMIS navigate to menu -> System -> System Configuration -> NMIS Nodes (devices)
b. Select edit next to the Node(s) you wish to add to the newly created group and location.
c. Select the newly created Group from the Drop-down menu
d. Under Extra Options in the NMIS Nodes Table select the Location you wish to associate with this device.
4. Navigate to opCharts in your browser
a. In opCharts filter the devices by using the menu on the left hand side to just show the Groups or Locations with the devices you wish to display on the map.
b. Once the filter is applied, simply click on 'View in geographical map' to generate your map only displaying these filtered locations / groups. More information on creating geographical maps can be found here: Maps - Geographical Maps
c. If you want to save this map to be viewed later click the drop-down icon in the top right of the map and select 'Create static map'. This allows you to add the map to a dashboard if desired.
d. Add the map to a custom dashboard to be displayed on log in. More information on creating dashboards can be found here: Dashboards