Introduction
opConfig 4 is the NMIS 9 compatible version. In this guide, you will learn all you need to start using opConfig.
Before you start
We recommend you:
- Be familiar with opConfig basic concepts
- Have read opConfig 4 Getting Started Guide.
Accessing opConfig
Once opConfig has been installed, we can access the GUI:
http://<yourserver>/en/omk/opConfig
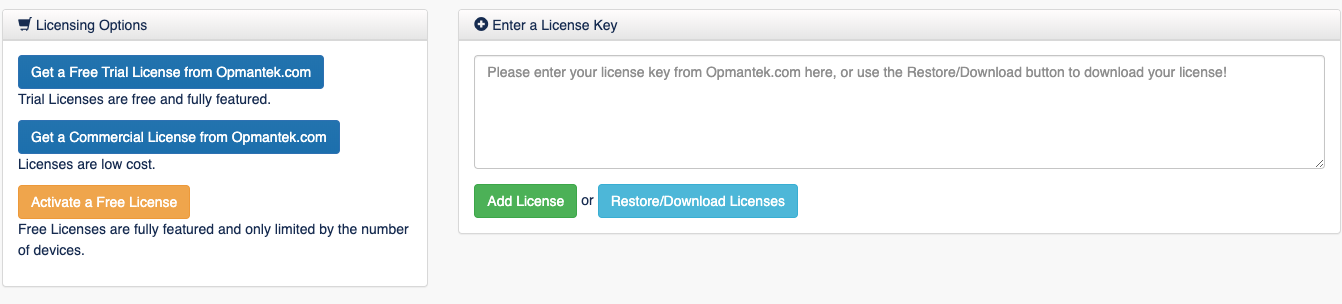
The first step will be to introduce the license, if we haven't done that yet:
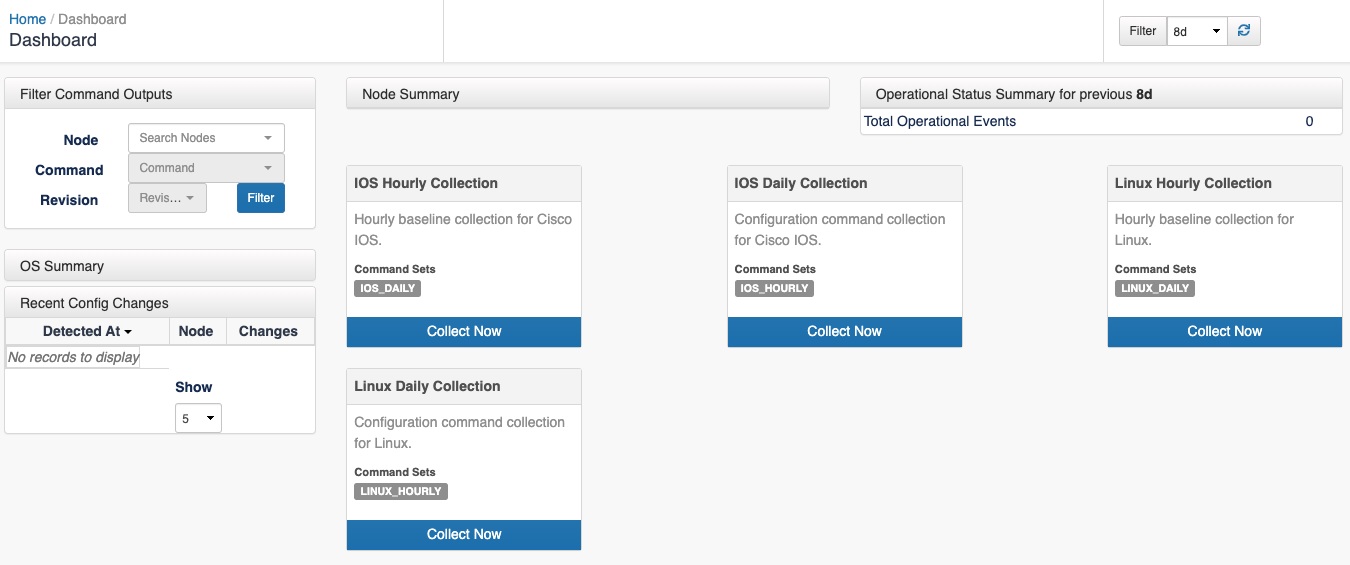
Once we introduce the license we will see the first screen of opConfig, the dashboard, that will be empty for the moment:
Set Up Nodes
Once opConfig has been installed, we need to set up the nodes. For this, we go to System > Edit Nodes.
All the local nodes are listed here:
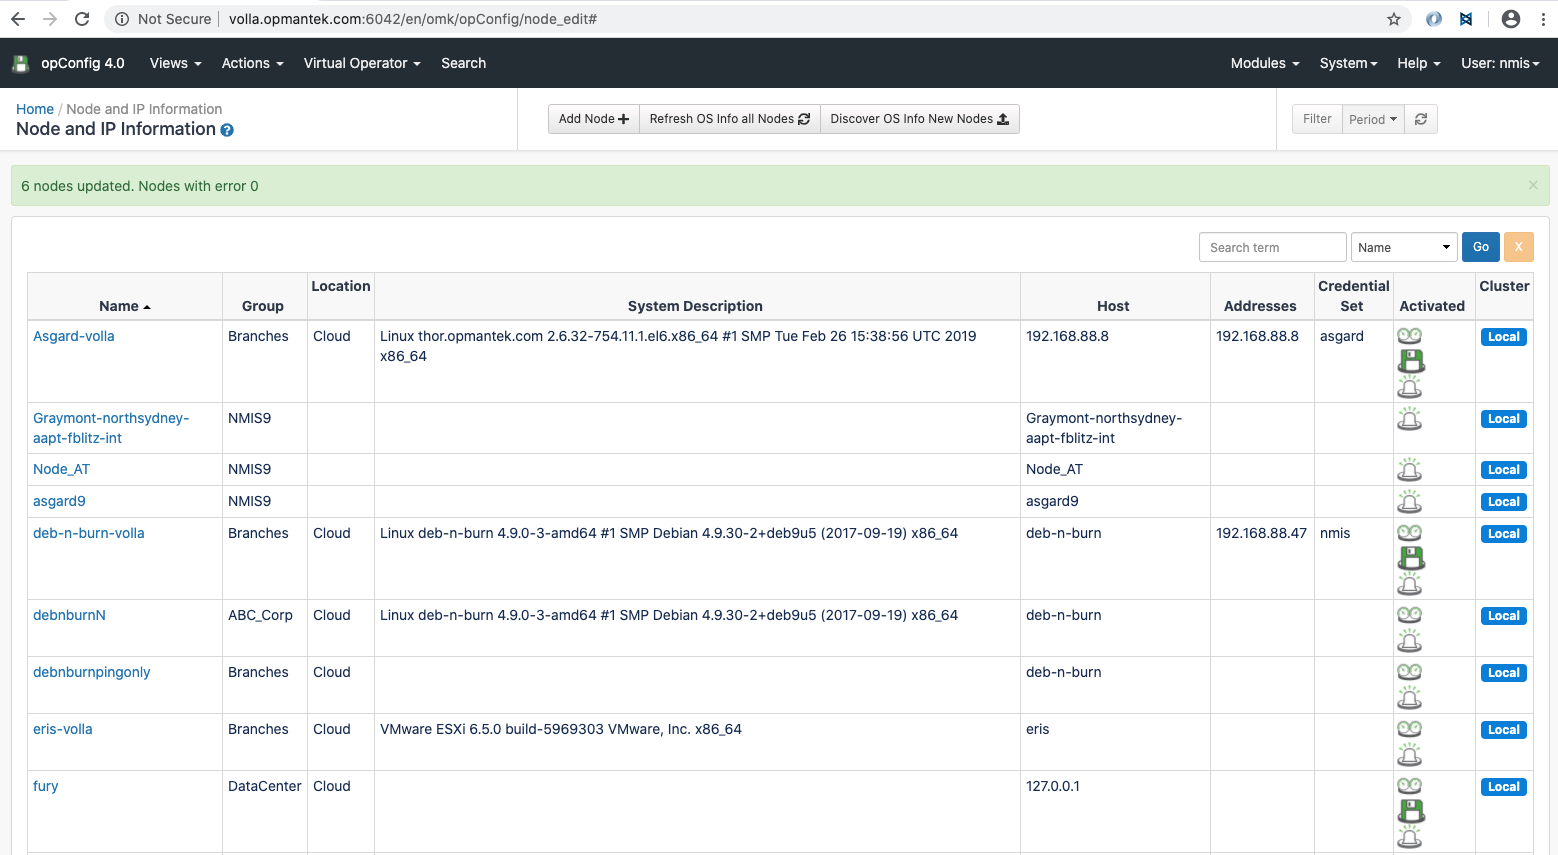
Click in the button "Refresh OS Info all Nodes" for update the OS Info for all the local nodes. In this case, it would not take into account if the node is active for opConfig or not for a node to be selected.
This button will update the OS information for a node based on the file OS_Rules.nmis, located in the configuration directory by default. This rules are based, mostly, in the sysDescr configuration attribute. For this to be set, the community string must be correct and the device should had been successfull polled from NMIS at least, once. We can check this attribute - among others - in the node information, by clicking in the node name.
In case we only want to set the OS Information for only the new nodes - The ones that don't have OS Info set, we can click in "Discover OS Info New Nodes".
Editing a Node
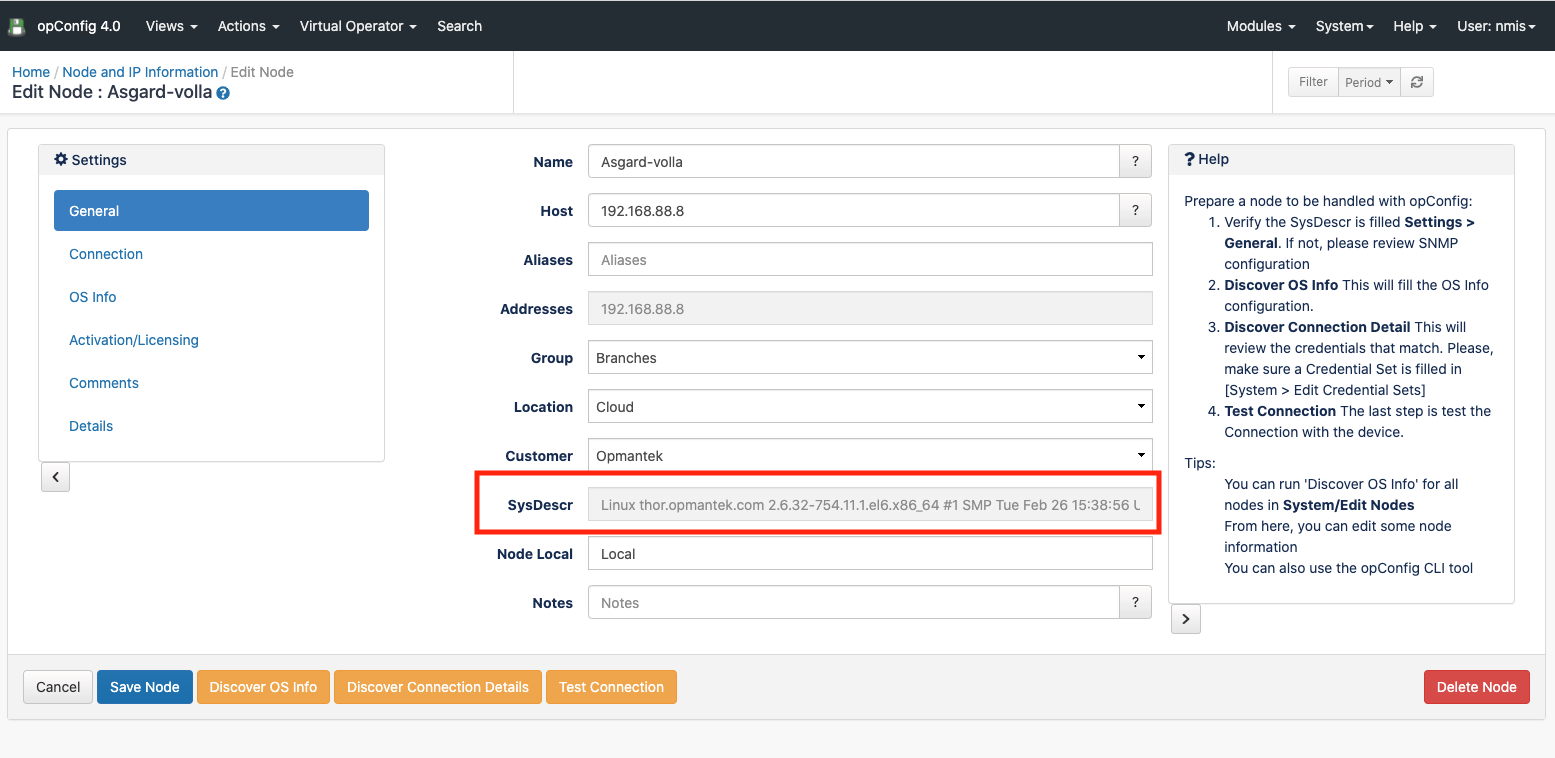
We can review all the Node information if we click on a node. The information shown for a node is the following:
- General: Some configuration information for a node.
- Connection: Connection information like credential set or personality. This information can be set by clicking in the "Discover Connection Details". But first, the OS Info must be set.
- OS Info: All the OS Info discovered using the OS Rules. Can be set by clicking in the "Discover OS Info" button. But first, make sure the sysDescr is filled in the "General" tab. What to do if not? Please review the NMIS Node configuration. The community string must be correctly set up, the node has to be polled successfully using the correct model.
- Activation/Licensing: We can see/edit the node activation for different products.
- Comments: We can add some comments for the node.
- Details: All the node configuration settings.
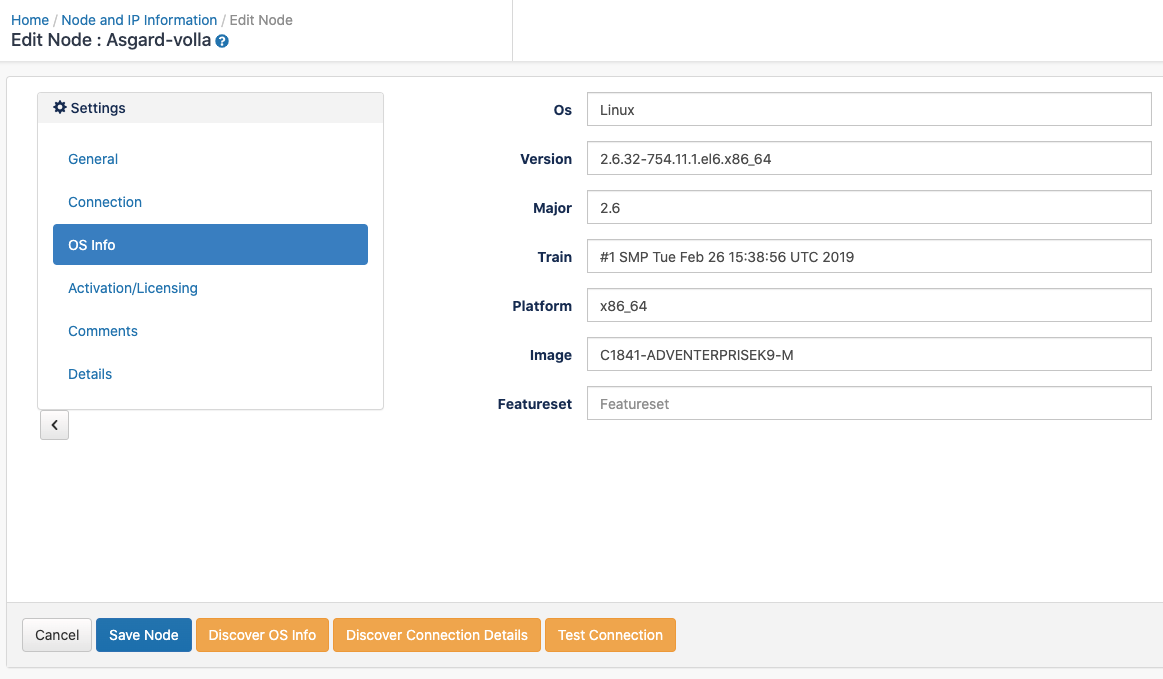
Once these details are set up, we can test the connection using the button "Test Connection".
We can also set up this configuration using the cli tool.
opConfig GUI Features
Views
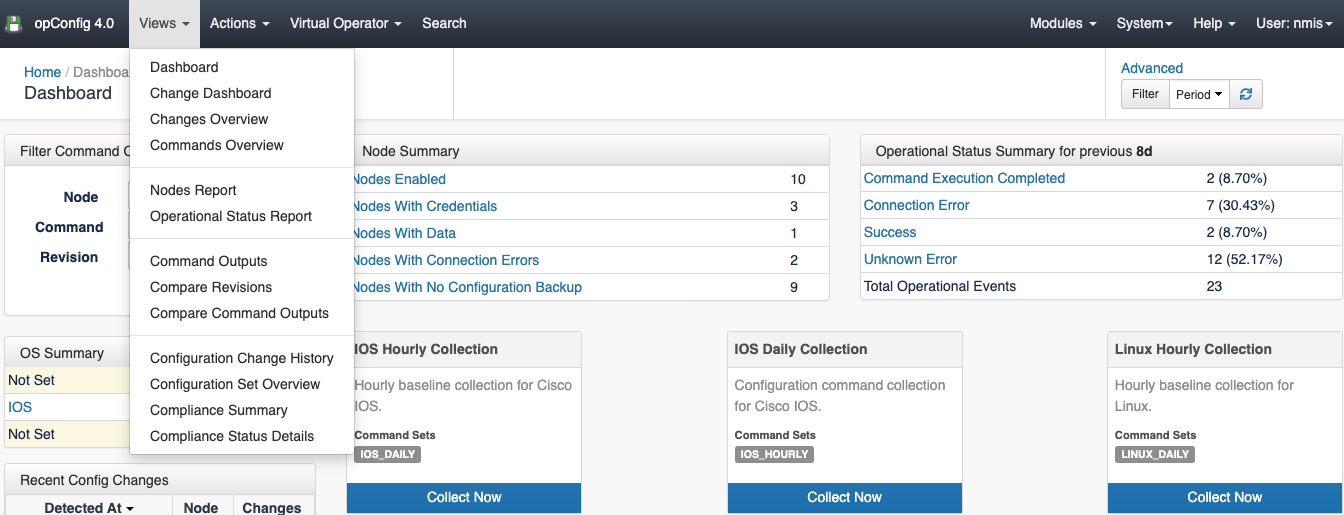
In the views menu we have the following views:
- Dashboard: opConfig landing page were we can see a Summary of the nodes report, last changes and scheduled jobs.
- Change Dashboard: A Dashboard with the recent commands and configurations.
- Commands: Commands run in the last 8 days (By default).
- Config Changes: These commands are the ones tagged with detect_changes in the last 8 days.
- Changes Overview: A table with the recent config changes.
- Commands Overview: A table with the recent commands run.
- Nodes Report: A table with the nodes information, when was the last change done for a node, information about the OS, etc.
- Operational Status Report: Overview of what opConfig is doing to which nodes, when, and how successful it was with these operations.
- Command Outputs: See the result of a command run in a node, for a specific revision.
- Compare Revisions: Compare different versions of a command.
- Compare Command Outputs: Compare the result of a command run.
- Configuration Change History: A history of the configuration changes performed. Here you can read further regarding how to automate configuration changes.
- Configuration Set Overview: A list of all the configuration sets, imported using the opconfig cli tool.
- Compliance Summary: A list of all the compliance policies. Here you can find further information about opConfig, compliance management and Open Audit integration.
- Compliance Status Details: The status of the compliance policies.
Actions
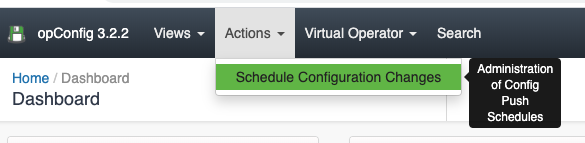
Schedule Configuration Changes
From this menu, we can schedule a configuration set to run once, by selecting a date, a node or node set, and a Configuration set. It is also possible to notify introducing an email.

When we create a new Schedule, we can see the following errors:
No nodes match your selections and the config set filters! A config set has a set of filters that has to mach with the selected node properties. For example, the selected Config set has the following filter:
"filter" : {
      "activated.opConfig" : 1,
      "connection_info.transport" : "SSH",
      "name" : [
         "node1",
         "node2",
         "node3"
      ]
   },
So, the schedule only will be possible if we select node1, node2, or/and node3, and each one is active for opConfig and has SSH as transport.
Virtual Operator
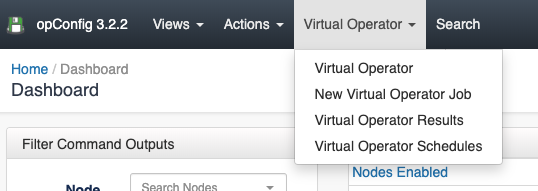
The Virtual Operator is used to help create jobs comprised of commands sets to be run on various nodes, reporting to see job results and troubleshooting to diagnoses nodes which raise conditions. You can find a complete Virtual Operator guide in this link.
Nodes Management

From the System > Edit Nodes menu we can see all nodes, a node details and Edit or add a new node. From the node details, we can Test the connection to a Node, or Discover the Node.
From opConfig 4.0.0, nodes information is shared between NMIS and opConfig, so the "Import Nodes from NMIS" option is not available anymore.
Credential Sets

Credentials for all connections made by opConfig are configurable from the opConfig GUI ONLY. Before anything else you need to create sets of credentials to access you devices. At this point in time, opConfig supports only Telnet and SSH, and for SSH password-based authentication and RSA with no passphrase is supported.
Starting to Collect Data
Steps to set up your first automated job:
- Configure a device to to be supported by opConfig.
- Create a configuration set
- Schedule a job. There are several ways of schedule a job:
- Create a new virtual operator job: Using the GUI we can create a new job that could be run in a specific time and hour. Note that this option will run once.
- Using the CLI Tool: With the configuration option push_configset.
- Cron job: For the execution of tasks periodically, usually based in the tags of the configurations. An example of some cron jobs for opConfig:
# opConfig: hourly command set running
1 * * * *   root    /usr/local/omk/bin/opconfig-cli.pl quiet=1 act=run_command_sets tags=HOURLY
# and the daily ones
7 7 * * * * root    /usr/local/omk/bin/opconfig-cli.pl quiet=1 act=run_command_sets tags=DAILY
# and a daily import from open-audit enterprise
21 4 * * * root     /usr/local/omk/bin/opconfig-cli.pl quiet=1 act=import_audit
# and a daily purge of old revisions
40 3 * * *     root /usr/local/omk/bin/opconfig-cli.pl act=purge_revisions quiet=1
The schedule maintains a queue of jobs and the opconfig daemon, opconfigd, is the responsible of running this jobs on time.
It is also important to review and set accordingly the purging policies.